by Jeff Daum, Ph.D., PPA Technology & Product Analyst
WhiteHot gets treated to GTECHNIQ Complete Wheel Coating Kit
As some of you may recall a while back WhiteHot placed second in the first ever Corvette In An Interesting Setting photo contest held by CorvetteBlogger and GTECHNIQ. Part of the prize was the GTECHNIQ Complete Wheel Coating Kit. Last week I had Costco mount new Michelin Pilot AS run flats on her front and rear. The change in handling and driving over the OEM Michelin’s which were six years old is very noticeable. Specifically, the Ackerman effect had gotten so bad that turning out of my garage felt like I was driving on either flat tires or had a broken steering component. Now there is no Ackerman effect whatsoever. The tires are inflated to the same psi as were the ones I took off.
At any rate, since I had new tires, I decided it was time to do an in-depth wheel cleaning and take advantage of the GTECHNIQ Complete Wheel Coating Kit. The kit contains buffing microfiber towels, a bottle of Panel Wipe, a bottle of Wheel Amour and several small applicator pads. What follows is first the PROCESS which I thought I’d include for any new members or members who have not removed their wheels but are considering it, next the APPLICATION and then the RESULTS (which you can jump to if not interested in the process 😊 ).
Here are some images of the wheels before cleaning:


PROCESS:
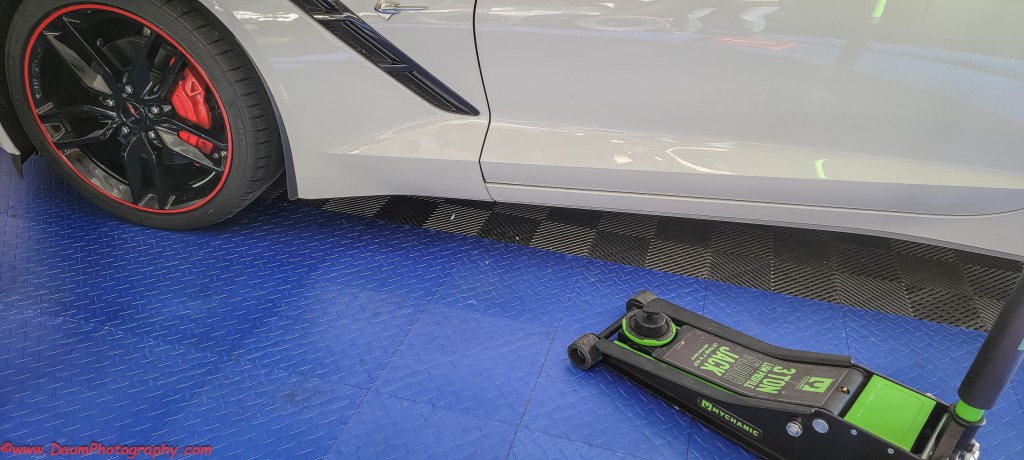
Removing wheels from our Corvettes is relatively straight forward but does require having the right tools/equipment including:
- Low profile jack (I used a Mychanic Low Profile 3 ton jack)
- Jack pads or pucks to prevent damage to the area around the specific jacking points (I used Korop jack pads from Amazon)
- 19 mm socket, breaker bar, short extension and wrench (I used a ½ inch Craftsman)
- Torque wrench (Danaher GearWrench micrometer adjustable Torque Wrench)
- GM Anti seize lube
- Wheel chock
- The first step is to have your Corvette on a level surface with working space around it. If you have the OEM alarm, be sure to turn the Tilt Alarm off before starting to jack it up.
- Put the wheel chock behind the rear wheel on the opposite side from where you are going to use the jack.
- Hook your jack pad/puck into the jacking slot behind the front wheel or put your puck on your jack pad. Carefully place the jack pad directly under the jacking point and slowly raise the jack to ensure you are correctly positioned.
- Pre loosen the wheel lugs on both the front and back wheels before you start jacking- you aren’t taking them off, just getting them started. You will probably want to use a short extension bar with the 19 mm socket to keep your wrench away from your wheel surface. You will also probably need to use the breaker bar to initially slightly loosen the lugs since they should be on at 100-foot pounds.
- With the lugs slightly loosened, start jacking until both the front and rear tires just clear the floor. NOTE: you don’t have to do both tires at once, but if you are cleaning them, it saves time. You can just jack high enough to remove the front tire and once you put it back on you can then move the jack to the rear jacking point (in front of the rear tire) and repeat the process. Be sure once you have the car lifted that the jack handle is vertical so that you don’t trip over it or bump it while cleaning the wheel.
- With the tire(s) off the floor, proceed to remove all the lug nuts and lift the tire off.
- This is a good time to check your brake pads, condition of your brake rotor, suspension, etc. You also might want to clean your caliper cover at this time.
- Now you can wash off your wheel inside and out using something like Dawn and possibly an iron remover. Thoroughly dry your wheels and you are ready to apply your wheel treatment.
- Once cleaned/treated, remount your wheels. Before mounting them, GM recommends using anti seize lube or grease lightly only on the center of the wheel hub to help prevent rust. After lifting the wheels onto the lugs, lightly tighten the lugs following GM’s recommended pattern.
- Gently lower your jack and get your torque wrench. It should be set to 100 ft pounds. Following the recommended sequence, tighten each lug nut to 100 ft pounds. NOTE: It is highly recommended that you recheck each lug nut using the torque wrench after you drive about 25 to 100 miles.
- Finally, reset your torque wrench back to zero to maintain its integrity.


APPLICATION of GTECHNIQ Complete Wheel Coating
This is basically a two-step process: You first use GTECHNIQ Panel Wipe by spraying it on one of their microfiber towels and cleaning the inside and outside of each wheel. Next, out of the sunshine and in a well-ventilated area, you moisten one of the applicator pads (cotton like flat round pad) with the shaken Wheel Armour. They recommend you do one half of the wheel at a time, and then buff it with their microfiber towel within 30 to 60 seconds. The entire application process was very easy to do and took under 15 minutes per wheel. They recommend waiting 12 hours before exposing the wheels to the elements.

Wheel Armour applied. Note the great reflection in the wheel barrel:

RESULTS
The shine was very apparent as can be seen in these images. They look great. Now whether it will hold up for the claimed 1 to 3 years is yet to be seen. Let me know if you have any questions.


