by Jeff Daum, Ph.D., PPA Technology & Product Analyst
Why do vehicles today need battery maintainers?
Modern vehicles have gotten a lot more sophisticated and their increasing electronics dependency often creates a parasitic draw on the battery when the engine is off. This is true whether the battery is a classic wet-acid, AGM or lithium type. This draw gets increased with aftermarket items such as dash cameras that record when parked and controllers that operate through the OBD2 port.
Normally this impact on the battery goes unnoticed unless the vehicle is driven infrequently or is only driven repeatedly over short distances. As the battery ages this becomes more apparent ranging from slower or harder startups, to eventually insufficient power to start.
Aftermarket solutions began appearing as trickle chargers in 1960s to 1970s that usually did the job, but often required vigilance to ensure the battery did not get ‘fried’ in the process. This technology was improved by the development of battery maintainers which incorporated circuitry to both charge and then reduce the charge once the battery was near full capacity. During this time batteries also evolved to include ‘maintenance free’ (meaning you no longer had to monitor water/acid levels in the individual battery cells), AGM (absorbent fiberglass mats) sealed and lithium-ion batteries.
To meet both the mix of older and newer types of batteries, chargers evolved further to be smart chargers. These incorporate software and circuitry that allow them to be used on all types of batteries, either by setting them manually for the specific type or by the charger itself recognizing the type of battery along with the battery’s current level of charge and tailoring the type, timing and charge cycle needed.
This brings me to CTEK.
For those of you not familiar with CTEK, they are a major manufacturer of OEM branded car battery chargers for Alfa Romero, Arctic Cat, Audi, BMW, Camaro, Corvette, Ferrari, Lamborghini, Husqvana, Rolls-Royce, Porsche, Yamaha and many others. They also enjoy a healthy portion of the after-market car battery chargers sold under the CTEK label.
I have been using CTEKs for more than twenty years[1] for maintaining my automotive batteries. I never had one stop working properly (even after a couple of them were dropped), but I added newer versions as their technology improved, or I simply needed an additional charger for another of my cars.
All CTEK units for the most part perform similar tasks: charging regular wet lead batteries, AGM (gel batteries), and the newer units/models do lithium (12V LiFePO4) batteries, intelligently maintaining the proper float charge regardless of how long the unit is attached to the battery, automatic desulphation program and reconditioning of batteries.
They also have built in back-up if power is interrupted. One power is restored the unit will resume at the step it was at and for the type of battery.
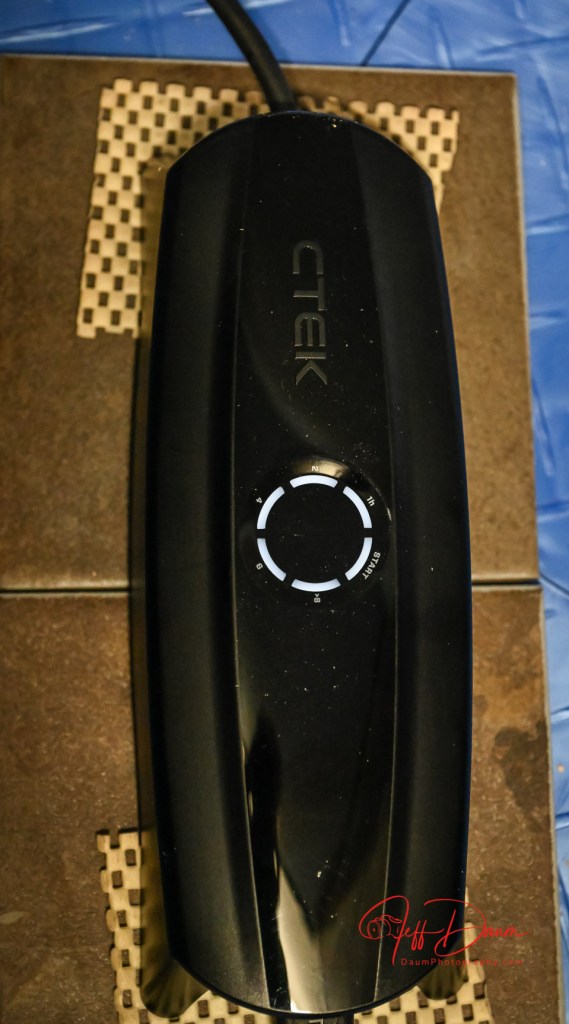
CTEKs newest units, the NXT5 and CS ONE (GEN 2)
At this year’s SEMA (Specialty Equipment Market Association) show I saw early versions of CTEKs new units, the NXT5 and CS ONE (GEN 2). I was impressed with the enhanced technology and Steve Hayes, Regional Sales Manager for North America, was kind enough to arrange for me to receive both units for this review.
NXT5
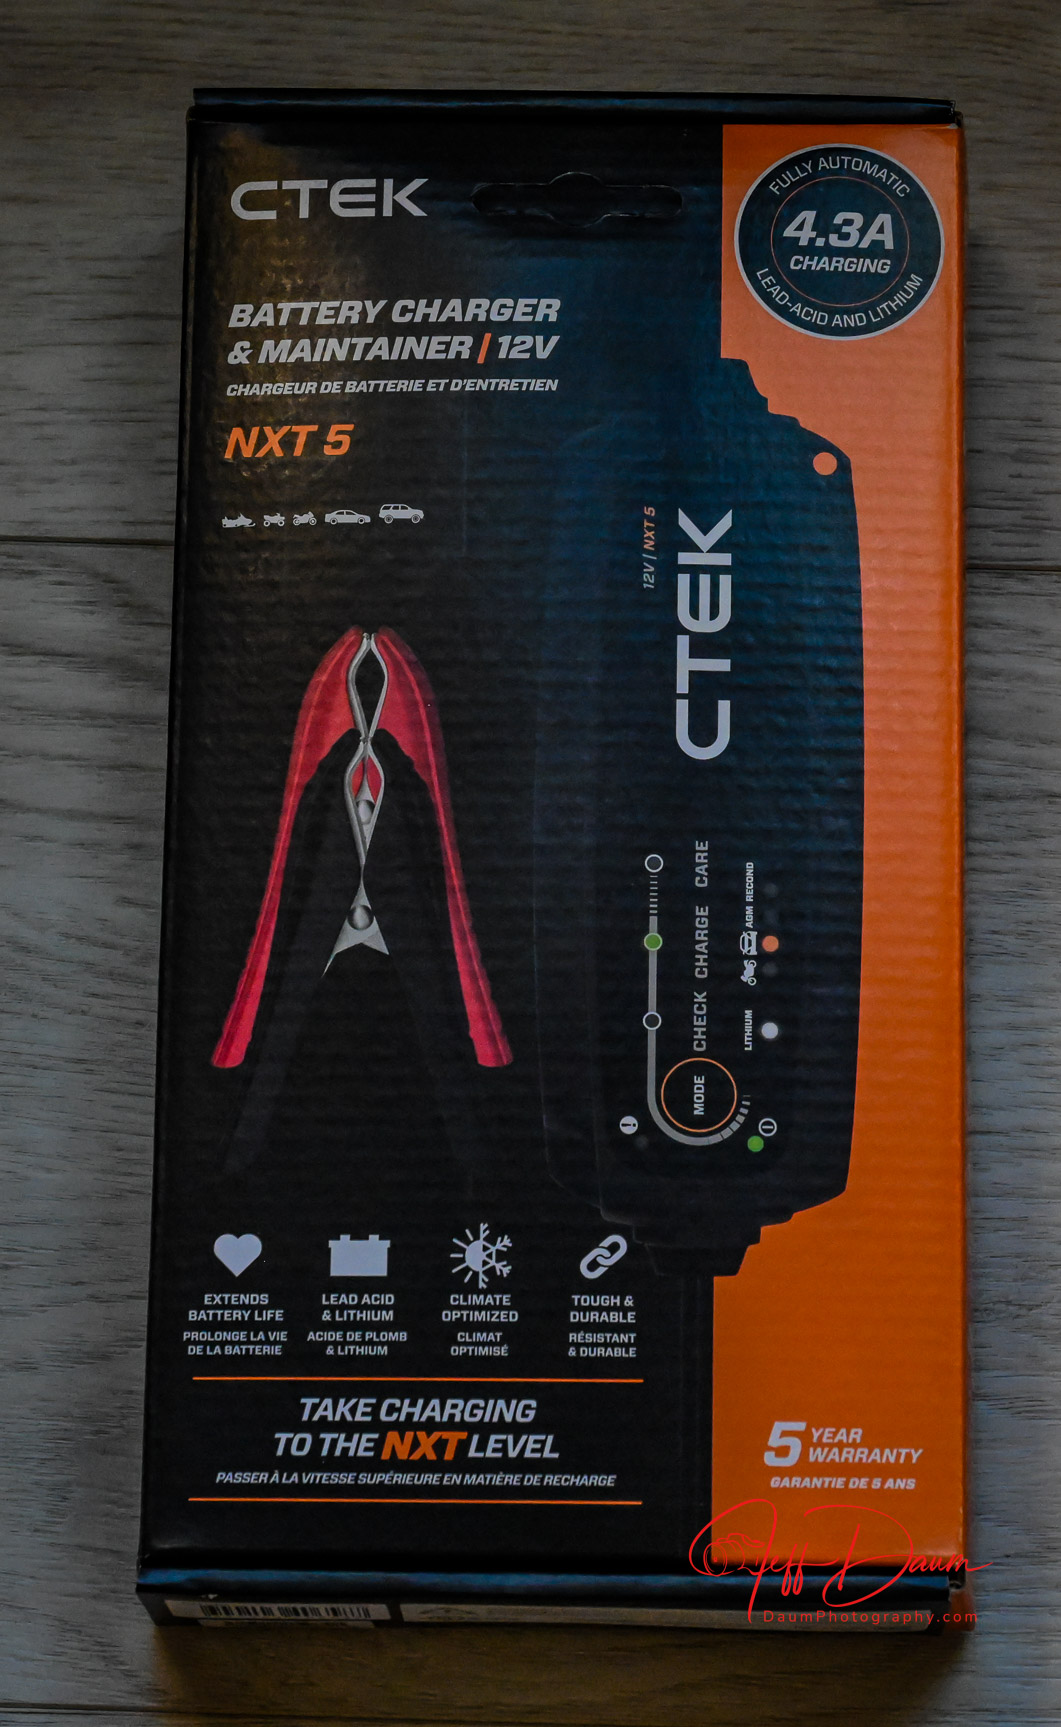

This unit is ideal for many automotive, motorcycle, boat, RV and similar applications. It lists at US$129.99 Here are the highlights per CTEK’s website:[2]
- Revives flat batteries and extends battery life.
- Supports 12V lead acid & lithium (12V LiFePO4) batteries (1.2-160Ah).
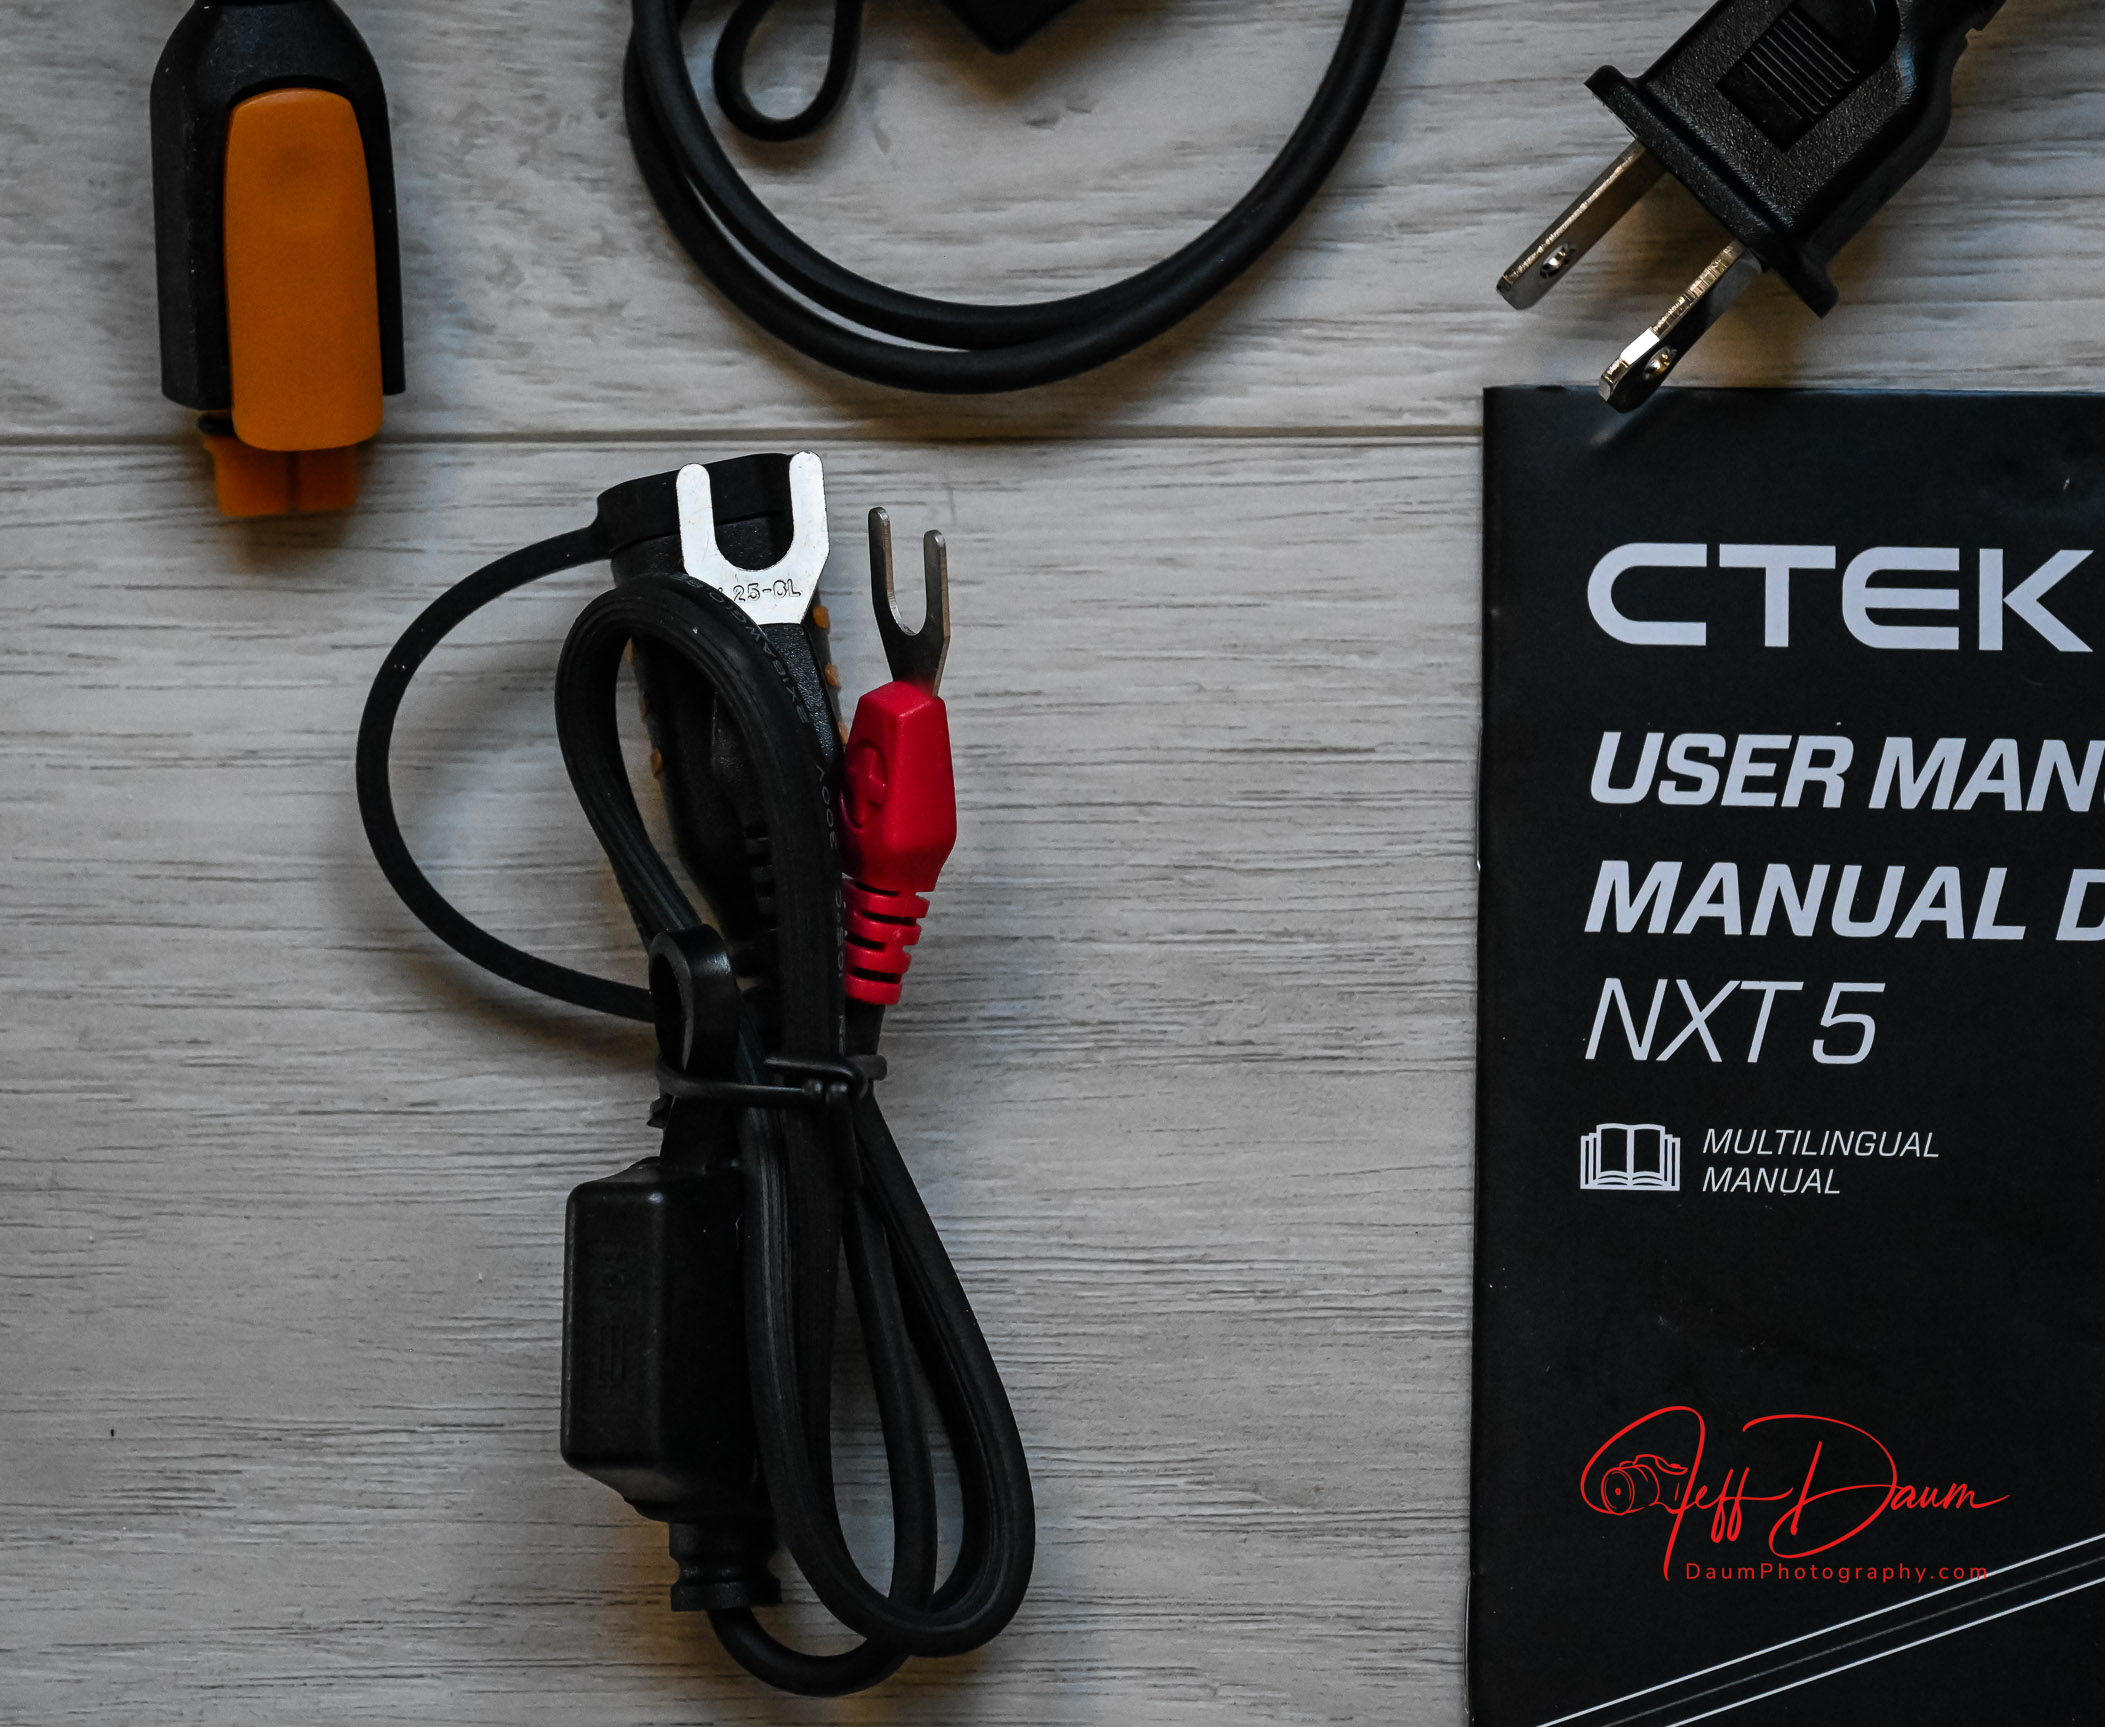
- Connect U-terminal included for permanent connection to the battery.
- Automatic temperature compensation for extreme weather.
- Fully automatic, spark-free and reverse polarity protected.
- Patented desulphation & reconditioning modes restore battery life.
- AGM optimisation mode for Start/Stop vehicle batteries.
- Quick and easy ‘connect-and-forget’ usability.
- Backed by a 5-year warranty for total peace of mind.
- Award-winning Swedish technology for unmatched performance.
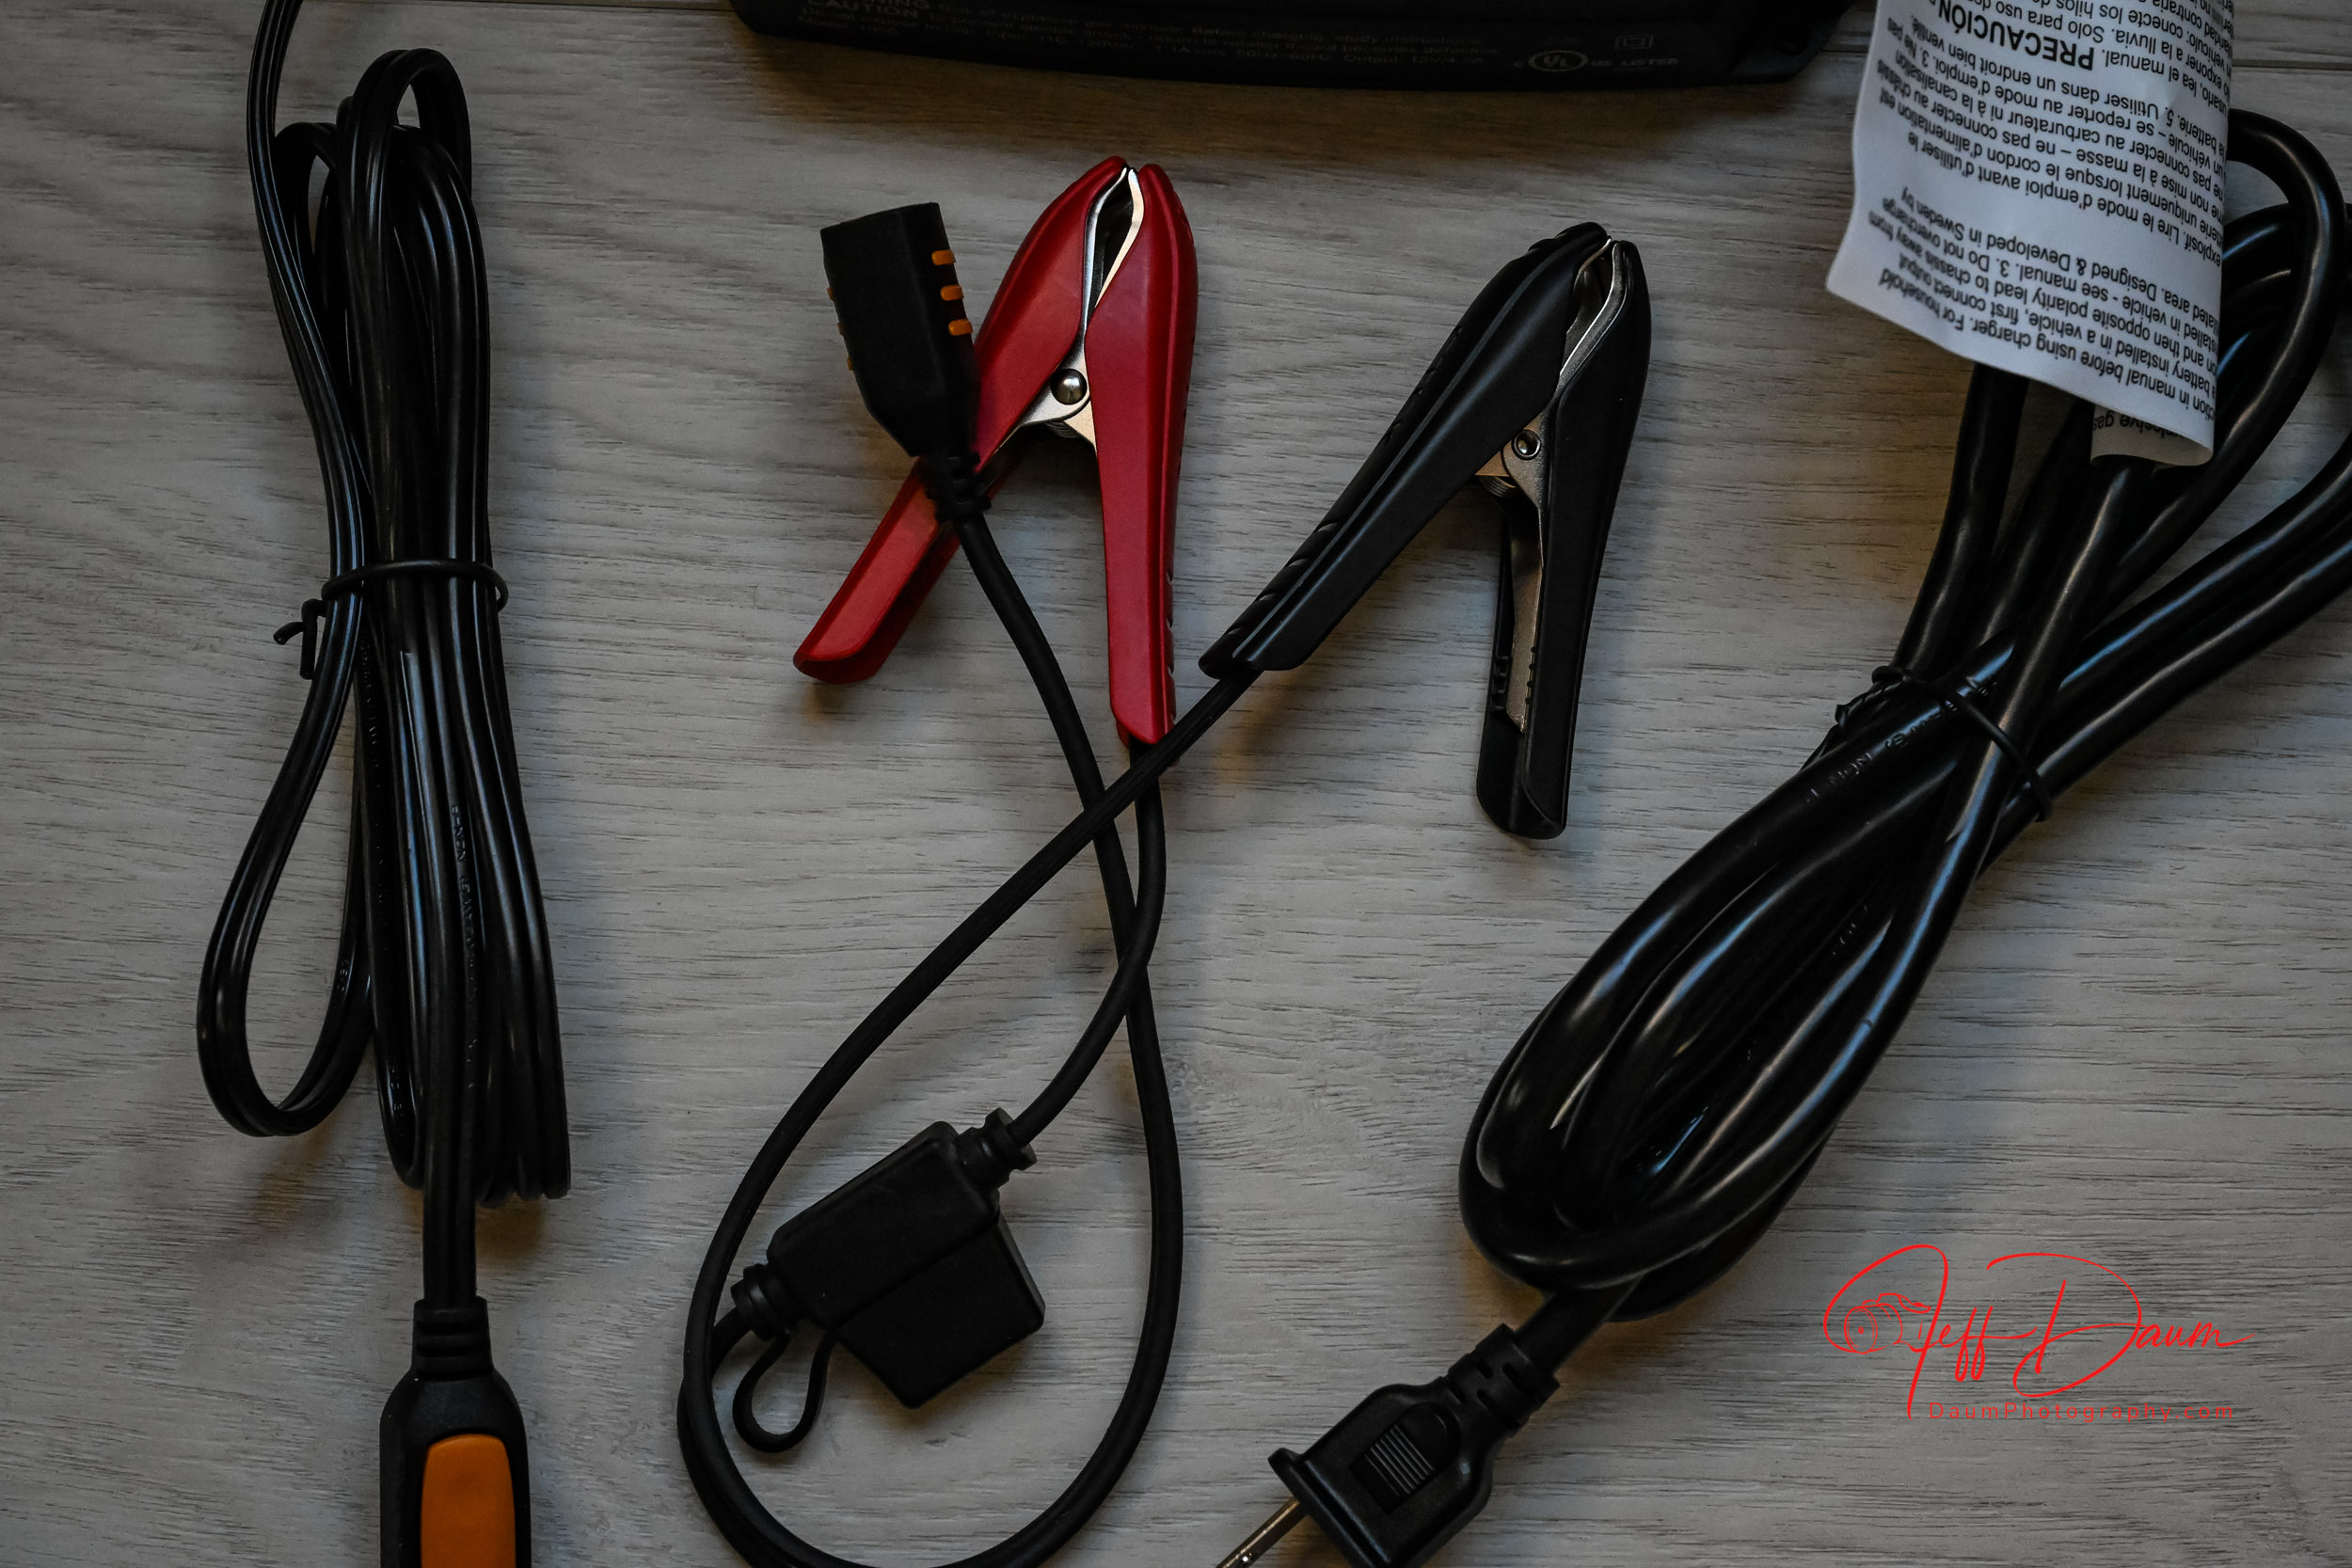
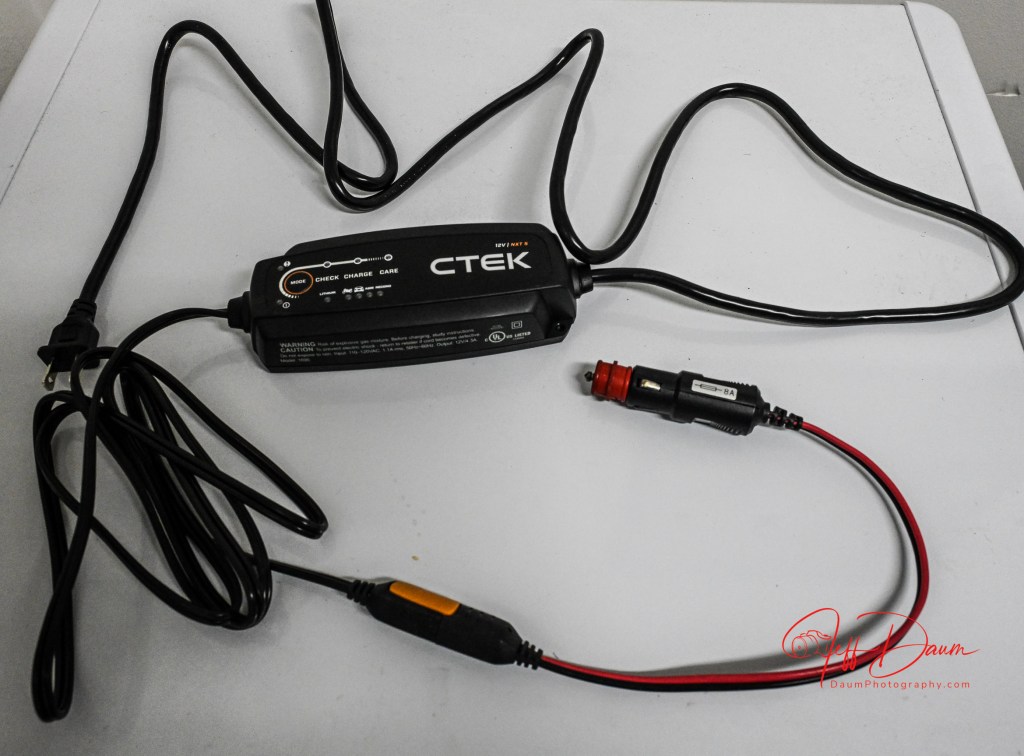
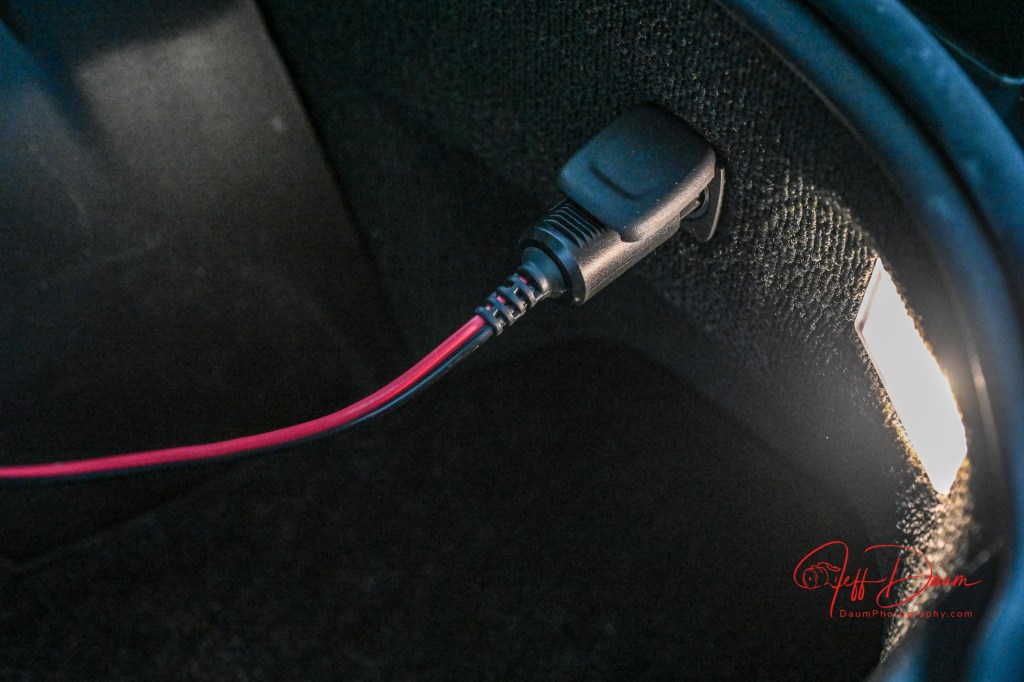
You simply connect the NXT5 directly to the battery poles or battery charging points elsewhere in the vehicle with the included clamps or permanently attach it to the battery with the included U-terminal connections. Alternatively, you can also use their optional CONNECT CIG PLUG (list US$29.99) which goes into your vehicle’s accessory outlet and connects to the NXT5 by its Comfort Connect. Note: To use the CONNECT CIG PLUG requires that your vehicle has a dedicated accessory outlet that remains ‘live’ when the engine is shut off.
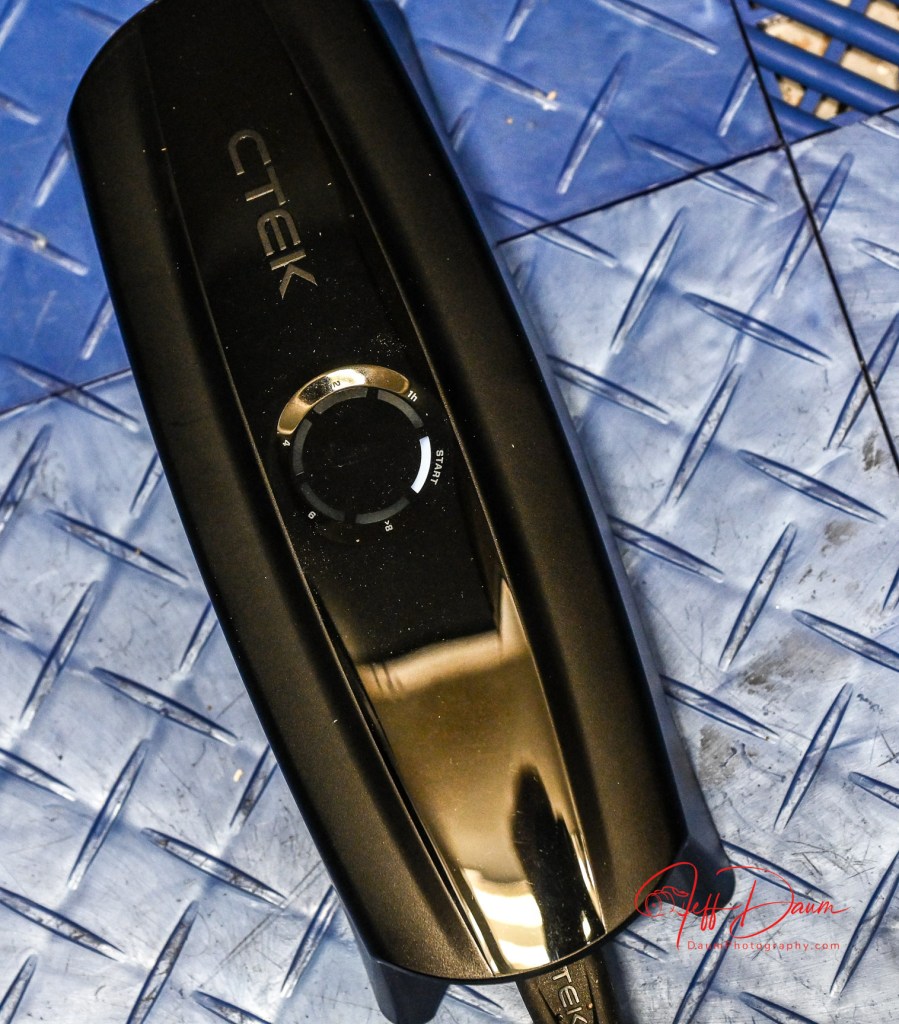
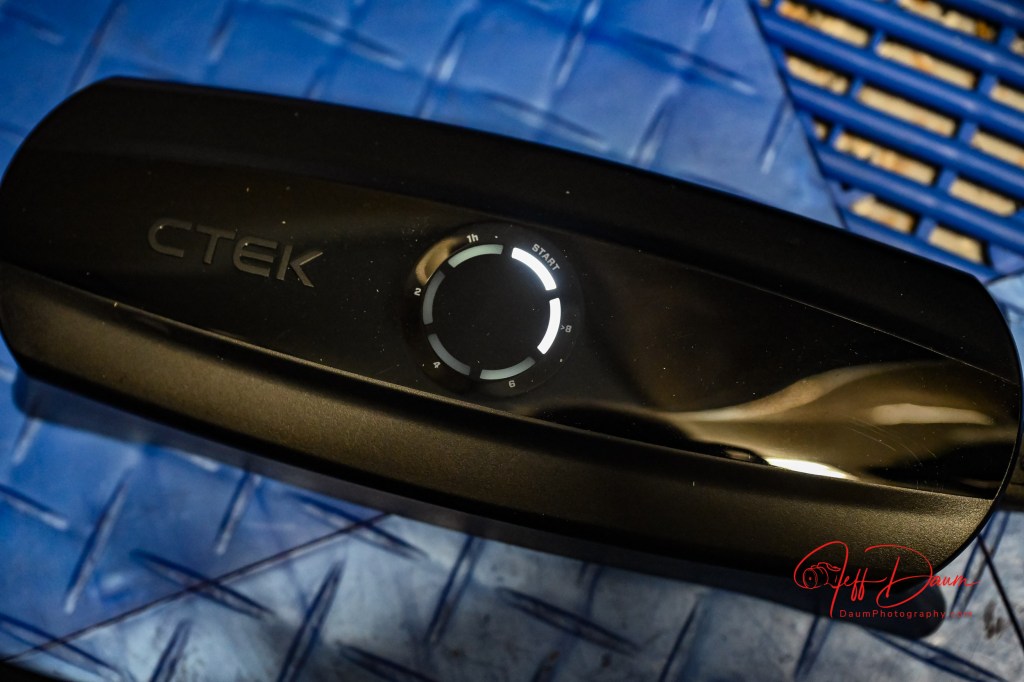
Once you connect and plug in the NXT5 you press the Mode button to select the correct cycle- there are eight: regular battery charge, AGM battery charge, regular battery recondition, lithium battery charge, motorcycle regular battery charge, AGM motorcycle battery charge, motorcycle regular battery recondition, motorcycle lithium battery recondition. As you step through the modes, the corresponding LEDs on the charger light up.
That’s all there is to correctly use the NXT5. You can leave the NXT5 attached until the next time you drive, even if it is over an extended period of weeks or months.
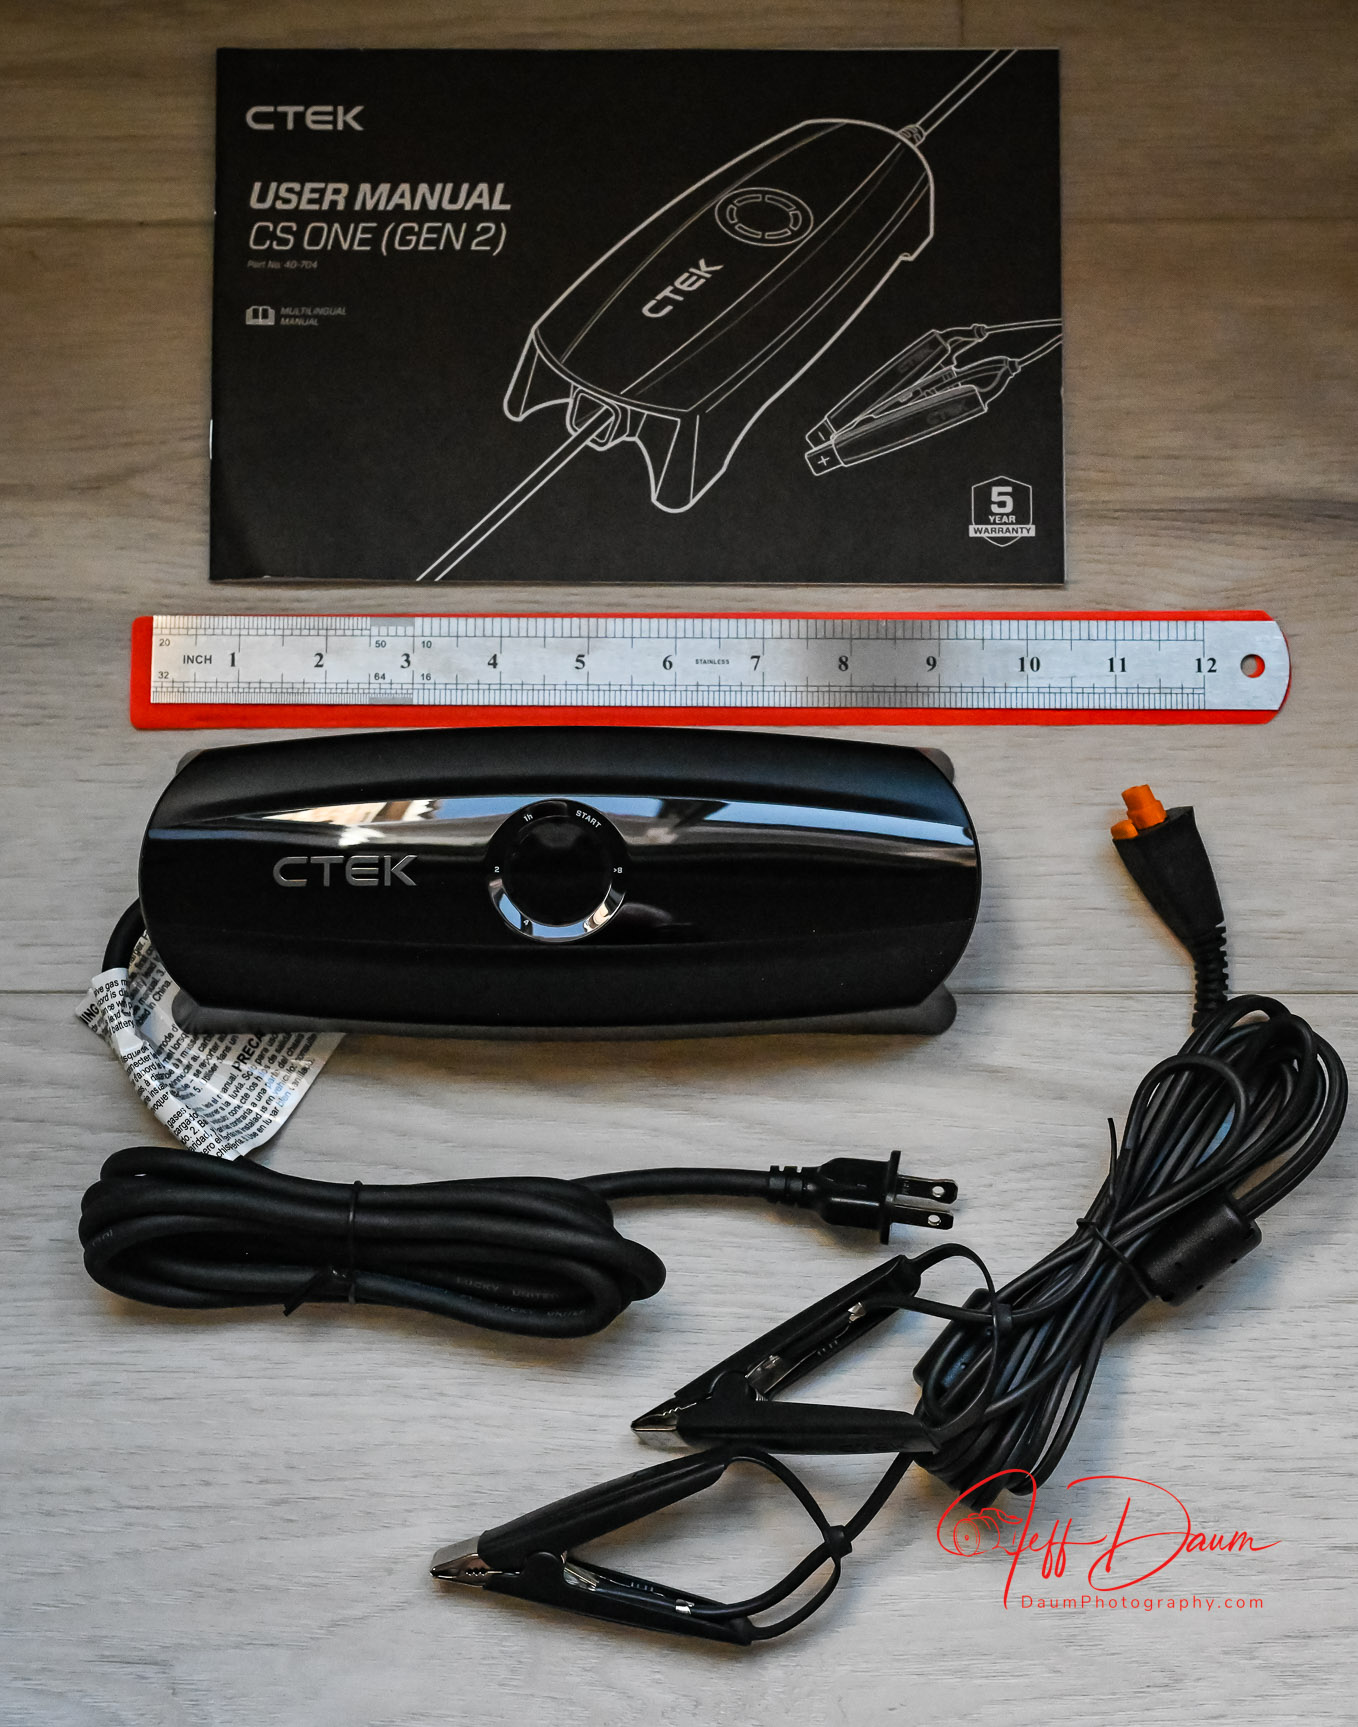
CS ONE (GEN 2)
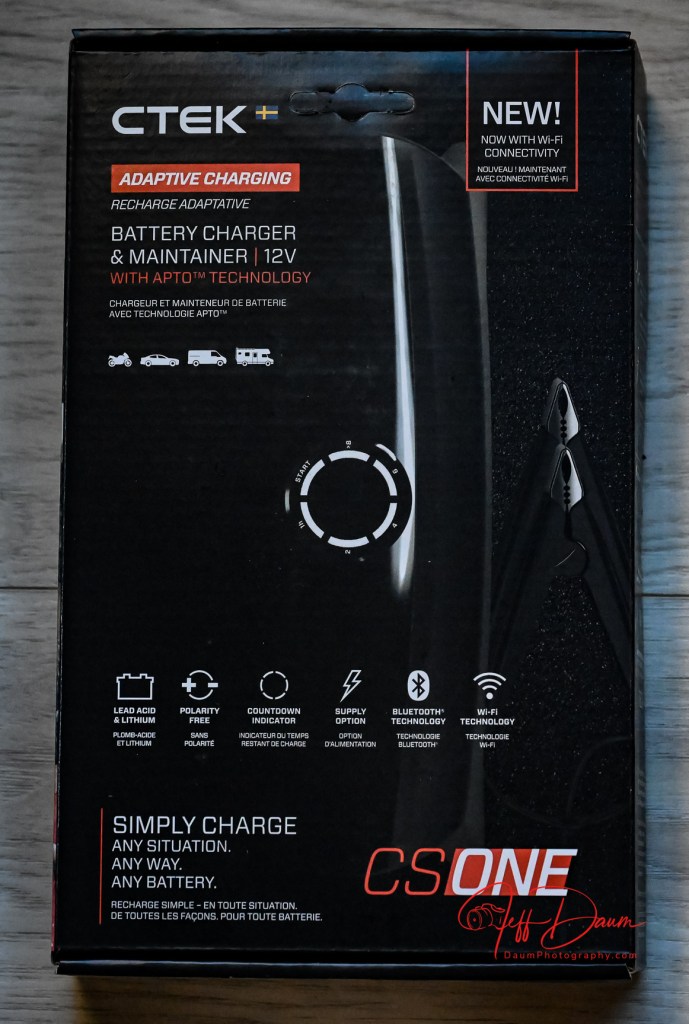
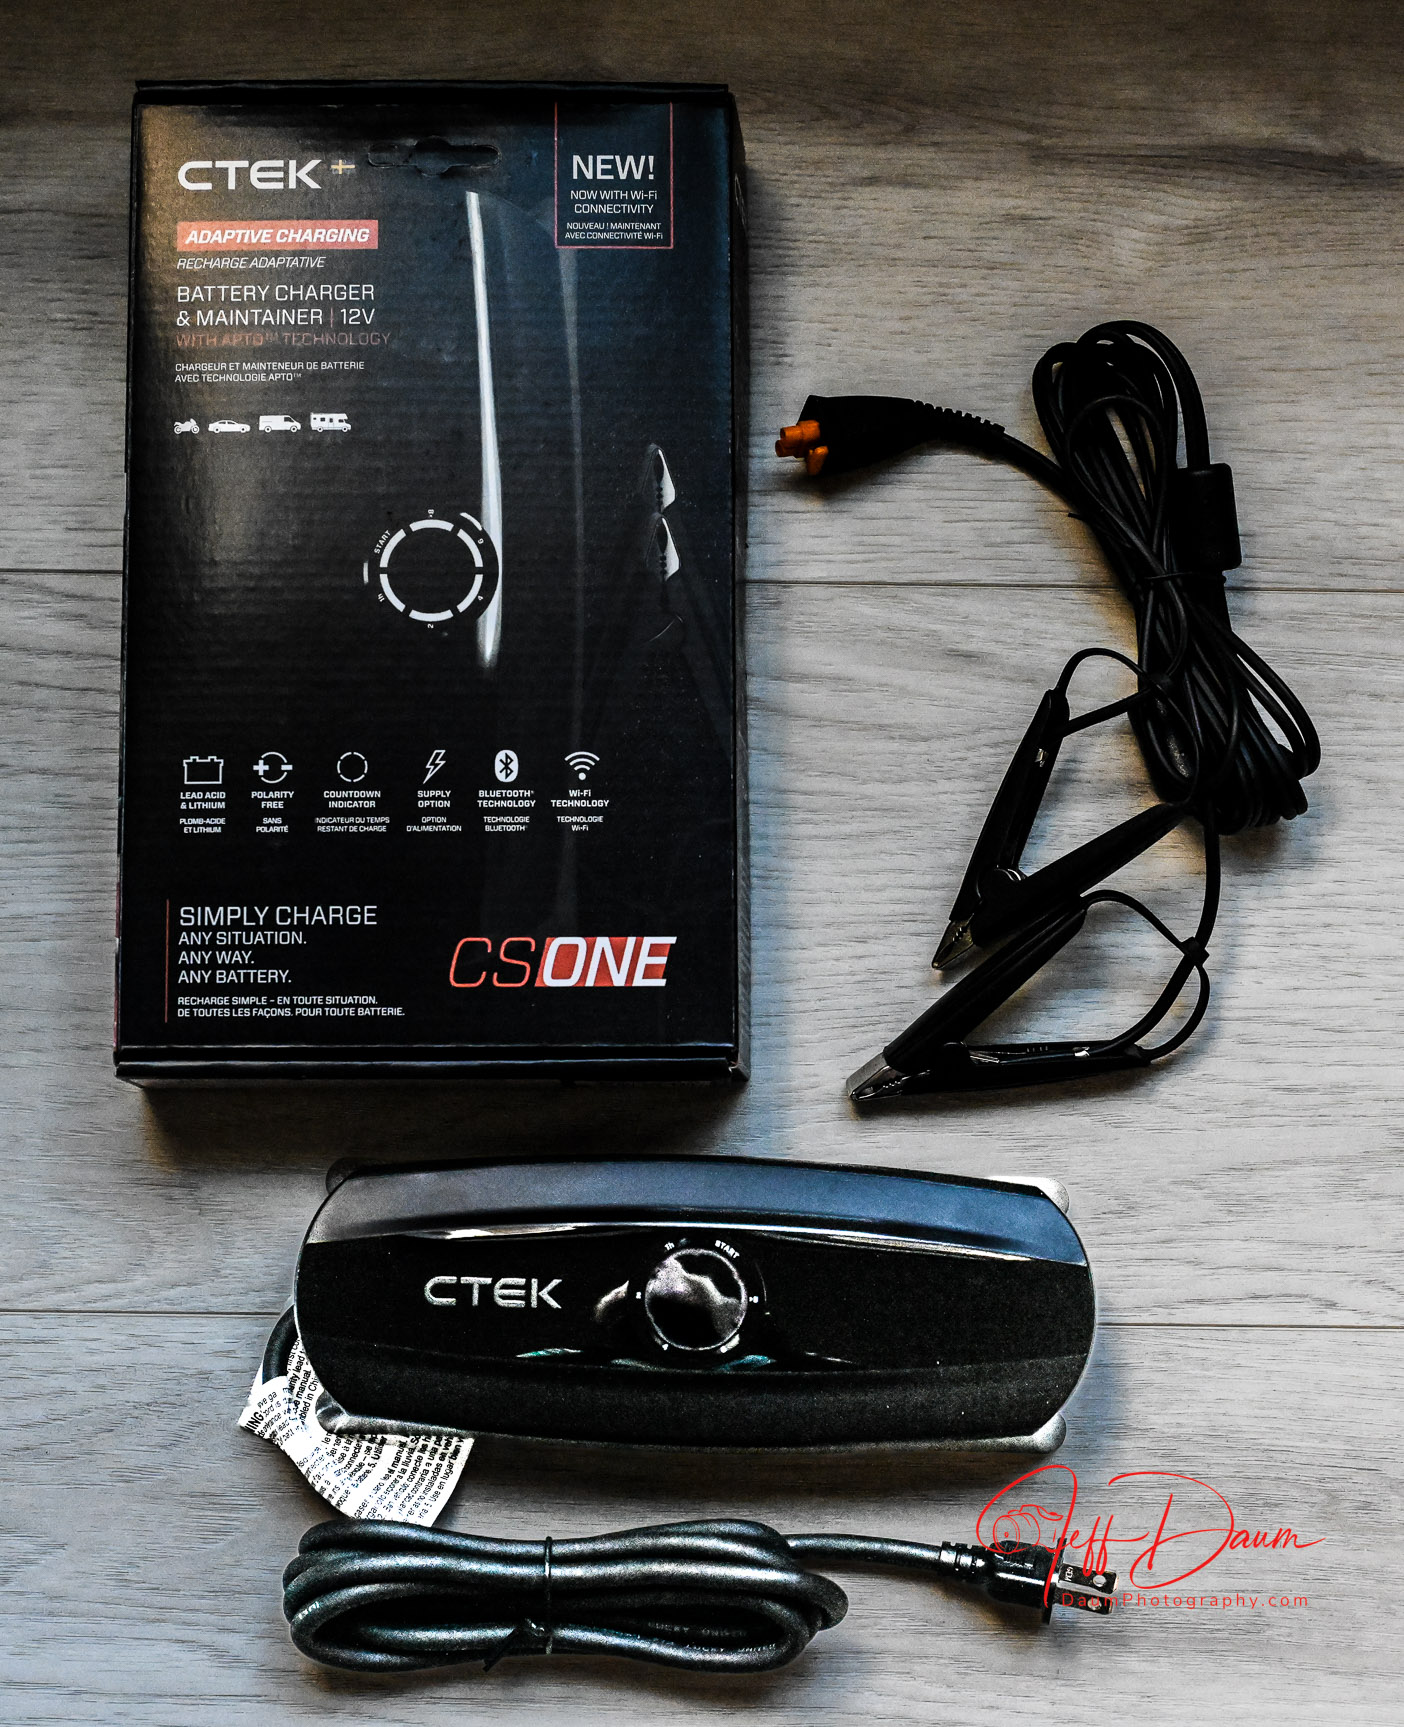
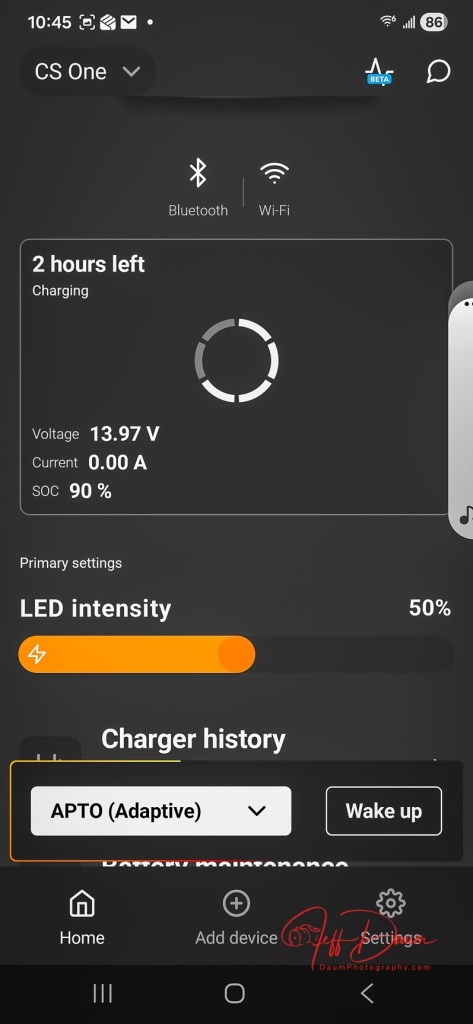
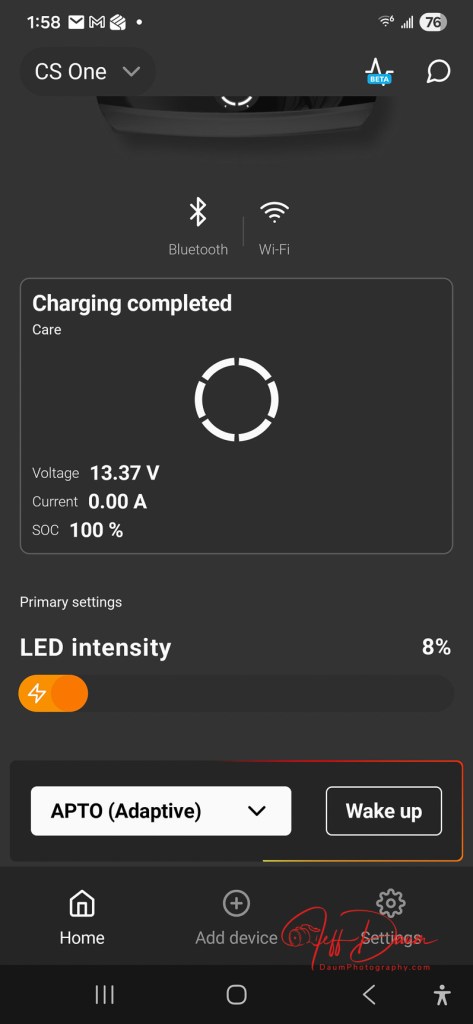
The CTEK CS ONE (GEN 2) takes charging and battery maintenance to a whole other level. It is fully automatic- it recognizes battery type and size, determines what is needed and does it all without your having to press any mode button (actually there aren’t any mode buttons to press). It connects with CTEK’s free App and provides you information through the app as to current charge status, battery voltage and charging history. The app will also notify you of firmware updates, charge cycles, stability, etc.
This unit is ideal for the enthusiast who wants the state-of-the-art smart charger/maintainer and the ability to check on the battery state of charge remotely via the app. It retails at US$314.99 Here are the highlights per CTEK’s website:
- Adaptive charging: APTO™ technology automatically adapts charging to any 12V battery, including lithium
- Polarity free: The clamps can be safely connected to either charging point when charging
- Connect & forget: Can be left safely connected for long periods during maintenance charging
- Seamless connectivity: Wi-Fi and Bluetooth-enabled app for additional features and insights
- Improve battery life: Extend battery lifetime by up to 3 times through regular charging
- WAKE UP lithium batteries with under voltage protection or deeply discharged lead-acid batteries
- RECOND program to restore and recondition lead-acid batteries
- SUPPLY program to support the battery during service work and retain contact power to the vehicle during battery replacement/removal
- Charge session monitoring, detailed charging history and activity log
- Custom charging reminders and automatic notifications on errors and updates
- Automatic temperature compensation for extreme weather
- 5-year warranty
To use the CS ONE (GEN 2) you simply connect the supplied battery clamps directly to your battery posts or to the alternative positive and ground charge posts in your vehicle. Then plug the CS ONE (GEN 2) into a wall outlet. It does everything from that point on. It is worthwhile downloading the free CTEK App and link it with the CS ONE (GEN 2) since it provides you significant information on what is going on as well as additional options. It also explains how to use the options and what displays mean.
Field Test
NXT5
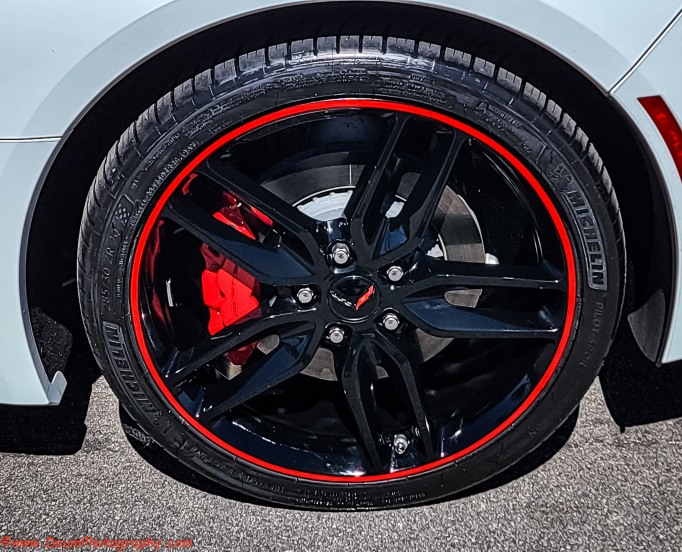
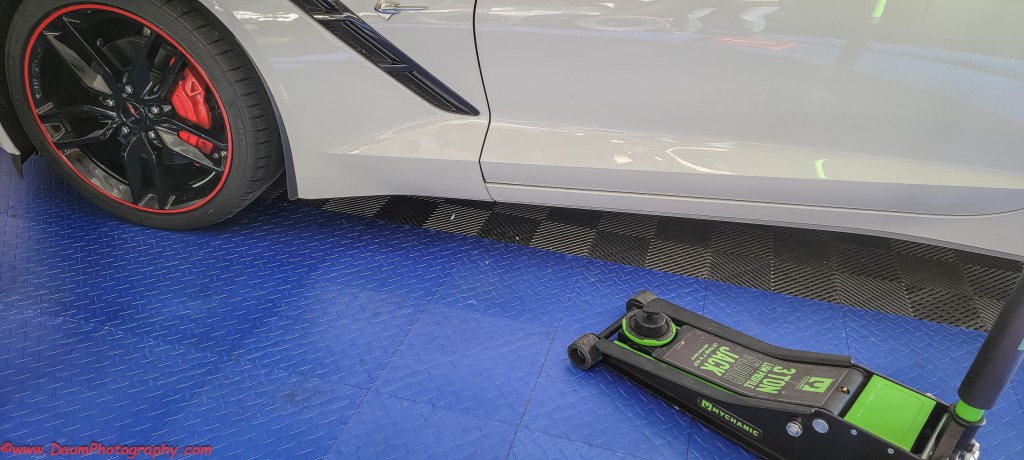
I connected the NXT5 to a Corvette Stingray which has a six-year-old ACDelco Gold nonAGM maintenance free battery. The Stingray has a dedicated accessory outlet on the side of the trunk specifically for charging the battery. The Corvette battery and its terminals are less accessible since it is housed beneath the trunk floor. So, I used the CONNECT CIG PLUG optional attachment to the NXT5.
After plugging in the NXT5 I used the Mode button to set it for a regular car battery. The LEDs showed it was in the Charge phase. After a few hours it then showed it was in the Care phase.
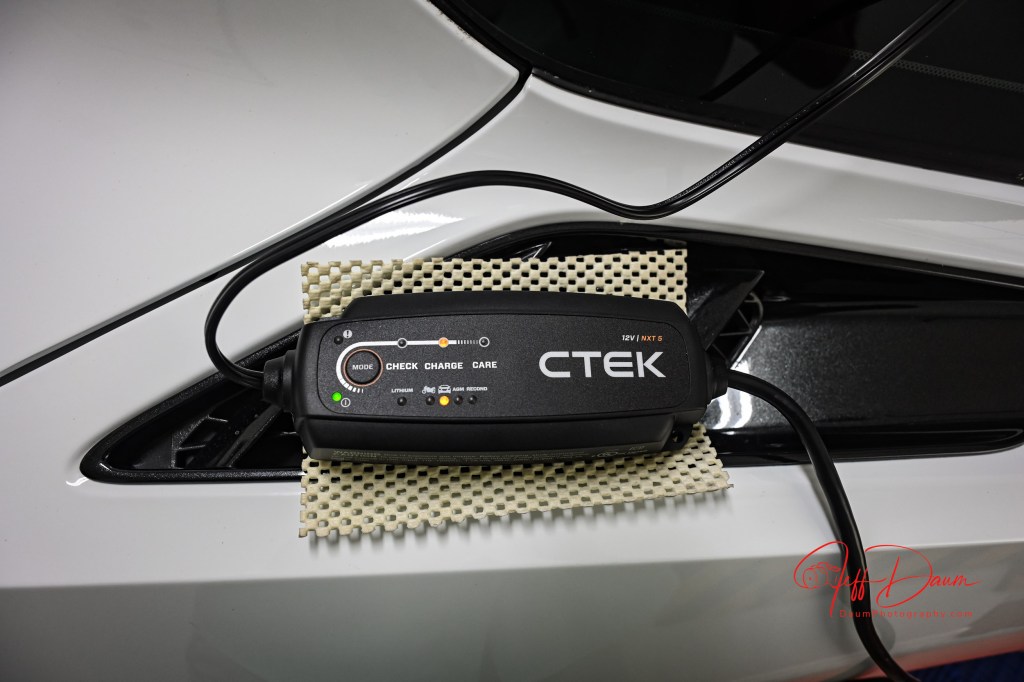
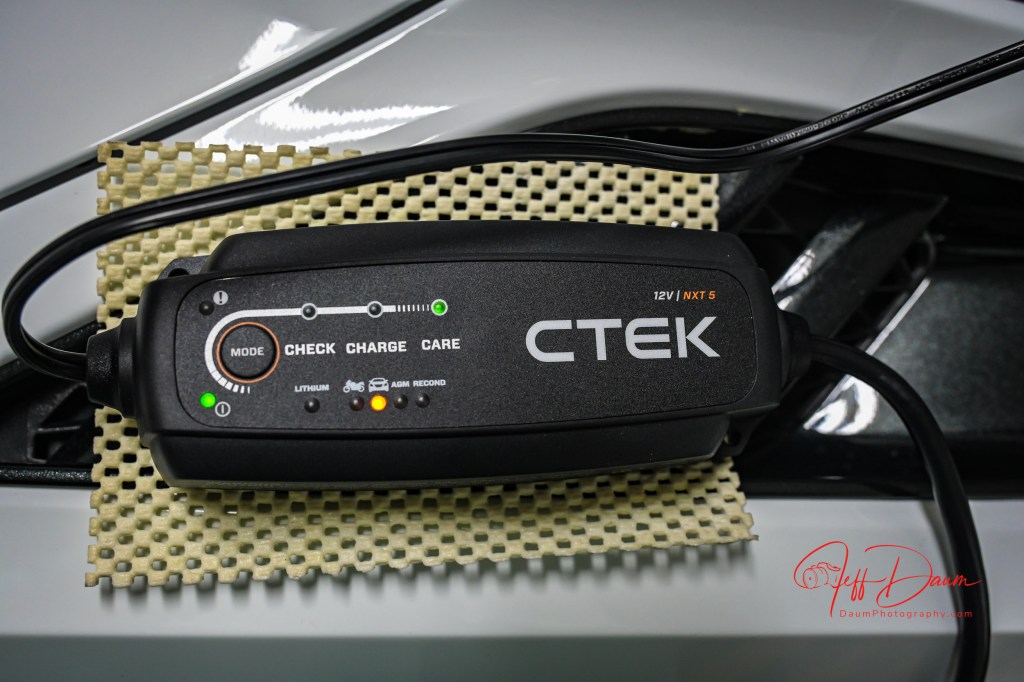
One thing I noticed is that the NXT5 unit remained relatively cool while charging and maintaining the battery. Earlier CTEK units tended to get warm during charging phases.
This NXT5 unit is really easy to use as a ‘set-and-forget-about-it’ battery maintainer. I have every expectation that it will do a great job not only keeping the battery in peak condition, but also in significantly extending the battery’s useful life.
CS ONE (GEN 2)
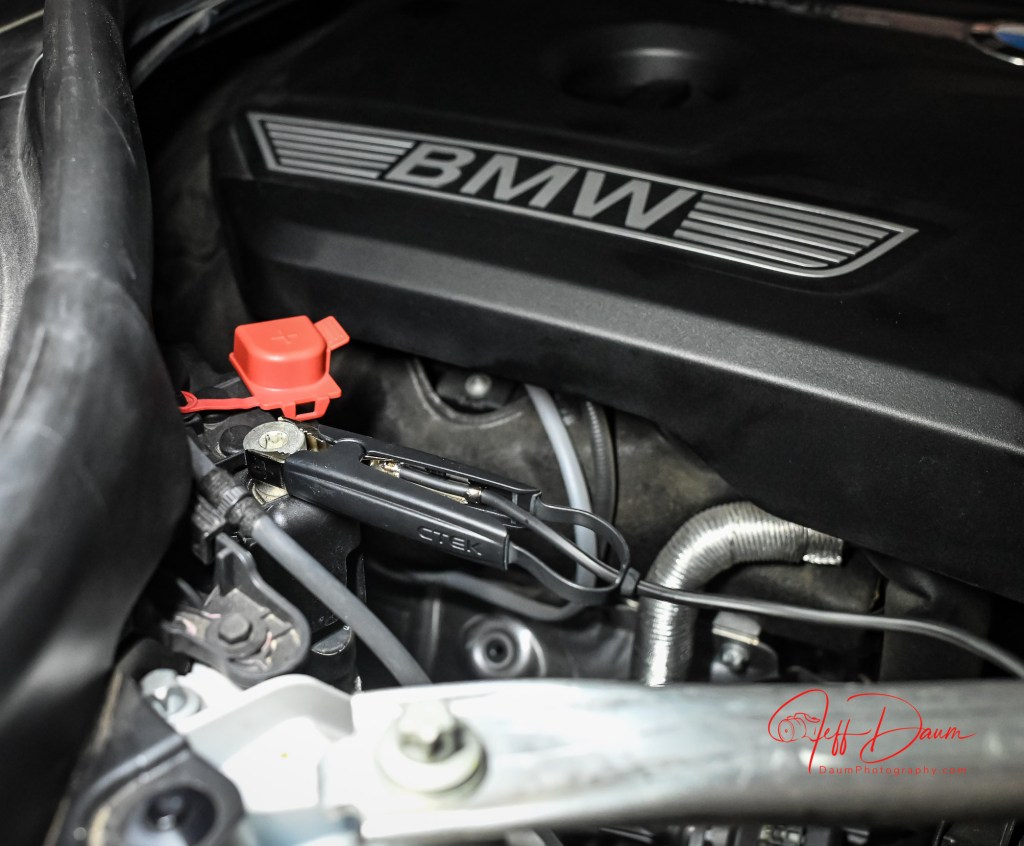
I tested out the CS ONE (GEN 2) by connecting it to BMW X3 which has a seven-year-old OEM AGM battery. The battery is located under the trunk floor, but the X3 has a dedicated positive and negative terminal in the engine bay. I connected the CS ONE (GEN 2) battery clamps to these terminals.

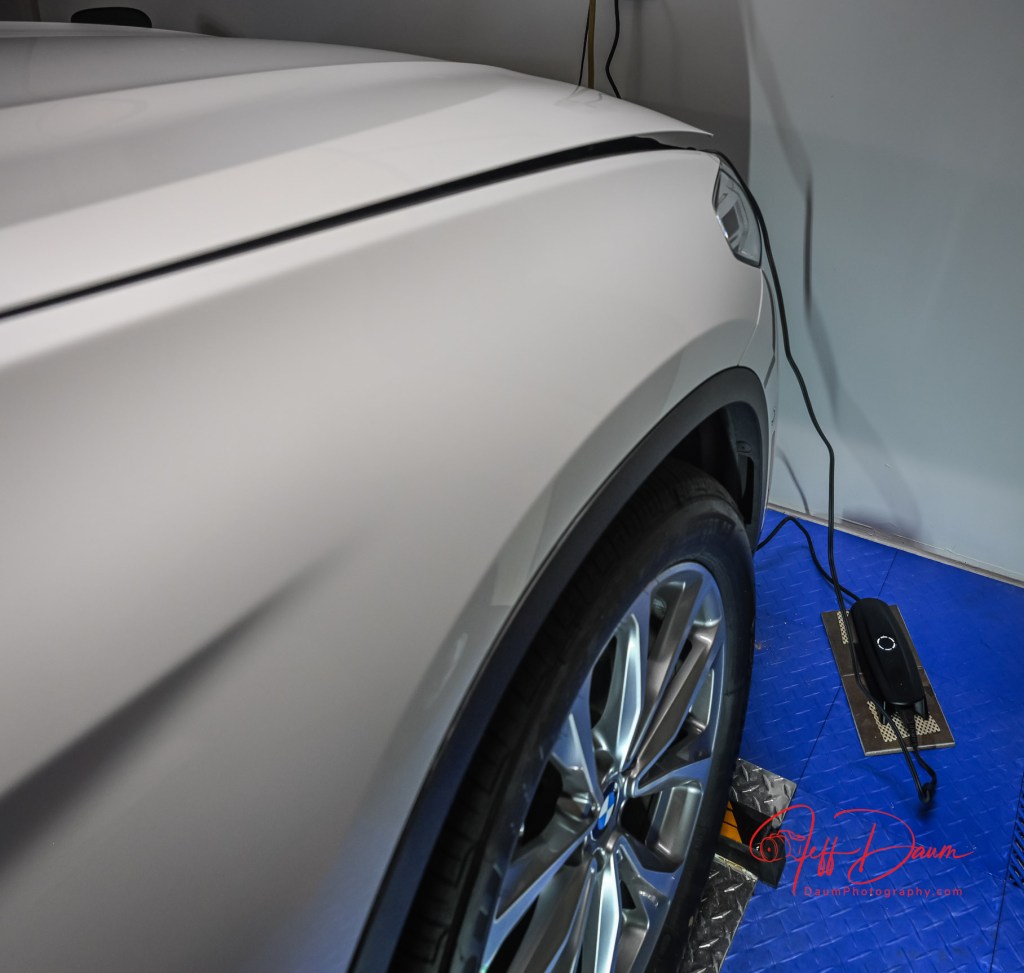
Once plugged in, the CS ONE (GEN2) went through its automated start up process going from Start to how many hours remain before the battery was at full charge. Unlike other CTEK units I have used including the new NXT5, the CS ONE (GEN2) has no mode button to use and does everything automatically.
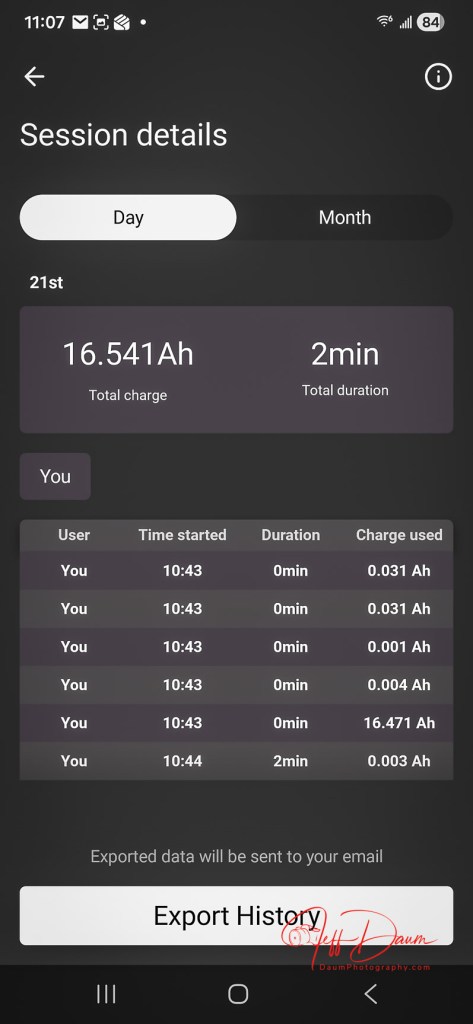
Connecting the free downloaded CTEK App on my Android phone was easy and quick. Following its guidance it quickly found the CS ONE (GEN2). The app is clear and a snap to use, displaying an animated status of the unit’s connection to the battery. It also shows other information including voltage, charging current, SOC (state of charge) %, a slider to adjust the unit’s LED brightness, charger history (by specific date or for the month), and option to share the device with others, option to select the charger’s output power (either Adaptive or Maximum), option to change Wi-Fi connection and factory reset.


It also contains a series of screens that explain charging states, pairing states, error messages, and how to connect and use the charger.
I really like that I can remotely check on the CS ONE (GEN2) status and ensure my battery is ready to go.
Preliminary conclusions
These two new CTEK battery charger/maintainers are extremely well designed, professionally built and do an outstanding job. As to which model to buy, it really depends on your intended application.
If you are looking for a highly reliable charger/maintainer, one that you can set and forget, my experience over the years supports that a CTEK unit will serve you well. It also demonstrates how CTEK extends the life of your battery. Each of these batteries live in a stressful environment where temperatures range in the 105 to 120 degrees Fahrenheit during several months of the year. Talking with my car clubs’ friends their typical battery life is closer to four years. I attribute the longevity of these batteries- the Corvette’s battery is six years old and the BMW’s is seven years old, to my continued use of CTEK units when they are not being driven.
If you have a question, please feel free to ask or comment below! Happy charging.
[1] See https://insight.daumphotography.com/2018/11/11/youll-get-a-charge-out-of-this/
[2] https://www.ctek.com/charging-solutions/battery-chargers?srsltid=AfmBOorcyZl4YAHYP116S7C4WzIzccIMTKCSlUENCJdURhZvG6d1poGv