White Giants: Time with the Largest Land Carnivores

By Jeff Daum, Ph.D., PPA and IP (Itinerant Photojournalist)

As an itinerant photojournalist I believe Annie Leibovitz said it best “I wish that all of nature’s magnificence, the emotion of the land, the living energy of place could be photographed.”

Some of you know my wife and I are enthusiastic globe-trotters and have had the good fortune to visit more than one hundred countries. Part of our motivation to travel has always been to see new flora, and wildlife, and to experience cultures that are different from our own. Unfortunately, some might not be around in the future for a variety of reasons.

We just returned from a trip to observe the Polar Bears[1] just outside of Churchill Manitoba along the Hudson Bay in the southern part of the Arctic Circle.  It was truly an amazing experience seeing these Ursus maritimus (literally ‘Maritime Bears’ because they spend so much time in the sea or sea ice), which are the largest land carnivores, in their milieu.  The males are generally between 550 to 1700 pounds and are eight to ten feet while the females are between 200 and 700 pounds at six to eight feet. 

Though they are carnivores eating primarily the Ringed seals they catch in the sea ice, they also eat grasses and berries. But I am getting ahead of myself- how did we get here?

The exploration began with checking into the Lazy Bear Lodge.  The real log cabin Lodge was built by owner Wally Daudrich from reclaimed trees, taking him over a decade to complete.  Wally’s son Deacon served as our highly knowledgeable and most congenial naturalist guide and Arctic Crawler™ Tundra vehicle driver.


[1] Commonly called Arctic Polar Bears, but since they only occur in the Arctic, they are properly called Polar Bears.  Their scientific name is Ursus maritimus.

We searched for quite a while before seeing a Polar Bear, and when we did it was in the distance near the shoreline.  Since darkness was setting in, we headed back to the lodge. I was a bit disappointed but clearly understood these Bears operate on their own schedule and there is no guarantee.

The next morning, we headed off again in the Arctic Crawler™ Tundra vehicle accompanied by a beautiful sunrise. 

Shortly thereafter we spotted a Polar Bear again near the shore.  Apparently we were more interesting than his search for seaweed or grass to eat and he started to amble over toward our vehicle. Because of their size, they don’t appear to be moving very fast, but in fact with his large stride he covered about a quarter of a mile (ok, since he was in Canada, he covered about 0.40 kilometers 😊) in just a few minutes.

He appeared to be curious about our vehicle, and particularly the corner red marker flags.  After carefully studying it, he stood up and swiped one of the flags.  He examined it and decided to leave it on the ground.  Once the Polar Bear walked away, Deacon carefully climbed down and retrieved the flag, so as not to leave it in the protected area.

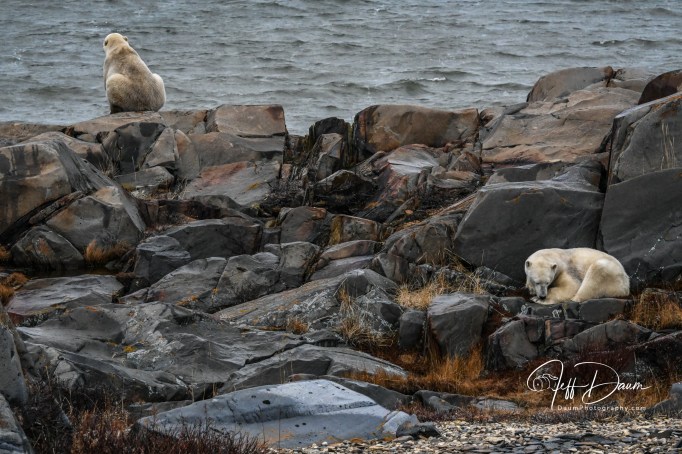
As the day progressed, more Polar Bears appeared.  Most were by themselves, but several ended up joining one another.  In those cases, there were displays of jostling and sparing.  This included pushing, cuffing and some biting.  But in no case did one Bear hurt the other or drew blood.  These interactions could last ten to fifteen minutes, and a couple of times forty-five or more minutes.  The longer sessions typically had ‘breaks’ where one Bear would walk a short distance away, or both would lay down next to each other, before resuming the tousling.

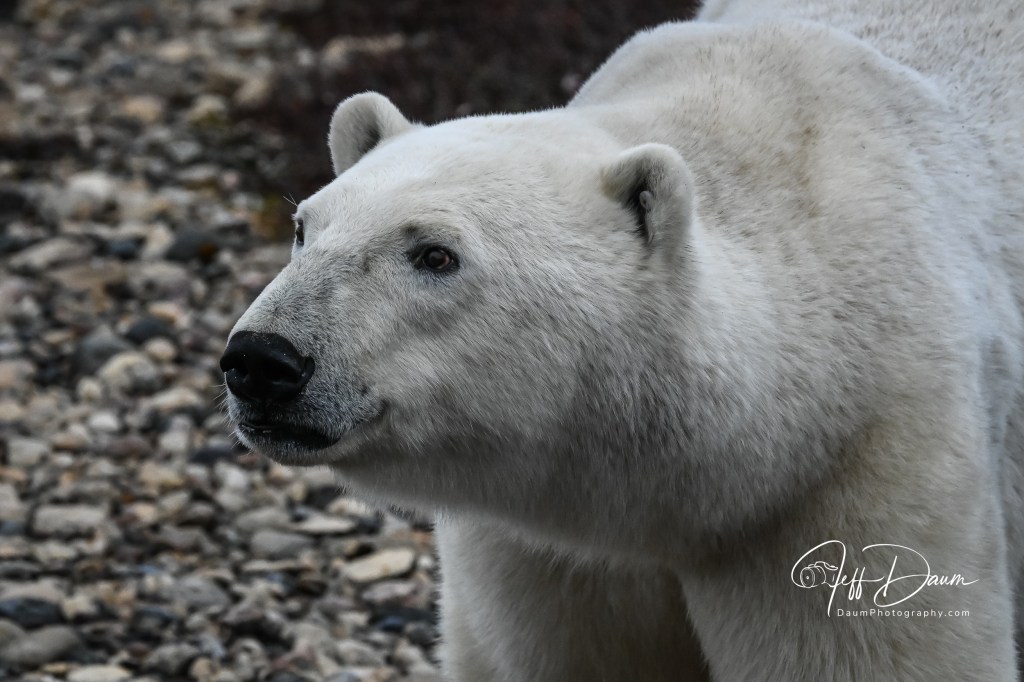
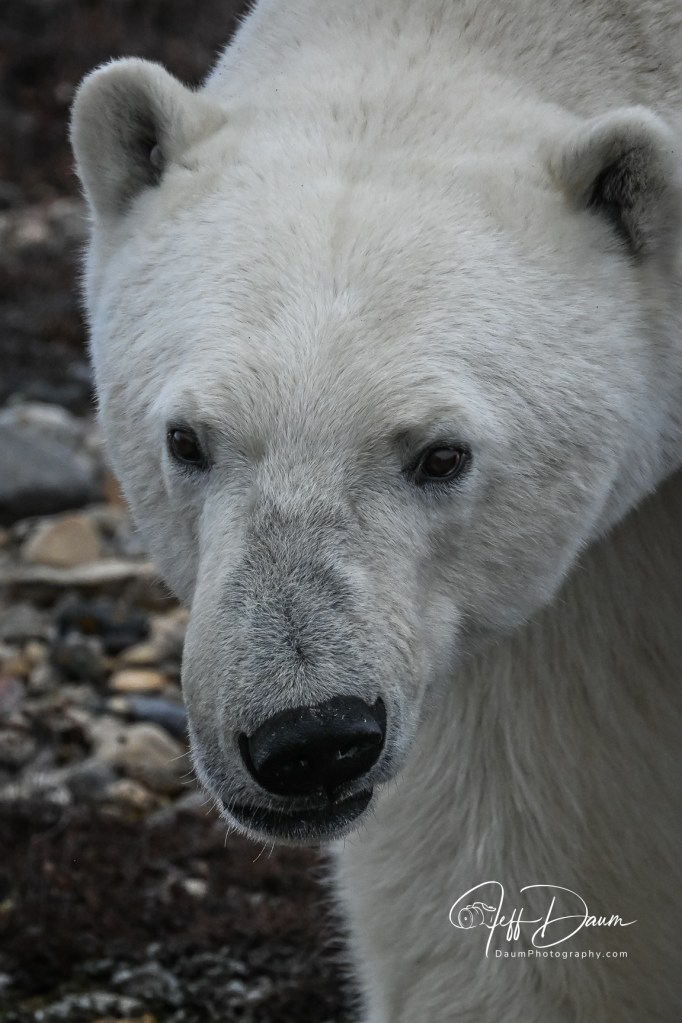
Based on what I observed, along with talking to our local guide, and to renown polar bear expert Matthias Breiter, they are highly curious, basically gentle giants.  They do not roar even when jostling.  Polar Bears don’t normally attack people but do go after opportunistic food caches and because of these present problems around towns.

Females will aggressively defend their cubs who tend to stay very close to the mother for two to three years.  However, they will not interfere with the cubs if they are fighting one another.

Polar Bears are frequently misunderstood, often the result of being portrayed as growling ferocious bears in movies, and they are needlessly shot and killed.

This Polar Bear is looking across the bay hoping for ice as the sun is rising.

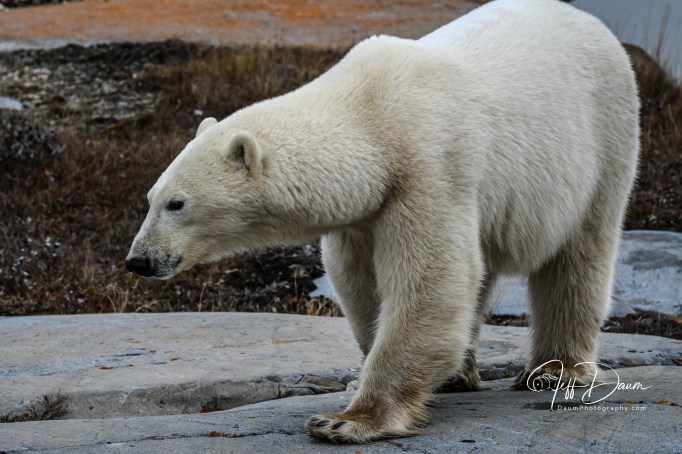
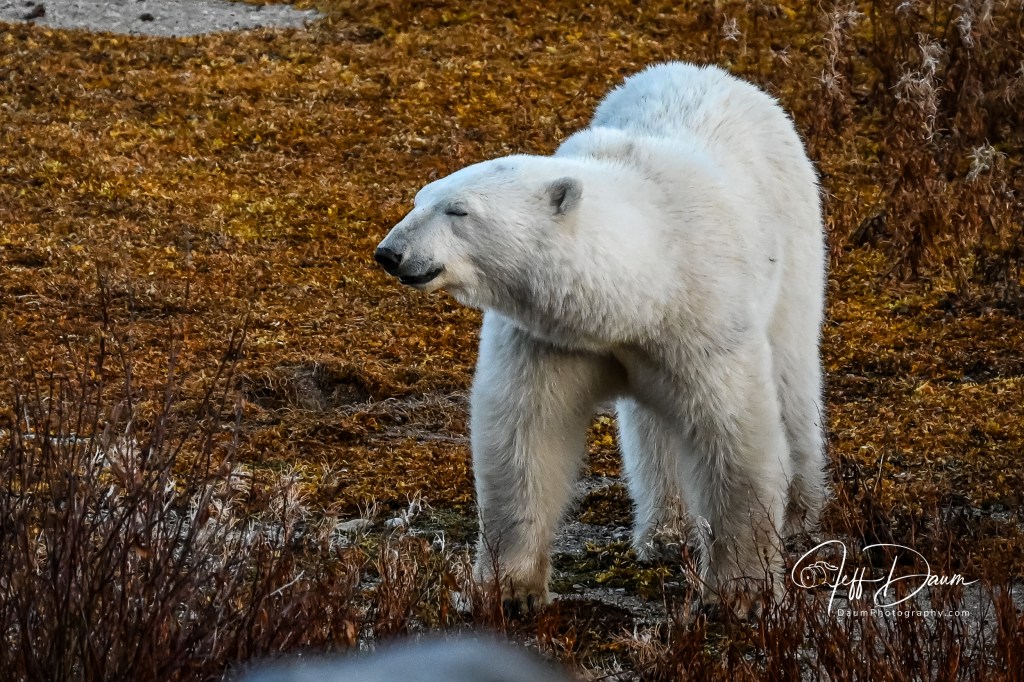
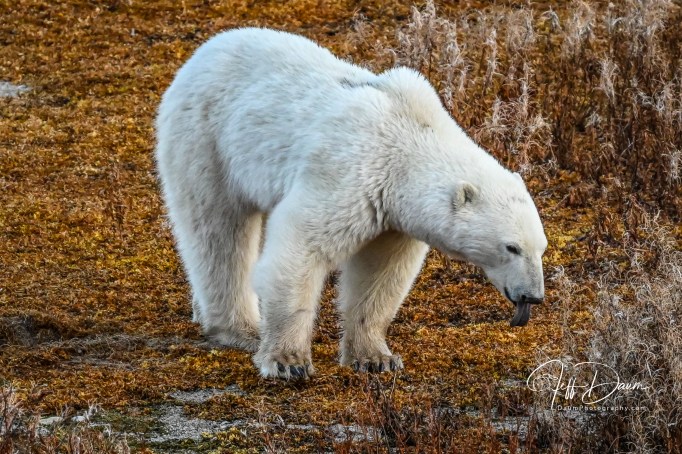
Just ambling along, possibly drooling thinking about seals.

Making sure his nails look good.

Jostling to assess one’s skills.
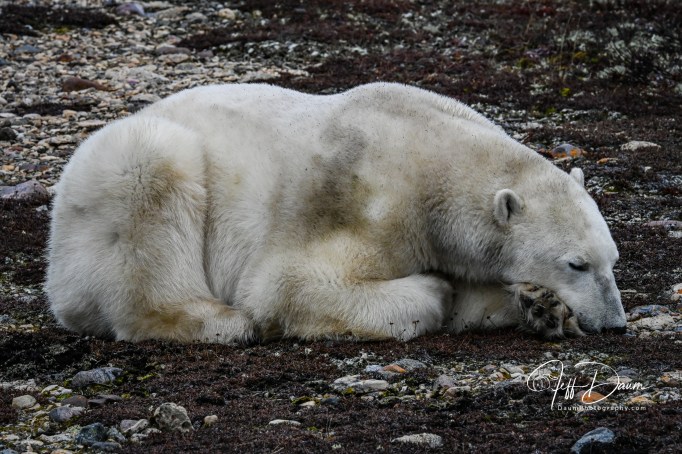
Just resting.

Not all Arctic Polar Bears are white.

Coming to get a closer look at me.

At the end of day, once again checking for ice.

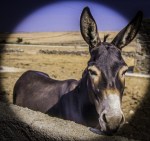
The following day our Deacon took us to different part in the Churchill Wildlife Management area[2] of Hudson Bay and we were fortunate to see a number of Polar Bears.  Additionally, we were treated to hawks, Willow Ptarmigans, ducks, Grouse and other birds.  While we did not see any Arctic Foxes (theorized to be disappearing because of the impact of global warming here) we did see one Red or Cross Fox, and several Arctic Hares.


[2] This is a limited access permit only area designed to protect and preserve the Polar Bears natural habitat.

We did not come upon mothers and their cubs any day until the third day, when the sun was setting and we were heading back on a road near the forest.  At that point a female with one cub pretty much hidden by the trees, were spotted heading back into the woods.

Our last day in Churchill we were treated to a visit with renowned dog musher, “Big Dog” David Daley.  He shared an overview of dog sledding, care, treatment and training of the dogs.  Then we were off for an invigorating sled ride for the IDIDAMILE (not to be confused with the Iditarod).  But that story is for another time…

For a teaser of the dog sled ride see https://youtu.be/uTvFXeF5PEA

Additional Bare Facts about (Polar) Bears 😊 from Matthias Breiter[3]

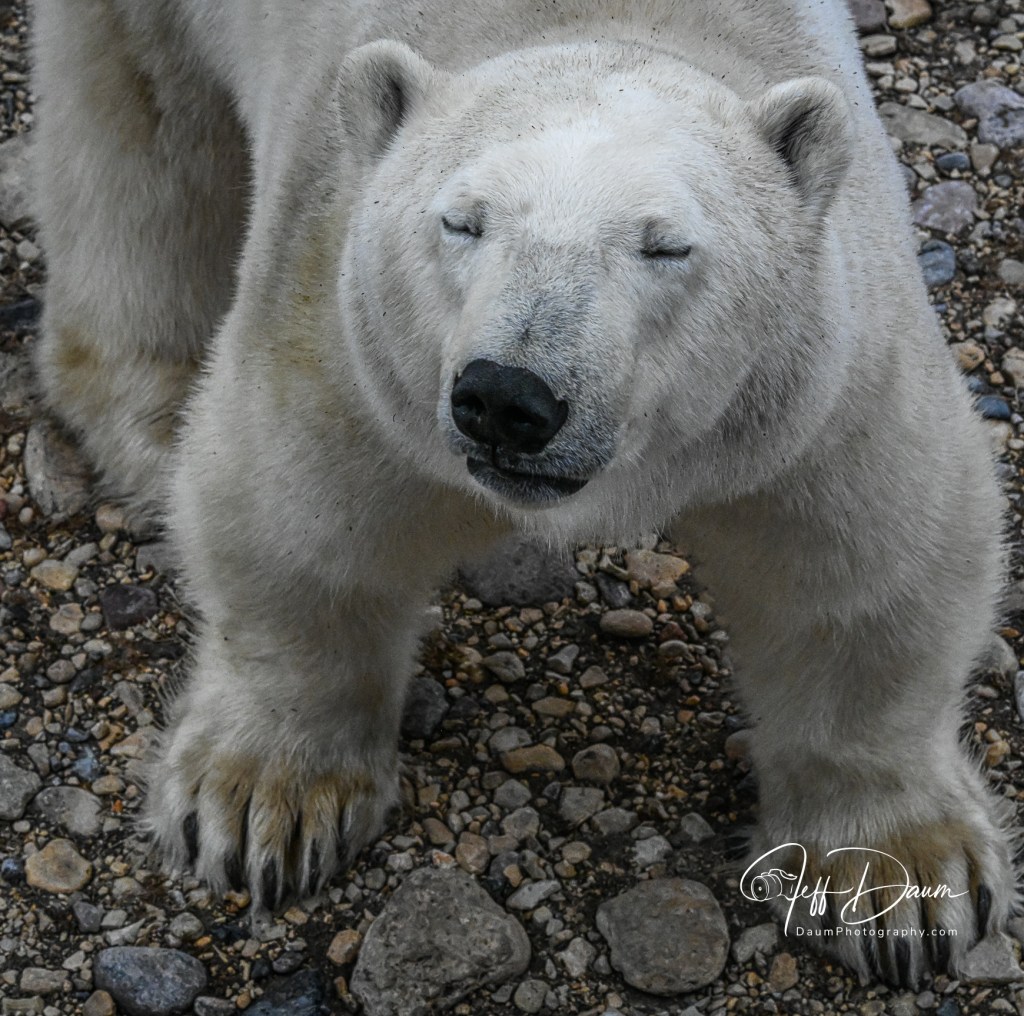
  • Polar bears often close their eyes when walking. They are not sleeping, however. Rather, they are focusing on their most advanced ability, their sense of smell.  They have an articulated nose.  The enlarged nasal cavity is a heat exchange chamber.  It helps heat cold air on inhale and cool down on exhale.  You won’t see a plume of moisture when they exhale even in below zero temperature and this helps prevent dehydration resulting from breathing.

[3] From a talk and discussion Matthias Breiter had with our Tauck group

  • They don’t have to pee to get rid of amino acids like we do, because they are able to recycle amino acids.
  • Tag or tags in ears means the bear has been caught around town and detained in bear “jail.”
  • Life span is fifteen to eighteen years, though some have lived over thirty years.
  • World population is estimated at 25,000 living in the circumpolar arctic region.
  • Mid-November to end of July they are out on the sea ice hunting seals.
  • Polar bears typically mate from March to May.
  • Pregnant females go to the dens in the forest in early October and typically give birth to cubs in late November or December, returning with the cub(s) to the sea ice in February or March.  The average litter size is 2.1 cubs.  If they have three, one is a runt and typically won’t make it to be a Yearling. They don’t go into the dens until there is snow on the ground.  There are about 600 dens under the tree roots and they are very stable.  They are reused.  About 300 of the dens are active.
  • While males do wander the females stay close to and return to the area where they were born.
  • Healthy females can live off their fat for nine months without eating.  They only lose about five percent of their muscle mass in hibernation.  In bears, muscle mass and the rebuilding of the mass is separate from the actual use of the muscles.  During hibernation they drop their metabolic rate by half.
  • Their big paws help distribute their weight and enable them to be exceeding good and very fast swimmers.
  • The big problem they have is thermal regulation and overheating.  If you scanned them with an infrared camera you would hardly see any indication of heat because of their subcutaneous fat layer and insulating fur.  The only places that they can dissipate heat are their arm and leg pits.  They will prostrate themselves on the snow or ice to cool down after a sprint or chase.
  • Polar bears are social, typically by gender. Aggression is rare, except as noted with females protecting their cubs. 
  • The biggest problem is that polar bears get shot needlessly in defense of property around the town by people who don’t understand how to control bears.  If you run from them, they may chase after you.  Movement toward the bear will normally cause them to back up.
  • Polar bears basically gain all the weight they need in six weeks to two-month period.  They then maintain that weight or lose a little for the rest of the year.
  • However, without the sea ice and the seal pups there would not be any polar bears surviving.  Now unfortunately the ice isn’t forming as early as it used to.  Sometimes you don’t have sufficient ice until December.  In the past, the ice formed in September. 
  • When he Matthias started working in Hudson Bay there were around 1600 polar bears, now there are 612.

For the camera enthusiasts: All images were taken with either a Nikon Z7ii using a Nikkor Z Zoom S 100-400 mm lens handheld or a Nikon Z7 with a Nikkor Z Zoom S 24-124 mm lens. The Nikons were carried using a Blackrapid double or single straps system. To ensure I always had enough power, I started each day with five fully charged batteries.  I did not run into any issues with the cold affecting my equipment.  The real challenge was holding the camera and lens steady while out on the observation deck due to high the crosswinds.


A few parting shots (pun intended):


In sum, we would say this Polar Bear experience was right up there with our Gorilla Trek (in the Bwindi Impenetrable Forrest) in terms of unique encounters with the awe-inspiring magnificence of Mother Nature.

If you would like to see my full gallery of Polar Bears click on https://www.daumphotography.com/Nature-Images/Arctic-Polar-Bears

Thanks for joining me on this adventure! Please feel free to leave comments and/or questions below.

Peter Brock, Designer Exemplar, and first look at the 2025 version of his iconic 1963 Sting Ray

By Jeff Daum, Ph.D., PPA[1]

Sixty-seven years ago, Peter Brock penned the sketch that Bill Mitchell[2] chose to become one of the most iconic cars: the split window 1963 Corvette Sting Ray. At the time, Peter was the youngest designer at General Motors. He would go on to be a renown visionary and prolific designer with accolades and records for a broad range of his designs including the Datsun 510 Coupe, Cobra Daytona Coupe, Shelby-DeTomaso P70 and Aerovault trailer. But my focus here is on Peter’s latest achievement, the 2025 Sting Ray Studio Concept car[3] revealed at the 2024 SEMA[4] show in Las Vegas, Nevada.

At first glance when the cover was drawn back on the 2025 Sting Ray Studio Concept car at SEMA, the body looked very similar to a well preserved 1963 Sting Ray even though it was described as a resto-mod. Peter had done something other resto-mod builders of the C2 Sting Ray had not. He retained the original body shape and design, staying away from radical changes such as widening the body, adding bulging fenders, etc. More importantly Peter added back into the 2025 Sting Ray subtle details and changes to bring it closer to what he had originally designed.

Peter shared with me the back story on how, and why, this came to fruition. He made a conscious decision to change as little as possible in the body to retain the original form since it was well established as an automotive design icon. In the five years it took to take its design to being a production car in 1963, GM was primarily focused on making money so there were compromises made on which details went into the final car. In this 2025 Sting Ray Studio Concept car Peter wanted to restore some of those important details.

Peter worked with Mike Staveski and his company, Resto Mod Vette to build the 2025 Sting Ray.  This is the second car that he did with Mike, but the first one that is designed fully to Peter’s specifications. Here are a few images of Peter at Mike’s shop making some of the modifications:

They began with a 1963 donor Sting Ray body. Mike decided on and sourced the modern drivetrain and chassis which included:

  • GM crate LS3 engine
  • Electronically raised and lower hood
  • Harrop fuel injection
  • Holley engine management
  • Dewitts radiator
  • 4L60e transmission
  • PSC push button shifter
  • Ididit steering column with Sparc Industries Wheel
  • Dakota Digital gauges (with Peter’s signature)
  • Vintage Air AC
  • Art Morrison custom chassis
  • Cerakote frame
  • C7 front suspension with AME IRS, Ridetech Coilovers
  • Wilwood electric brakes
  • Additional Corvette parts from Corvette Pacifica
  • Additional parts from Atech Motorsports
  • Dynamat sound proofing
  • Custom glass from AM Hot Rod Auto Glass
  • Douglass Interiors Leather, Linen & Sage
  • Forgeline 18 wheels
  • GM Hypersonic Gray paint

Peter designed and supervised the details he wanted to add back to the body. These included making all the vents and air scoops functional. Mitchell, at the time, wanted the nonfunctional vents because while it saved money by not making them real, it added perceived value to potential buyers as they viewed the car in the showroom.

Another important change for Peter was to improve the interior visibility. Mitchell wanted a split rear window on the 1963 Sting Ray as homage to the Bugatti 57SC Atlantique, but that impacted the rearward visibility and Zora Arkus-Duntove[5] was really upset with Mitchell for mandating that. In Peter’s original sketch the glass was not split and went all the way down to the radius along the side. To improve this on the 2025 Sting Ray, Peter enlarged the area of each split window and eliminated the “B” pillar on the doors so that now the side windows are one continuous piece of glass. Together these changes result in better visibility from the inside of the Sting Ray and it feels more open. Complementing this, Peter used only the finest materials on the interior of the resto-mod. This is reflected in the new instrumentation, the top-grain leather on and around the dash, including around the air ducts. All that leather was hand stitched but resulted in a very high-end production finish.

Continuing with detail changes on this 2025 Sting Ray, two more can be seen when looking at it from the back. In addition to the enlarged split windows, Peter brought the fin all the way down to the midline of the body through and including the gas filler door. The fin is also slightly raised paying more homage to the Bugatti Atlantique. A nice detail is that the gas cap can now be placed into a holder inside of the gas filler door when removing it. At the front of the car the headlights have been changed from the flip up 1963 approach to built-in LED quad headlights with halos. Most of the original bright work on the body, like the bumpers, was downplayed and changed to black chrome encouraging one’s eyes to focus more on the overall form. Peter also put his race-type mirrors on the doors, which work well with the flow of the body.

At one point in our interview, Peter mused that this is based on a sixty-seven-year-old design, saying “how does something last that long and still evoke such admiration and desire from people that see the car.”  He went on to add “the impetus for the Sting Ray grew out of Mitchell going over to Italy and seeing all the streamlined cars and bringing back photographs of them for us to study. I do not think he knew whether we could design a car that would meet his expectations. But once he saw what we were turning out, his enthusiasm grew, and he kept coming back into the studio to see the progress we were making. We did not always agree on direction, for example, I wanted the nose lower and back end higher, but Mitchell was traditional and knew the drop away in the rear would sell, so that is what we went with.” With emotion, Peter added that he had a particularly good relationship with Mitchell, and that he was a great mentor. Tony Lapine and Larry Shinoda, veteran design specialists, took over the final version as the Sting Ray was getting ready to go into production. Peter had been moved to work with Harvey Earl.[6]  He added that it would have been super to have Tony and Larry around to work with him on this 2025 Sting Ray. Since that was not possible, he wanted to make sure it stayed true to their original efforts.

Peter said Mike has a super crew who worked on this 2025 Sting Ray. It came out so well and has been so successful that Peter and Mike have decided to do a series of these cars. Mike told me (JD) he has sold three of these already. This one is headed to Barrett-Jackson’s Scottsdale auction. Craig Jackson, CEO Barrett-Jackson, was at the SEMA reveal and was very impressed with the car and intimated it may be his feature car at the auction. Based on the level of enthusiasm and interest, Peter and Mike think they may do a dozen or two of these cars. Each will be different in terms of paint, interior and finish, but the overall design details will remain the same, so it becomes a limited production that follows the Studio Concept. Mike already has plans for a Z06 version that will follow this same approach. I mentioned to Peter that notably missing on this first 2025 Sting Ray were some safety features such as shoulder (three-point lap) belts and air bags. Peter said he expects more enhancements to make it into upcoming versions, and that the seat belts in this one will be changed before Scottsdale.

It almost seems heretical to talk about cost when discussing the sheer beauty, art, and evolution of the 2025 Sting Ray, but I know some readers will ask me if I do not. Mike told me he has priced these Studio Concept models starting at USD 495k. Of course, Barrett-Jackson’s Scottsdale auction will provide a real-world test of the market value of Peter’s 2025 Sting Ray.

Lest you think Peter, at 88 years old, is now resting on his laurels, he took me into his studio to show me his new car project. Of course, it is sleek with some neat aerodynamic features, and he is very excited about it. However, that is all I can share now, details are currently embargoed but stay tuned.


Thanks for visiting and reading. If you have a question, please feel free to ask below! 

[1] Primary sources for content were interviews with Peter Brock and Mike Staveski. Other sources included Peter’s book Corvette Sting Ray Genesis of an American Icon and Brock Racing Enterprises publications.

[2] Head of GM Design from 1958-1977

[3] A Studio Concept car was a term applied to a few special ‘one-offs’ made at GM Styling, after production was underway, for GM executives.

[4] SEMA is the Specialty Equipment Marketing Association, and the show held annually, is the largest of its kind.

[5] Corvette Engineering 1953-1975

[6] In charge of GM Design from 1927-1958


ZHIYUN Weebill 3S gimbal camera stabilizer: Steady As She Goes

By Jeff Daum, Ph.D., PPA

Simply put, a gimbal stabilizer is intended to help take videos minimizing movement created by the way you hold the camera while shooting.  If you have looked at adding a gimbal stabilizer to your equipment, you found an abundance of options out there.

This review is of the new Weebill 3S and how ZHIYUN designed it to stand out from the rest of gimbal stabilizers.  The unit was provided to me by ZHIYUN and GlobalPR.

What Is In The Box

When you order the Weebill 3S it is shipped directly from Hong Kong to you and the price includes free shipping and no additional custom’s duty and import taxes.  In my case it arrived quickly and in excellent shape.  All components are well packed.

There are two options when you place your order: the basic Weebill 3S at US$319 or the Weebill 3S Combo at US$439.  ZHIYUN is offering a 10% off discount code for my readers. Links are provided in footnote at the bottom for orders from their site or Amazon.1 I recommend the combo over the base since it includes the extension handle and wrist support which make the unit much more manageable.  Both come with the same warranty: free replacement or repair for quality defects within 15 days of receipt of product. Free repair from ZHIYUN for defective material or workmanship that results in product failure for 12 months from date of selling.

Included in the box is a heavy duty nicely designed case that can hold the Weebill 3S and all of its components as well as your camera and lens.  Though, if you are like me, you already have multiple camera cases and probably won’t end up using the ZHIYUN case.

The components (image above) include #1 the Weebill 3S, #2 the extendable Sling Grip and Trans Mount Wrist Rest, #3 assorted cables for direct connection to different OEM cameras, #4 the Quick Release plate, Camera Backing Base, M4 wrench and ¼” screws, #5 Tripod base and Quick Start Guide.

The first step was to download the user manual from ZHIYUN ( https://www.zhiyun-tech.com/en/download/instruction/617?type=website&page=download_software&source=instruction ) and charge up the Weebill 3S (NOTE: as with many electronics today, no USB charger was included with the Combo.  Any USB C phone charger 14 W PD or less will do).  It takes about two hours from empty to full charge, with the state of charge showing on the small built-in screen.  Based on how you use the unit, the charge can last up to 11 hours.

Putting the components together was fairly straightforward.  NOTE: When assembling the quick release plate to the camera, the provided ¼” screw will only fit into the end of the center slot on one side- the end which has ZHIYUN printed on the underside.  It takes a few tries to get the screw to perfectly match the threads in the plate.  The same is true when putting the screws into the camera backing base.  The screws will only thread into the end of the backing base which has ZHIYUN printed on the underside.  You’ll use the provided M4 wrench to tighten the screws.

The main unit weighs 2 lb. 4.2 oz (1.026 kilograms), adding on the extension handle, tripod and mounting plate brings it to 3 lb. 13.8 oz (1.752 kilograms).

For my testing, I used a Nikon Z7 mirrorless digital camera and a Nikkor 50 mm 1.8 S lens.  This camera and lens were listed on ZHIYUN’s compatibility chart.   The actual weight of the Nikon with lens came to 2 lbs. 7.6 oz (1.1226 kilograms).

Once you get the Weebill 3S fully assembled and your camera and lens mounted, connect your camera to the Weebill 3S using one of the supplied USB cables.  Later you can potentially use a Bluetooth connection.  In my case, the Bluetooth connection would not work.

Next you will need to go through the balancing steps for each of the gimbal’s three axes.  Especially If you are new to gimbals know this is a critical step that must be completed carefully to ensure that the gimbal will work properly. 

NOTE; If you are new to using gimbals, I encourage you to watch some ZHIYUN’s videos https://www.zhiyun-tech.com/en/service/support/617/3/show?type=website&page=second_nav&source=service2#/pages/index/support/videoPage   Here is another one that is particularly helpful: https://www.youtube.com/watch?v=BzmKhXDjf2k&ab_channel=MamoAir  

The above-mentioned videos will walk you through the process including how to update the Weebill 3S software.  If you haven’t balanced another gimble in the past, you may find it frustrating the first time, but it gets easier after just a few attempts.

NOTE: the Weebill 3S is very sensitive to the slightest change in camera/lens combinations, so be sure to remove your lens cover, and have your battery and memory card inserted before doing the balancing.

After getting your camera and lens balanced, you need to allow the Weebill motor software to make final adjustments (again as mentioned in the ZHIYUN videos above).  Now you are ready to go.

INITIAL FIELD TESTS

My first test was to shoot a static object while moving around it.  For comparison I shot the scene twice, once using the Nikon on the Weebill 3S and a second time hand holding the Nikon, trying to shoot the scene as close as possible to the first time.  This would attempt to partially answer “is a gimbal set up worth it for simple videos?”

In this and the following videos, the top frame video is always the one taken using the Weebill 3S and the bottom frame video is the handheld without the use of the gimbal.  Physically for this the camera and lens are sitting on top of the Weebill 3S in the three axes gimbal set up, and you are holding it with two hands by a combination of the Weebill 3S body and either the tripod or sling grip.

As can be seen there is movement generated by the camera in both versions, but the top frame one which used the Weebill 3S has noticeably less camera induced movement.

Next test was replicating shooting a video while both you and the target are moving.

Again, there is movement generated by my moving in both versions, but the top frame one which used the Weebill 3S has less movement caused by my walking while videoing.

This next test was of the Sling Mode, where the Sling Grip is moved so that the camera and Weebill 3S are under the Sling Grip.  This setup allows for capturing images/video from a perspective starting at or near the ground/floor.  The Weebill 3S and camera are actually more easily supported by just one hand lightly on the Sling Grip.

This Sling setup resulted in very little camera movement and a perspective that would have been difficult to duplicate without the Weebill 3S unless you were lying down on the floor holding the camera.

The Weebill 3S comes programmed with several cinematic features to enable creative shots.  It can be easily set to PF or pan follow, POV point of view, F follow, L gimbals locked, and V vortex mode.  Each mode locks or unlocks individually one, two or all three axis. You can also remotely control its movement via the ZYPlay app. Here is a brief example of Vortex mode:

A fun effect that would be very difficult to duplicate without the Weebill 3S!

PRELIMINARY CONCLUSIONS

Some thoughts/suggestions:

  • ZY Play app requires your scrolling through and agreeing to a User Agreement that ran on for about a dozen screens on Android and second agreement of about ten more screens.  This one appears to be written by a legal team that never had to read it on a phone screen. Why not have a simplified agreement?

Here is just one of the extensive sets of screens.

  • Earlier production units included a magnetic key that was attached to the underside of the camera mounting bracket and could be used for tightening the attachment screws.  That is no longer provided.  However, an Allen wrench is provided to serve the same purpose.  Either go back to the magnetic key or have an attachment place on the Weebill 3S body for the wrench so it is at the ready in the field.
  • A more significant change at this stage of production occurred with the Camera Backing Base.  This used to be a Quick Release Base.  Now the Camera Backing Base attaches to the camera body with one ¼” screw and the use of the M4 wrench.  In turn, the Camera Backing Base attaches to the larger Quick Release Base using two ¼” screws and the M4 wrench.  What this means is that you can’t just release the Camera Backing Base as with previous versions but must either unscrew the base from the Quick Release Base or release and slide out the Quick Release Base to remove the camera.  When you go to replace the camera, this ends up resulting in it being in a slightly different balance point and requires the rebalancing of the Weebill 3S before proceeding.  Fortunately, I found that it normally only required the rebalancing of one of the axes.
  • At least for use with the Nikon Z7, you have to remove the camera still attached to the quick release plate to change the battery and/or the memory card.  Consider a raised camera base plate that will allow changing the battery without having to remove the camera.
  • Suggest getting a spare M4 wrench if you don’t have one handy.

Positives:

  • The Weebill 3S appears to be very well constructed and feels solid.  I had no concerns about my camera suddenly dropping off or swinging wildly out of control.
  • The Weebill 3S has a built-in LED light that you can adjust in terms of intensity from 1000 lux down, and color temperature ranging from 2600k to 5500k.  It is a very handy fill light when needed.
  • It is ergonomically designed to allow easy access to the menu options (visible on its building screen), change operating modes, turning on and off the built-in LED light, starting and stopping your camera’s recording, etc.  The front rotary switch also can be user programmed.
  • Tripod extension is very useful as both an extension of the grip and to set the Weebill 3S and attached camera down on a flat surface without it tipping over.  It can also be used to perform super smooth panorama shots either manually or through the ZY Play app automatically.
  • The quick release allows for easy change from landscape to portrait orientation with minimal or no rebalancing needed.

In Summary

I think that ZHIYUN has done an admirable job of setting this Weebill 3S three axes gimbal apart from its competition.  It is very well made, compact and reasonably lightweight.  The Weebill 3S comes loaded with usable features that will enhance your videos along with reducing shake caused by how you hold your camera and move.  Just be sure that your intended camera and lens are on the ZHIYUN compatibility chart.  Based on how sensitive I found the Weebill 3S to the positioning of my Nikon and lens, I think even though it is on the compatibility chart it was near the top limit of the Weebill’s motors.

I hope you found this useful. Please let me know if you have any questions!

Cheers

1 To obtain the 10% discount use the code DaumWB3S.
And one of these purchase links:
ZHIYUN official store: https://geni.us/wb3s_str_dp

ZHIYUN Amazon: https://geni.us/AMZ-WB3S-PR-Daum