McKinnon 25L Camera Pack: a crazy versatile backpack!

By Jeff Daum, Ph.D, PPA, Technology & Product Analyst

I have owned many backpacks designed to carry my camera equipment but have to say that none have proved to be as customizable and convenient as the McKinnon 25L Camera Pack.1

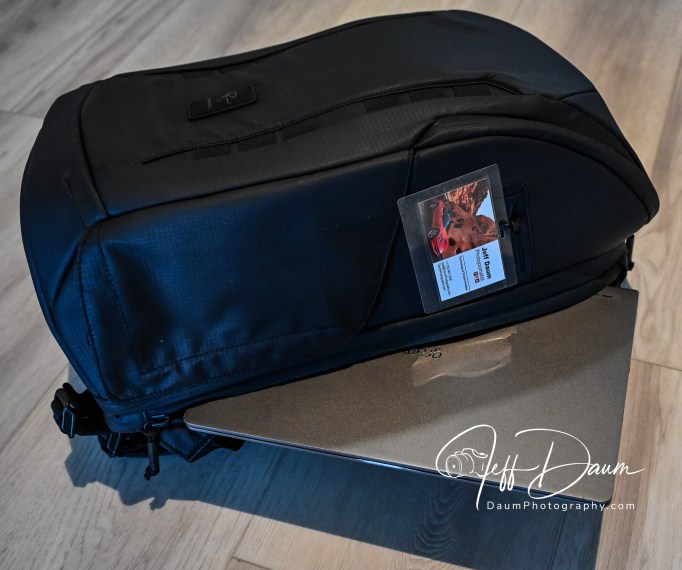
As soon as you take it out of its wrapper you are impressed with the quality of materials used and its fit-and-finish. The case is a combination of Polyester, Nylon and Polyurethane foam and has a water-resistant exterior.

Empty it weighs 3 pounds 3.4 ounces (1455 grams) and measures approximately 20 inches H x 12 inches W x 7.5 inches D (508 mm x 304.8 mm x 190.5 mm).  It has an easy-to-grip carry handle at the top of the back, along with heavily padded shoulder straps.  The straps are adjustable and include an adjustable cinch strap that can be used between the two shoulder straps.

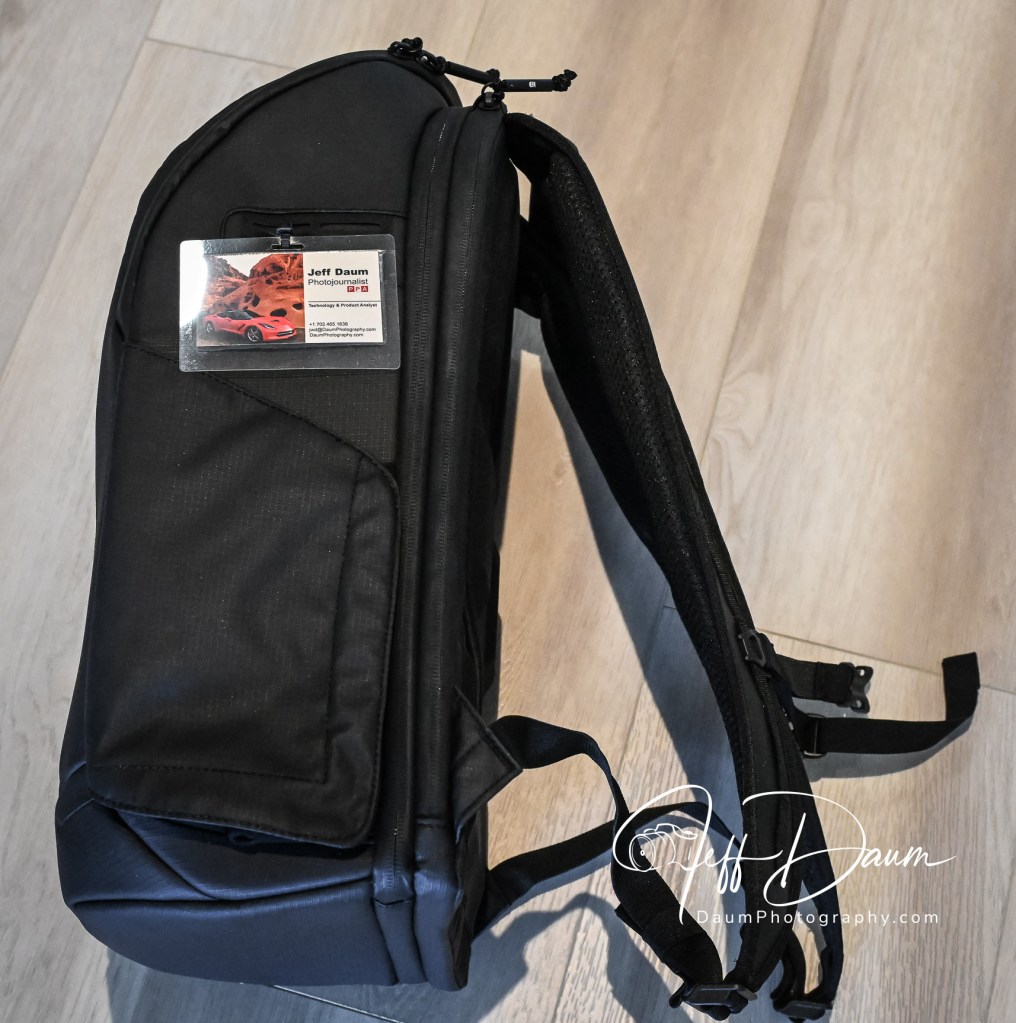
The back side of the McKinnon is heavily padded to ensure the backpack is comfortable on your back yet allows for air circulation.  The center padded section can also serve as a strap to slip over another suitcase handle when you are not wearing the backpack.  Each side of the bag has a nice sized drink or item holder pocket.  The pocket is held flat until you use it by a magnetic flap.  There are also attachment slots near the top of the sides for optional gear straps to secure a tripod or monopod on the side.

At the back of the backpack is a zippered laptop sleeve.  The zipper runs from the left side (looking from the back) of the top down the full height of the backpack. The laptop sleeve is the full width of the backpack. The next zippered compartment (from the back) fully unzips the entire back so that the backpack interior is completely accessible.  At that point you’ll see two mesh zippered compartments on the interior of the heavily padded back that can hold filters, paper, pens etc.

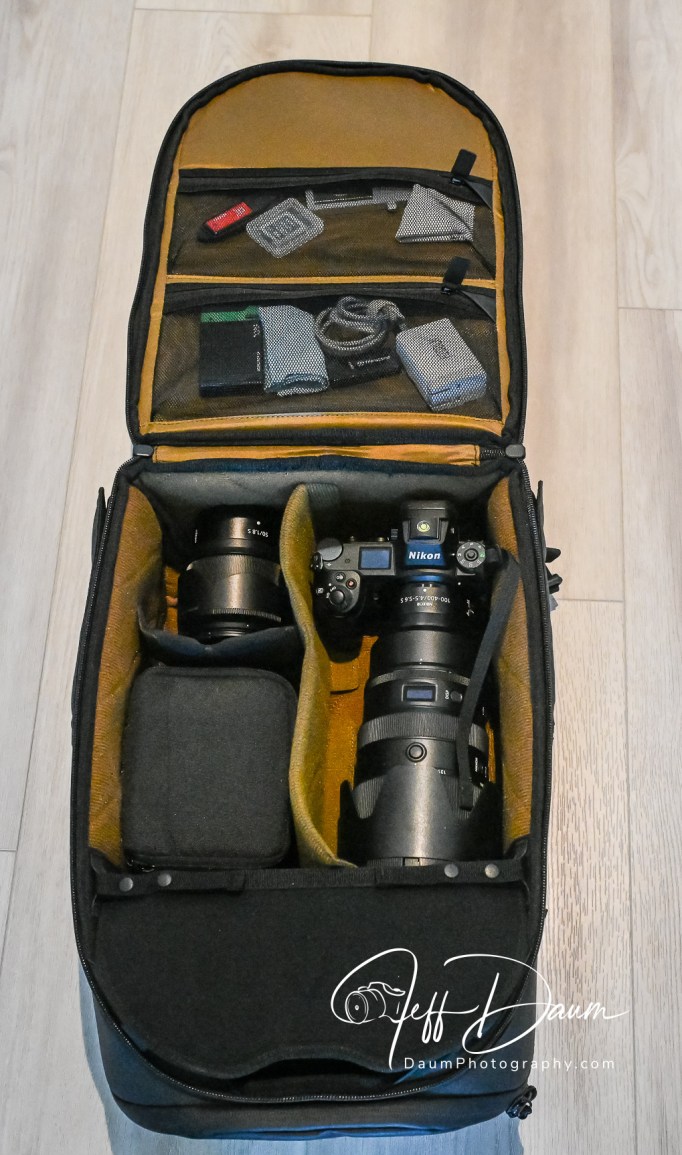
You will also see the Nomatic ladder system. That allows you to reconfigure the interior of the backpack.  The ladder easily divides the interior to have the top section, which is accessible from the outside top of the backpack separated off from the rest of the interior, to be either one third or two thirds of the usable storage space.  You can also fully remove the ladder system so that you have one large interior compartment.

If you leave the ladder system in you have access to the separated top section from the inside by a flap that is held magnetically closed.  That same section is accessible by a zippered flap on the front top of the backpack.  On either side of this top section are two small mesh pockets and there is also a larger zippered pocket in the top flap.

The front of the backpack is minimalist and has surprising rigidity.  The case can stand upright on its flat base.

Nomatic sells optional add-ons for the McKinnon 25L Camera Pack that enables a variety of internal configurations for your equipment.  These include a Divider Kit to create sections horizontally and vertically, Small and Large Cube inserts, Accessory Straps, Waist Straps, Memory Card Case and a Battery Case.  All except the straps, attach using Velcro and are easily positioned and removed as needed.  You can see these at their site https://www.nomatic.com/collections/all-camera/products/mckinnon-camera-backpack-25l .

Field Test

My initial impressions are that the McKinnon 25L Camera Pack is well thought out and highly practical for most photographers.  I set out with it fairly loaded at more than 20 pounds of equipment including two Nikon Z7s, one with a Nikkor 28-120 mm zoom attached and the other with a Nikkor 100-400 mm zoom attached, a Nikkor 50 mm lens, an LG laptop and miscellaneous chargers and cords.

It felt comfortable on my shoulders throughout the day.  The access to the cameras was easy.  I especially liked having my prime camera in the upper section accessible through the top flap.

Summary

If you are looking for a highly customizable camera backpack, the McKinnon 25L Camera Pack should be at the top of your list.  I give it five out of a maximum of five Mules!

  1. Product provided for review by Kyle Abarca, Nomatic Community Marketing Manager ↩︎

Thanks for visiting and reading. If you have a question or like to comment, please feel free to enter it below!

The Innovative Neakasa Magic 1 Vacuum Steamer

By Jeff Daum, Ph.D., PPA

The Neakasa Team provided me a sample of their new Neakasa Magic 1 Vacuum Steamer to review.  Typically, portable clothes steamers are not something that most people get excited about. 🙂 This Magic 1 is truly different.

A Closer Look at the Neakasa Magic 1 Vacuum Steamer

The Magic 1 is about the size of many portable steamers at approximately eight inches in length.  It weighs two pounds (915 g) dry.  The non detachable power cord is almost six feet long.

It comes with a “5 Tips to ensure a smooth first use” guide as well as parts/buttons explanation.  Water goes into a removable container located in the front of the handle and holds approximately 3 ounces (100 ml).  They recommend distilled or purified water.

The innovative difference that sets the Neakasa Magic 1 Vacuum Steamer apart is the built-in vacuum function.  You can turn this on or off instantly.  In essence, what this does is sucks the fabric to the face of the Magic 1 while it steams it.  This, in theory, should enhance the steam’s ability to smooth out wrinkles.

Preliminary Use

After filling the Magic 1 with water, it came up to operating temperature within about 30 seconds.  I decided to try it out on several different types of fabric, using the vacuum function turned on.

First was a cotton shirt.  Here are before and after images:

As can be seen, the Magic 1 did a commendable job in eliminating wrinkles.  It was very easy to do.  I followed their suggestion to let the garment hang naturally while moving the Magic 1 top to bottom.

Next I tried it out on silk.

It glided smoothly across the silk and quickly reduced the wrinkles.  Because the fabric was so light weight I found it worked better if I held the fabric flatter (in the horizontal plane) with one hand while moving the Magic 1 top to bottom.

A pair of jeans

This heavier fabric required more pressure to somewhat eliminate creases, though the vacuum had no problem keeping it on the steamer face.

Khakis was my last test.

The Magic 1 did a very good job eliminating wrinkles on these pants.

Preliminary Conclusions

The Neakasa Magic 1 Vacuum Steamer does set itself apart from typical handheld steamers. It is easy to use and a comfortable weight.  It quickly comes up to steaming temperature and the vacuum smoothly suctions all types of fabric to the steam face.

This vacuum function results in more effective and easier ‘de-wrinkling’ as compared to using a typical handheld steamer.  Another bonus according to the manufacturer, is that the vacuum function removes 99.9% of bacteria and dust mites.

My only suggestions for future iterations are very minor: to increase the water capacity and increase the power cord to eight or ten feet.

Thanks for visiting and reading. If you have a question or comment, please feel free to enter it below!

Nearby Beauty

A positive ramification of Covid restrictions, is the opportunity to take time and explore one’s local flora and fauna.  We set out to hike a trail that is part of the Hoover Dam railroad line, built in 1931 to provide a means of getting concrete and supplies needed for construction of the dam.

The trail follows on the path of the original rail line, but the rails are no longer there. It provides gorgeous vistas looking down on Lake Mead and of the rock formations as you pass through five of the original rail tunnels through the rock.

This is one of my favorite images, as the colors reminded me of Monet’s Water Lilies painting.

Here is a short slideshow of the hike if you would like to see more: https://youtu.be/-EIc-_Y9cZE

A brief visit with a Silverback and his family

by Jeff Daum, Photojournalist, PPA

For many, the concept of a Gorilla conjures up King Kong.  While they can be quite intimidating based on their typical size- 200 pounds for the females, and 400 pounds for the males, this short video shares their more ‘domestic’ side.

It was shot in the Bwindi Impenetrable Forest in Uganda.  Somewhat aptly named, because to catch a glimpse of the Mountain Gorilla, you need a permit, a guide and the willingness to slog up the mountain which is at times akin to a rainforest.   There are no paths.  The Impenetrable Forest floor is typically slippery, often thorn laden, with lots of roots to trip you up. Everyone falls at least a few times- the trick is to not get hurt when you do.  Your guide leads you up to where the Gorilla family was last seen.  Along the way, lower branches and nettles are cut away with a machete.  The trek can be anywhere from a couple to four hours up the mountain before you hear, then come across the Gorillas.

In this video, you will initially see the adult male Mountain Gorilla, called a Silverback because of the silver/white hair down part of his back, relaxing in the grass near his family.  Next is the mother cuddling one of the young gorillas.  A sibling is seen foraging nearby.  Mom then goes off for a snack.

Two of the young brothers (?) take this as an opportunity to get into a brief scrap and then appear to be conspiring.  The Silverback then rejoins the family, where the mother is laying down with the young gorillas playing around and on her.

Finally, all pack off with one of the young gorillas hitching a ride on the mother’s back, while everyone follows the Silverback off.

Hope you enjoy the excursion.

For more images of Mountain Gorillas, please visit https://www.daumphotography.com/Nature-Images/Gorillas

A Visual Taste of Italy: Lombardy & Tuscany Regions

Perspectives of a globe trotting photojournalist part 2

As with part 1, Highlights of St Petersburg, https://insight.daumphotography.com/2016/11/17/highlights-of-st-petersburg-russia/ this is another response to the challenge of providing a mini-tour of one of my trips.

This is an al dente tour (that is, hopefully not too short nor too long to adequately provide a ‘just-right’ taste) of the Italian regions of Tuscany (central Italy) and Lombardy (northern Italy).  It begins at the Ligurian Sea west of Pisa, continues up to the magnificent mansion on Isola Bella, north of Milan.  Then onto Milan and the Duomo. Next some countryside and wine tasting. Followed by Pisa.  Back to the coast for Cinque Terre, some more wine tasting and the countryside around Peccioli.

I hope you enjoy!  Looking forward to your comments.  Ciao!