By Jeff Daum, Ph.D, PPA, Technology & Product Analyst
I have owned many backpacks designed to carry my camera equipment but have to say that none have proved to be as customizable and convenient as the McKinnon 25L Camera Pack.1
As soon as you take it out of its wrapper you are impressed with the quality of materials used and its fit-and-finish. The case is a combination of Polyester, Nylon and Polyurethane foam and has a water-resistant exterior.
Empty it weighs 3 pounds 3.4 ounces (1455 grams) and measures approximately 20 inches H x 12 inches W x 7.5 inches D (508 mm x 304.8 mm x 190.5 mm). It has an easy-to-grip carry handle at the top of the back, along with heavily padded shoulder straps. The straps are adjustable and include an adjustable cinch strap that can be used between the two shoulder straps.
The back side of the McKinnon is heavily padded to ensure the backpack is comfortable on your back yet allows for air circulation. The center padded section can also serve as a strap to slip over another suitcase handle when you are not wearing the backpack. Each side of the bag has a nice sized drink or item holder pocket. The pocket is held flat until you use it by a magnetic flap. There are also attachment slots near the top of the sides for optional gear straps to secure a tripod or monopod on the side.
At the back of the backpack is a zippered laptop sleeve. The zipper runs from the left side (looking from the back) of the top down the full height of the backpack. The laptop sleeve is the full width of the backpack. The next zippered compartment (from the back) fully unzips the entire back so that the backpack interior is completely accessible. At that point you’ll see two mesh zippered compartments on the interior of the heavily padded back that can hold filters, paper, pens etc.
You will also see the Nomatic ladder system. That allows you to reconfigure the interior of the backpack. The ladder easily divides the interior to have the top section, which is accessible from the outside top of the backpack separated off from the rest of the interior, to be either one third or two thirds of the usable storage space. You can also fully remove the ladder system so that you have one large interior compartment.
If you leave the ladder system in you have access to the separated top section from the inside by a flap that is held magnetically closed. That same section is accessible by a zippered flap on the front top of the backpack. On either side of this top section are two small mesh pockets and there is also a larger zippered pocket in the top flap.
The front of the backpack is minimalist and has surprising rigidity. The case can stand upright on its flat base.
Nomatic sells optional add-ons for the McKinnon 25L Camera Pack that enables a variety of internal configurations for your equipment. These include a Divider Kit to create sections horizontally and vertically, Small and Large Cube inserts, Accessory Straps, Waist Straps, Memory Card Case and a Battery Case. All except the straps, attach using Velcro and are easily positioned and removed as needed. You can see these at their site https://www.nomatic.com/collections/all-camera/products/mckinnon-camera-backpack-25l .
The McKinnon 25L Camera Pack lists for US$299.99, comes with free shipping (in the contiguous US) and a lifetime warranty.
Field Test
My initial impressions are that the McKinnon 25L Camera Pack is well thought out and highly practical for most photographers. I set out with it fairly loaded at more than 20 pounds of equipment including two Nikon Z7s, one with a Nikkor 28-120 mm zoom attached and the other with a Nikkor 100-400 mm zoom attached, a Nikkor 50 mm lens, an LG laptop and miscellaneous chargers and cords.
It felt comfortable on my shoulders throughout the day. The access to the cameras was easy. I especially liked having my prime camera in the upper section accessible through the top flap.
Summary
If you are looking for a highly customizable camera backpack, the McKinnon 25L Camera Pack should be at the top of your list. I give it five out of a maximum of five Mules!
Product provided for review by Kyle Abarca, Nomatic Community Marketing Manager↩︎
Thanks for visiting and reading. If you have a question or like to comment, please feel free to enter it below!
Have you ever wondered how steak houses can get a great crust on your steak yet still serves it cooked rare or medium rare right up to the crust? Odds are they are using an infrared burner instead of an open flame grill.
Many of us are used to grilling over flames (gas, charcoal, or wood) where there is often the challenge of cooking to the proper degree of doneness without charring or burning the food from flare ups. Even when we succeed typically the food is cooked from the outside in meaning the food closer to the outside is overcooked compared to the center. A gas infrared grill is different because the flames are never near the food, rather they are in a burner box that heats a unit that converts it to infrared energy. The result is a much hotter, more uniform heat source that doesn’t tend to dry out the food as it cooks.
After years of mastering cooking on a regular gas grill,
I decided to switch to a 100% infrared system. I was intrigued by promises of a much higher cooking temperature of 900 degrees Fahrenheit for a perfect crust on steaks, shorter cooking times and especially no flare-ups. After researching options available, I decided to purchase a TEC 44” Sterling Patio FR Built-in Grill.
TEC Details
TEC has an excellent reputation for very high build quality, using only the best materials and being made in USA. I ordered it with the optional ‘Gator Rack’ after talking with their helpful support staff. [The Gator Rack is two of their Infrared Smoker/Roaster plus Chip Corral units, since the TEC 44” is basically a double wide grill.] My initial concern was how to cook foods that I previously did on a rotisserie since the TEC Sterling Patio unit does not have any means to add a rotisserie. They assured me that the Gator Rack would result in the same outcome as if it was cooked on a rotisserie.
Note: infrared cooking requires a learning curve. While I was able to produce good results within a couple of successive attempts with a variety of foods including steaks, burgers, chicken, etc., it really took a couple of months to perfect the technique. The learning process included trusting the new technology and shorter cooking times, relying on an accurate thermometer for measuring internal temperature and keeping everything including tools, hands, and arms away from any part of the cooking surface that was extremely hot in spite of having no visible flames.
Basically, the key differences between open flame and infrared grills are:
Infrared can be nearly twice as hot- on high the TEC easily hits 900 F degrees
Food remains much moister because of no open flame
Everything cooks faster
You need to be extra careful when turning food since you don’t see any flames but it is super-hot. I use Mountain Grillers® grill gloves that fully protect my hands and forearms.
It preheats much faster combined with shorter cooking times resulting in using less gas
The TEC looks different from a regular grill. When you open the top you will see grill grates that are sitting on top of special radiant glass panels that actually convert the flames from the flame box below into infrared energy. The other thing you will probably notice is how heavy all of the components are.
The TEC Sterling Patio FR Grill has a handcrafted, contoured, double-walled Lid. Includes two high performance infrared grilling systems which carries a 10 year warranty.
Choice of LP or natural Gas
2 fuel-efficient stainless steel burner that reaches higher temperatures (900° F) while using less fuel (60,000 BTUs/hr 30,000 per burner) than other grills
592 sq. inches of evenly heated grilling surface capable of cooking 32 hamburgers in 8-10 minutes
Warming rack (sold separately) provides an additional 185 sq. inches of area for light cooking, baking, or warming food
Rapid preheat—0°-900° F in 10 minutes (on high) with hood closed
Flare-resistant design prevents charring of food
Cooking surface can also be used as a conventional stove
Electronic ignition
100% 304 stainless steel construction including cooking grates
Handcrafted in America
List price $6,399.00 but often offered on sale or with some optional accessories, with free shipping.
Here is my TEC 44” Sterling Patio FR:
Cooking experiences
Using the TEC is straight forward. You open the top and press the igniter button while turning the gas knob to high. You will hear the gas ignite in the flame box and you can look through the viewer hole in front by the knob, to see the flames. The model I purchased has two separate burners that can be used together or independently. Once you light the burner(s) you close the top to allow for the grill to preheat for ten minutes. When preheated on high the temperature reaches 900 degrees F. TEC provides a guide for representative foods and whether you preheat on high or medium, and to cook the food with the hood open or closed. A unique feature of the TEC is that you can cook foods at a temperature as low as 200 F with the hood open or 300 F with the hood closed.
Once preheated, you can also independently control each side of this grill to cook at different temperatures. TEC has additional recipes and tips for cooking a large variety of foods on its website along with instructional videos.
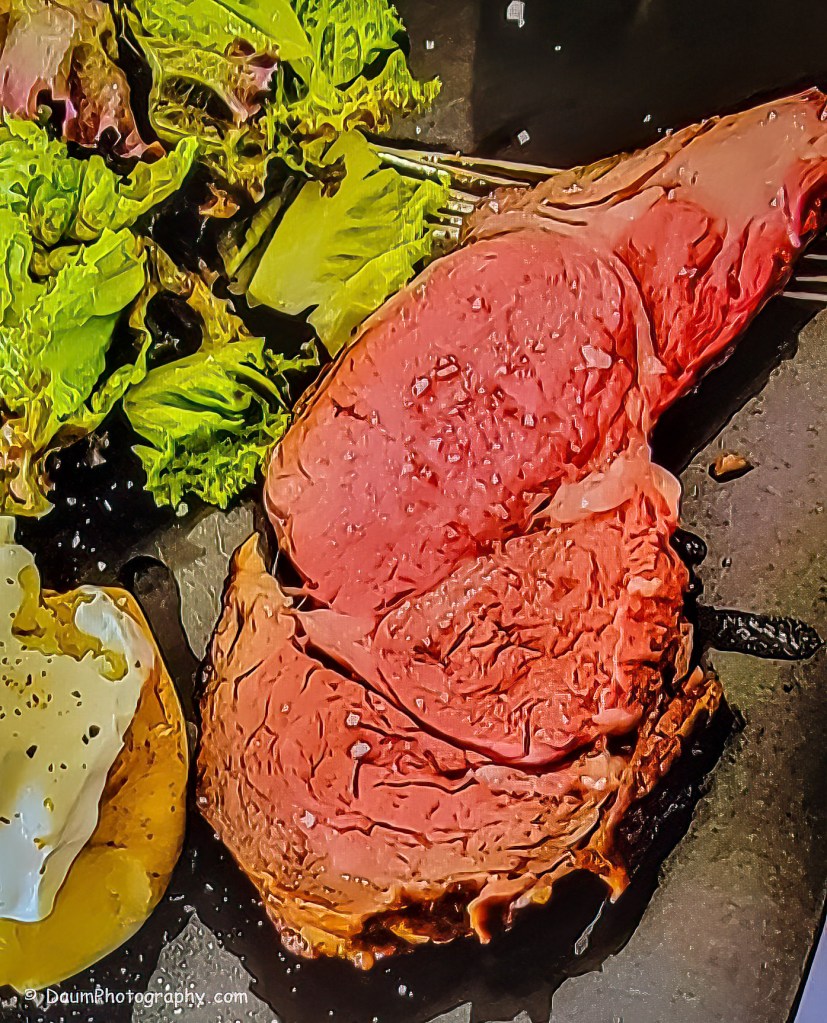
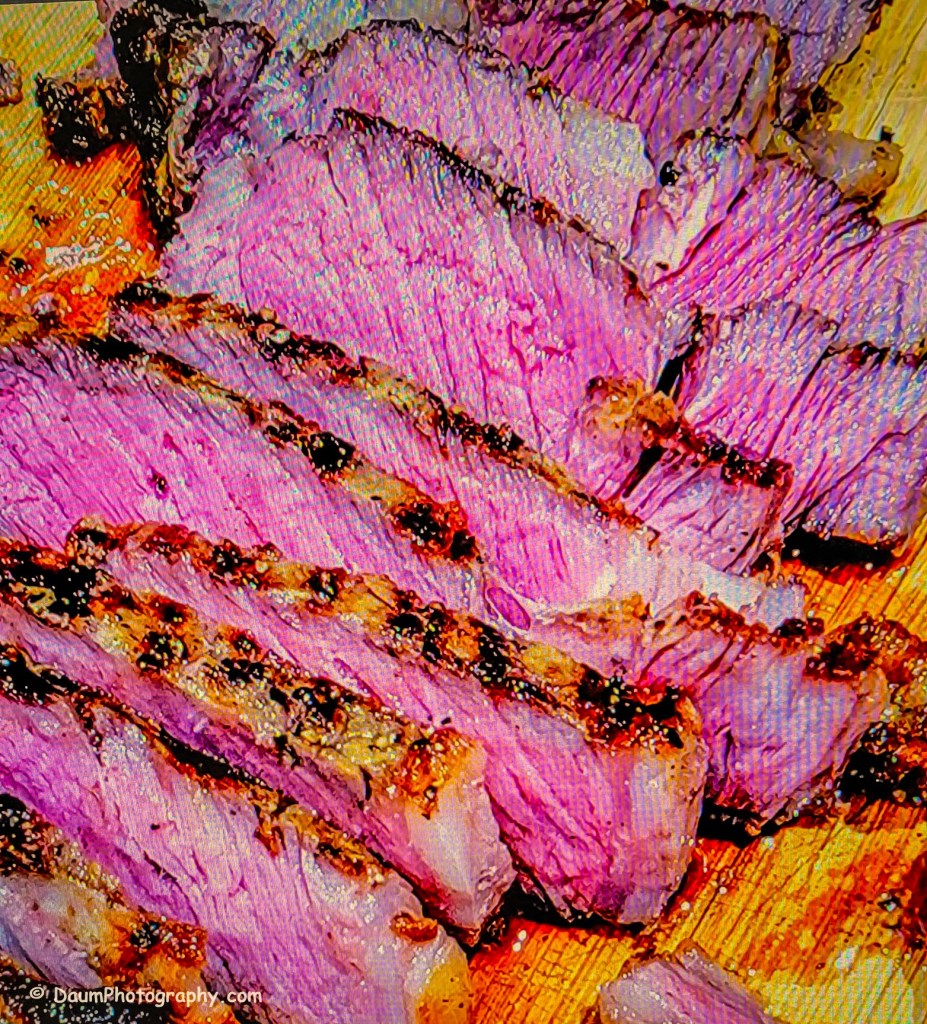
Here is what I have found after using my TEC for about a year and one half and cooking a cross section of foods including steaks, lamb and pork chops, hamburgers, sausages, fish, Cornish hens, whole chicken and chicken breasts, leg of lamb, pizza, baby back ribs and turkeys as well as vegetables: All foods end up being consistently moister/juicier cooking with infrared vs. open flame gas or charcoal grills. Meats get cooked to the perfect degree of doneness (using a thermometer to accurately measure the internal temperature) from edge to edge without the area closest to the outside being overcooked. Cooking times can be vastly different (shorter) than you are used to because of the way infrared heat penetrates. A good remote thermometer is critical, especially as you are learning how to cook using 100 percent infrared. Note: thermometers typically will not accurately read the temperature surrounding the food you are cooking, but all you are really concerned with is the internal temperature. I have been using a MEATER Plus® wireless thermometer with great success.
Fat that drips down onto the glass panels while cooking vaporizes and adds to the flavor. Adding wood chips can be done directly on the grates or in the wood chip holder (corral) that comes with the Gator Rack.
One of the biggest surprises with the TEC was how foods that I previously cooked on grill using a motorized rotisserie, turned out on the TEC. As mentioned earlier, TEC Sterling Patio FR grills do not have the ability to add a rotisserie. Instead, they use the Gator Rack option. This unit consists of a very heavy stainless steel drip tray that goes on top of the grates, and then has a sloped rack that hooks over the back lip of the grill and sits in the drip tray. It also has a wood chip holder tray that sits in front of the rack that you can use if you want to smoke what you are cooking. Turkeys, legs of lamb and whole chickens came out beautifully cooked on all sides as if they had been on a rotisserie without you having to turn them.
Pizza was surprisingly easy to cook on the TEC. I used their recipe and cooking guidelines with my Gator Rack to prepare beautiful pizzas from both scratch and store bought. The crust turned out to be crisp and the toppings cooked perfectly. They do sell a pizza rack option, but the Gator Rack works the same way.
Cleaning up is easy- you close the top and turn the controls to high and let it run for ten minutes. Any food dripping or sauce (that drop past the grates onto the special radiant glass) ends up being vaporized. Then once the grill has cooled, you just wipe up the dust and debris off the glass with a paper towel. Hint: I found after I finished cooking and before turning the burners to high, using a wire brush like the Kona 360® dipped in water and then scrubbing the grates, helped keep the cooking grates themselves very clean.
Conclusion
I am extremely pleased with my decision to switch from a classic gas grill to a 100 % infrared grill. The quality of the TEC USA built is outstanding. Once you get through the learning curve and you trust the technology, you will not want to go back to cooking on non-full infrared grills. Food is so juicy/moist and beautifully cooked. The total lack of flare ups is a big plus. Cleaning up is easy and quick except for the drip trays of the Gator Rack. Those require scrapping out and then scrubbing like a regular oven tray. I have purchased a large plastic box (IRIS USA 50 quart 28”x15”x6” storage bin) that I use to soak the drip tray in hot water and Dawn before cleaning and it makes it much easier.
You will end up modifying (shortening) your cooking times for most of your recipes if they were based on open flame grilling. In the beginning I simply recorded the time and heat setting and how the food turned out, so that I could adjust cooking times until the results were consistently what I wanted.
I found very little I would modify on the TEC design. You can see in some of my images, I did add a hood thermometer (GasSaf® 3″ BBQ Temperature Gauge Thermometer). I use this just for a general idea of the interior temperature.
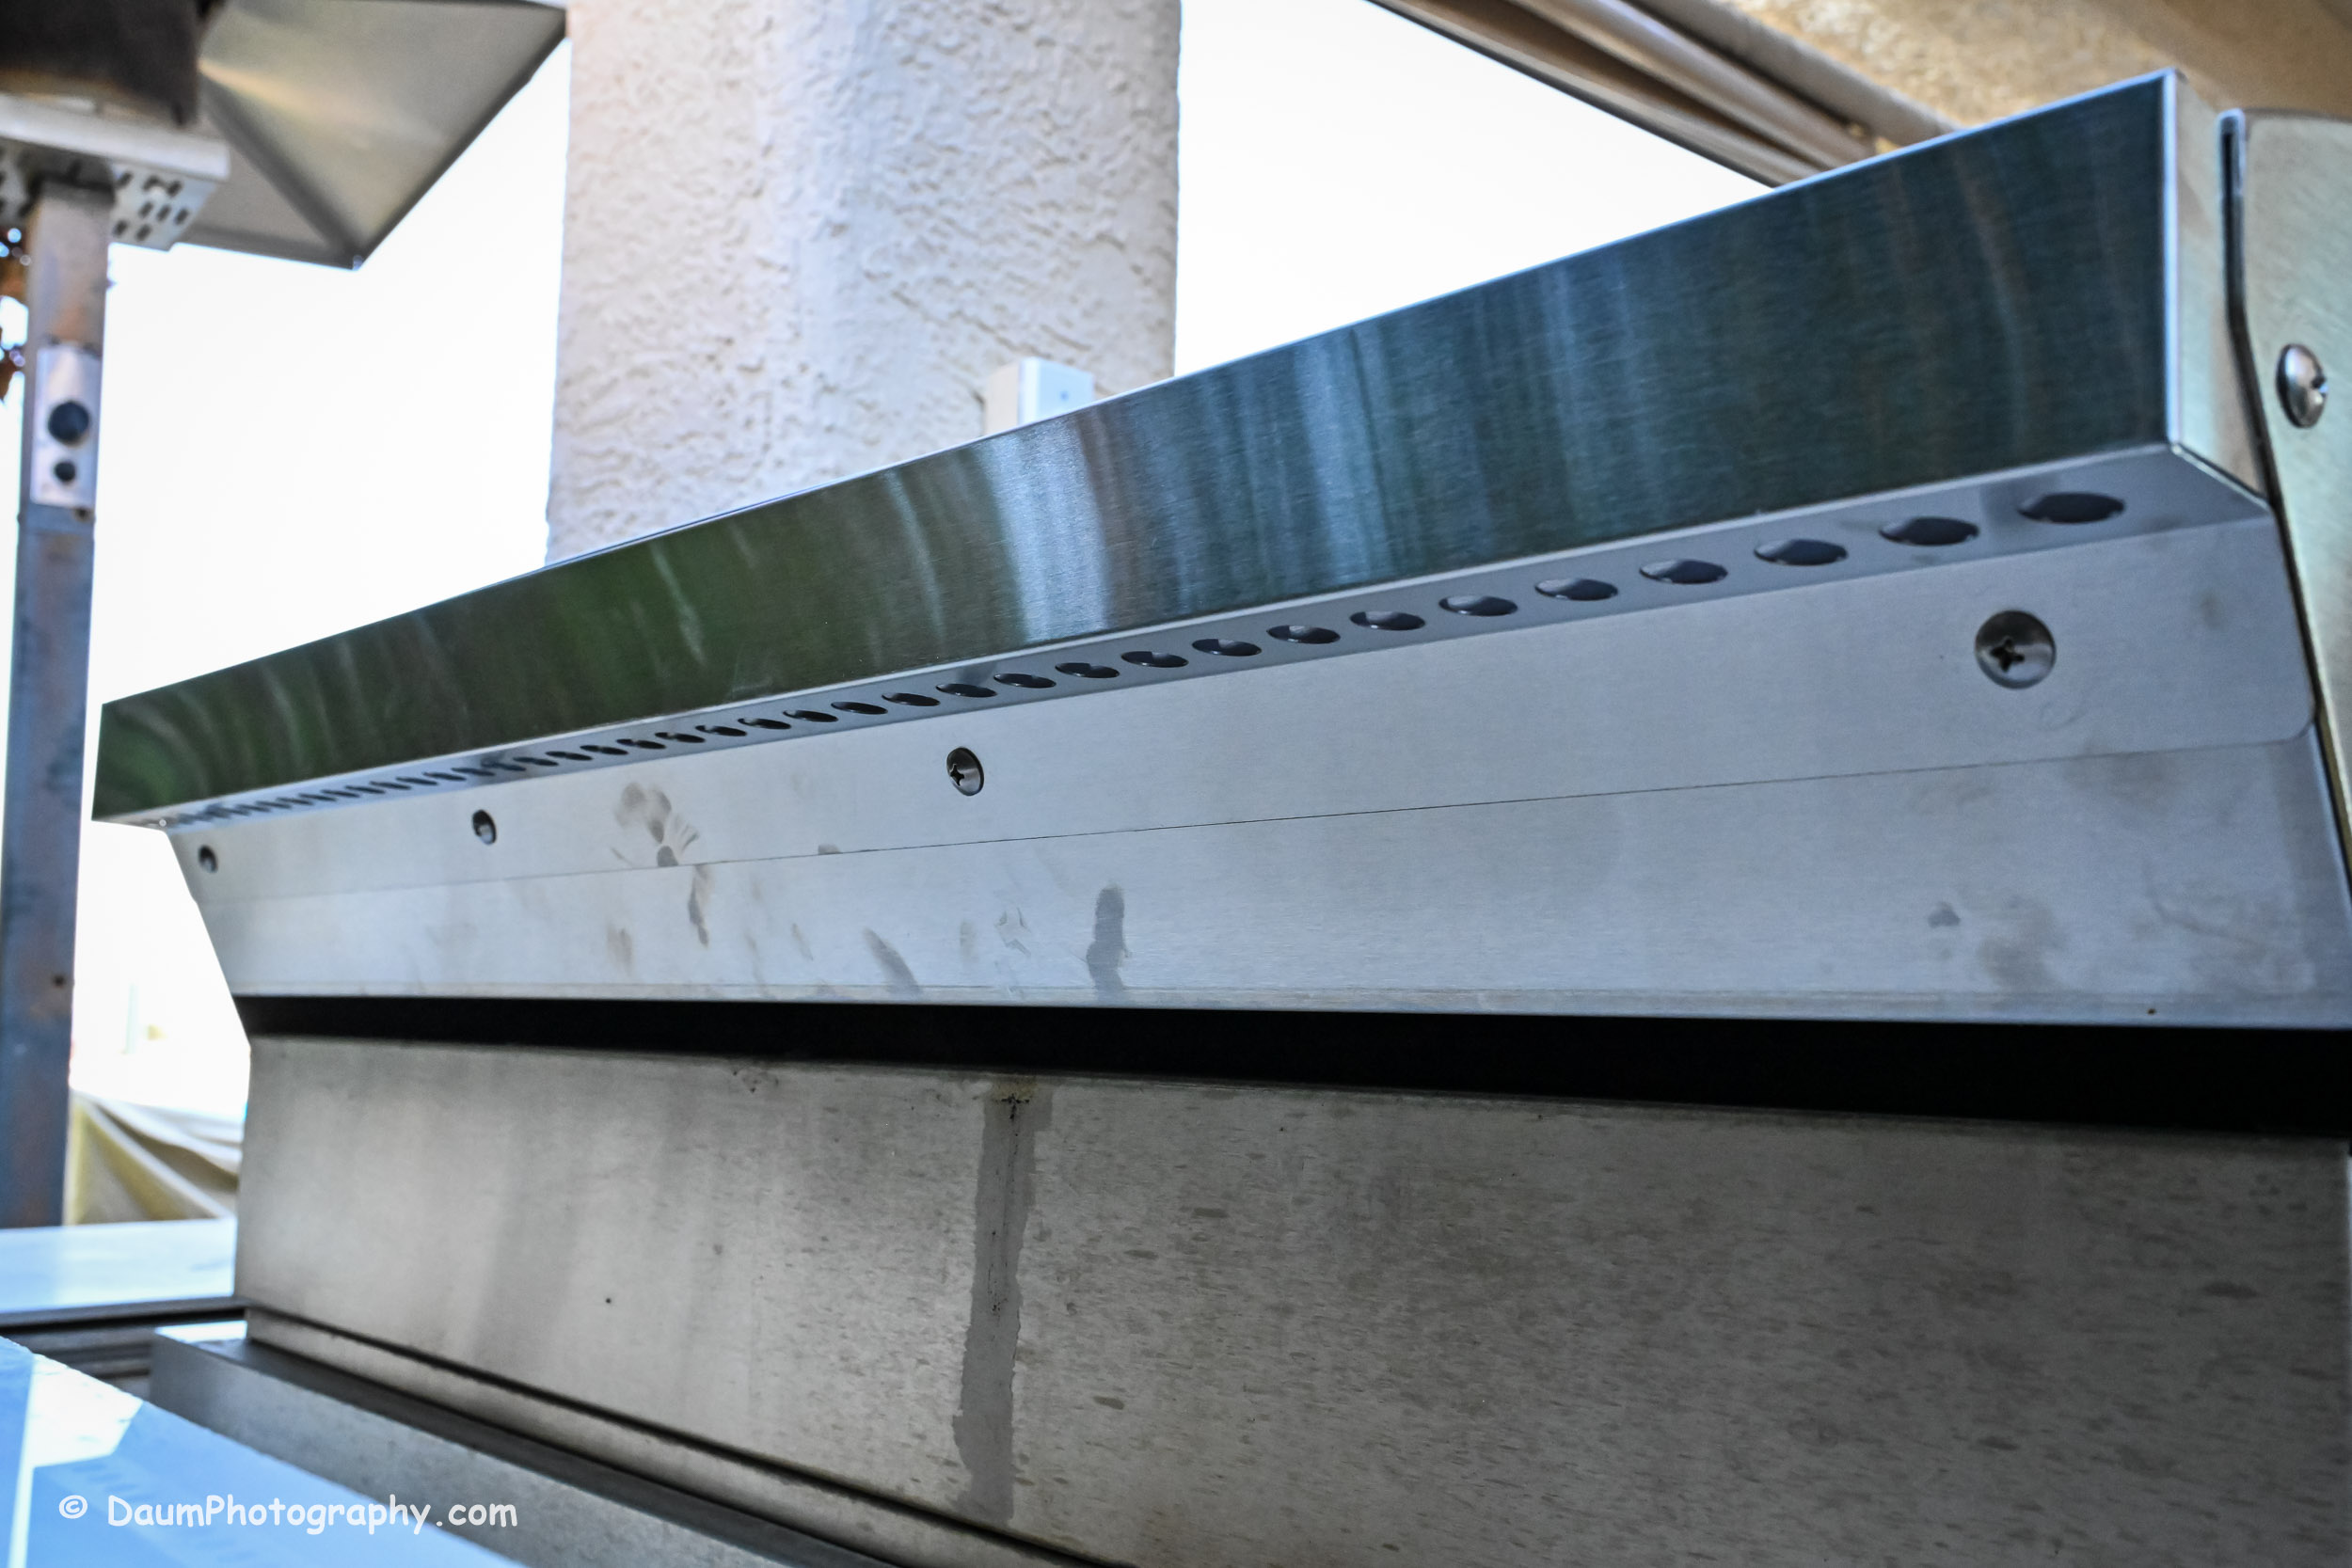
We live in an area with frequent high winds and found that while this had no impact on cooking items like steaks, etc., it sometimes resulted in one side of the two burners blowing out when doing long low temperature cooking, such as baby back ribs. There is no flame sensor on the gas feed to the burners so if the flame goes out, the gas will continue to flow. I contacted TEC Customer Service about this to see if they had a sensor with auto-cutoff that could be retrofitted, but they did not. However, they do sell a Windbreak baffle that replaces the upper back plate on the grill top. They provided this to me. Affixing the Windbreak baffle was easy since it screws into the same holes the back plate uses. Here is what it looks like (upper left image is the original grill back without Windbreak baffle; remaining images show the Windbreak baffle attached):
Since attaching the Windbreak I have not experienced any flameouts caused by the wind in my low temperature cooking.
My rating:
I enthusiastically rate this TEC 44” Sterling Patio FR Built-in Grill five hot flames out of five.
I hope you found this useful. Please let me know if you have any questions!
If you are like me, as you accumulated personal electronic devices like your phone, ear buds, laptop, smart watch, etc., you ended up with a gaggle of chargers.
In many cases the chargers were designed to work with a specific device and therefore have a different end (C, micro usb, Lightning) and item specific voltage output. When you took a trip, you had to remember to bring each one.
This brings us to the FLEDGING Spruce® all-in-one Charger, supplied to me by their Head of Marketing for review.[1] The Spruce is a compact charger unit capable of charging up to five devices simultaneously, quickly, and all at the proper voltage.
By my measurements the unit is 4.33”x3.15”x1.89” (110.2mm x 80.1mm x 48.1mm) and weighs 1lb 0.8 oz. (475g). It comes standard with the country specific power cord (type A, C or G) you select when ordering, a C to C cable, soft carry case and instructions.
Designed in the USA, the unit is manufactured in China. It lists for USD 124.99 on their website.[2]
The fit, finish and quality of build is excellent.
The compact unit has a phone or tablet wireless charging pad on top that can be used flat or raised up to 70 degrees, 3 USB C and 1 USB A ports on the side.
Wireless charging pad
On the back of the unit is a schematic showing the relative outputs in wattage for each of the ports.
–
The Spruce is powered by a GaN (Gallium Nitride) semi-conductor with software that provides the appropriate wattage for each plugged in device.
Included with my Spruce was FLEDGING new magnetic power cable. This very clever cable has a male USB A connector on one end and a magnetic port on the other that accepts interchangeable connectors of either C, Lightning or micro USB. Additionally, the cord has magnetic rings on it so that it coils and holds to itself when not stretched out.
I was informed that this FLEDGING new magnetic power cable will available later this year as an optional addon to the Spruce.
Field Test:
You will find the instruction manual is not necessary, since all you need to do is plug in the power cord and your respective cords to your electronic devices and/or place your phone or tablet on the charging pad and you are good to go.
I used it to simultaneously charge an iPhone, iPad, 2 sets of ear buds, and laptop. The Spruce remained cool and charged each of the 5 electronic items to 100% as quickly as their individual rapid or quick chargers normally do. Simple, highly efficient and eliminates all the respective chargers as well as having to find either 5 available outlets or the use of a multi-outlet power strip.
The compactness of the unit can’t be beat versus having five individual chargers. Now you might be wondering about the fact it weighs in a about a pound or 475 grams. Sure, that is more than a single phone charger weighs, but when you put all the respective five chargers (phone, laptop, tablet, ear bud, etc.) you would need together, you will find they will be close to a pound or 475 grams or even more, in total weight.
Conclusion The FLEDGING Spruce is a welcome solution to simultaneously charging multiple electronic units from one source. Very well designed and constructed with easy functionality.
Summary Rating: Half Full Bucket- not ready for prime time.UPDATED: Based on more than five years of actual use: Can not recommend purchasing the Phyn Plus Smart Water Assistant due to a total lack of customer support and a software system that even after many updates makes the same errors.
This review is based on a one-year use of the Phyn Plus Smart water assistant + shutoff system. According to the manufacture “Phyn Plus uses patented, high-definition pressure wave analysis to alert you the second a leak is detected, mitigate costly damage through automatic water shutoff and teach you about your water use.”[1]
A little over a year ago, our water authority had put out a brochure describing several whole house water leak detectors, and the logic for installing one. Based on my research on the related technology used by the proffered leak detection units, I chose the Phyn.
Specifically, “Phyn Plus is the only connected water monitor to offer an ultrasonic flow sensor, exclusively built by Badger Meter, with no moving parts, ensuring accuracy and durability over the long haul. Other water monitors use turbine flow sensors with rotating discs that are less accurate, and often degrade over time or can get stuck by debris or buildup.[2]
My primary interest in the unit was two-fold: avoid an expensive water leak and resultant property damage, and monitor water usage and issues while not home.
Installation and start-up:
I decided to go with a Phyn certified installer because I was going to need to have some re-piping done to take full advantage of the Phyn unit, and, using their certified installer extended the warranty by one year.
When my home was built in 2005, the feed from the city water pipe where it entered the house, was split with one part going to a pressure reduction valve (PRV) and then on to the house, and the other side of the split bypassing the PRV and going to the inground watering system. Phyn requires that any water it monitors must first go through the PRV, so I had to have the inground rerouted to follow the PRV.
Here you can see the original piping, where the house water (“A”) goes through the PRV and the inground water (“B”) bypasses it.
Here is the revised piping, where all the water from the city pipe goes first through the PRV, flows (“1”) to a tee, feeding the house (“2”) and the inground (“3”). The original pipe to the inground from the city feed was cut and capped (circle “4”).
At the time of the re-piping I had the plumber replace the original PRV with a beefier industrial version.
Once the installation was completed, the Phyn unit was plugged in and linked to the WiFi. Using the free app from Phyn, it walks you through the set up which includes describing type and number of appliances using water in you home. Next it monitors water use, but does not automatically shut off the water until after the learning/training period has elapsed.
The training was pretty straight forward. The system virtually, instantly shows when water is being used, for example, turning on a sink faucet or flushing a toilet. After the learning period is complete, through the app, it will show you lots of useful information including current water pressure, water events by category (sink, shower, outside faucet, etc.) along with total water usage by day. When you open the app, it shows you the current water temperature, current pressure, and flow (if any) in gpm. If water is being used, it will show a flowing stream representation behind the information. From that screen you can run a plumbing check, see water use by date, by event, etc.
You can also use the app to turn off all the water, electronically through the Phyn unit.
Actual Day to Day Use:
The information can tell you pretty accurately how much water each of your appliances uses, for example, when you shower, flush a toilet, run the washing machine, etc.
For the first couple of months, the unit seemed to work pretty well, with a few hic-ups. Several times it shut the water off while one of us was showering, because it thought it was a leak. These were pretty much eliminated after continue (re)training or correcting the apps query or mis-categorization.
During this period, I also found Customer Service/Technical Support to be responsive, though not necessarily problem resolving. For example, there appears to be an issue I can only describe as a software problem, where the AI they use doesn’t seem to be able to learn atypical water use. Specifically, we have an auto-fill system on my pool that uses a float valve similar to a toilet valve, and when the water drops below a preset level, opens the valve to allow water replacement. During low or no wind days, this tends to be recognized by Phyn’s AI algorithm and doesn’t cause any issues. But on windy days, the pool water surface undulates causing the float to bob and erratically open and close the valve. Phyn’s AI algorithm almost never recognizes this and as a result, labels it a leak.
I contacted and explained this to Customer Service/Technical Support several times before they finally understood the issue. They told me the system would need more time to learn it. It is now a year, and it still hasn’t learned it.
Another problem that started recently, is the system has forgotten event characteristics it previously knew. For example, we have a whole house water conditioning system that does a reverse flush every fourteen days, in two steps, one hour apart. By design, this reverse flush occurs during the late-night early morning hours. Originally Phyn once trained on this, had no issues with it. However, during the past few months, it only tends to get one of the two steps properly recognized, and either turns off the water to the house during the second step or mis-labels it as an amazingly long shower, for example. No changes were done to the whole house water conditioning system which might explain Phyn’s lack of ability to remember what it previously knew.
Similar issues have been occurring with the inground watering system. It runs on a specified schedule for a fixed amount of time. Originally Phyn learned and recognized it. Over the past few months, it now frequently gets ‘confused’ and combines the inground event with other water usage events in the house. This results either in mis-categorization, warning messages from the app, or large amounts of water usage un-classified. Again, there have been no changes done to the inground system which might explain Phyn’s lack of ability to remember what it previously knew.
Each of these issues have been provided in detail to Customer Service/Technical Support along with supporting screen shots of the data. Unfortunately for the past several months, even though I have documentation showing the emails were received and opened at Phyn (both to specific individuals I sent them to, as well as Phyn’s CEO), no one at Phyn has had the courtesy to get back to me.
This is inexcusable. I would have expected them to want to take advantage of the specific data of these anomalies and improve their AI algorithm. Clearly there are other customers who might be interested in their leak detection system who also have pools, whole house water conditioner systems, and inground watering equipment.
In Summary
The concept is excellent. The quality of the Phyn Plus unit build appears top notch. The unfortunate short fall is that the unit has failed to learn unchanging water usage after a year in service, and that Customer Service/Technical Support is nonchalant and non-responsive about it. Because of this, it is extremely hard to have any confidence the unit will in fact detect a true leak and perform properly, if and when that occurs.
Note: If Phyn does get back to me and resolve these issues, I will update this review and rating appropriately. Until that point, caveat emptor for anyone considering a purchase of the Phyn Plus unit.
Update: July 2020 Unfortunately no one at Phyn has responded to my customer service requests (sent both on their web site and by email directly to them). The software has been updated a number of times, yet the same issues continue. There are definitely ‘learning’ issues that are not corrected even after repeated use of their app to change a mis-categorization to reflect the correct source of water use.
Further, I completed an honest product review (much like this write-up) of the Phyn Plus unit on their own web site, using their form, as a verified purchaser of the unit, and they acknowledged receiving the review, but did not publish the review. Clearly an attempt to mislead individuals who look at their published reviews.
Update:October 2020 Still no response from customer support, technical support or anyone at Phyn since providing back in May 2020 extensive documentation of issues. Up through the present, I have repeatedly contacted Phyn through their website support, sent in numerous examples (including screen shots from app data) of serious software issues, contacted through their app and over the phone. I have been told several times when I successfully connect with a ‘live’ representative, that my concerns were being escalated. No response, no improvement resulting from software revisions (actually, has gotten worse).
As a result of this article, I have received several contacts from other purchasers of the Phyn Plus unit, who also have experienced similar problems including the lack of any customer support.
It is unfortunate that Phyn management believe this is the way to treat customers, rather than to try and resolve the real field documented issues with their product, and ultimately improve it.
Capturing the essence of an animal in their natural habitat is a unique and time sensitive challenge. You typically don’t have control over the lighting, the conditions and certainly, rarely the animal itself. More than not the opportunity is a chance encounter.
Oh but the results can be so satisfying.
With a bit of luck (and imagination) you get to soar
Observe a Mother teaching her son the art of hunting
a Father and son playing
A rare black rhino foraging
An odd ‘couple’ out for a stroll
Mother and child (look under her) enjoying the day
When I started in professional photography my equipment consisted of Nikon Fs (F, F3, Photomic, etc.).
Here is a comparison of my first professional camera in the center, with my first digital with a Leica lens on the right, and my latest digital Nikon on the left.
Evolution (or Nikon on steroids).
I tend to add new equipment when I feel the technology offers a significant improvement. For example, the small Leica was my initial move into the world of digital. It was considerably smaller than my film cameras, and offered the ability to immediately confirm I captured what I wanted. It also allowed me to learn how to shoot in digital since, in my experience, it required somewhat different skills than film cameras. Framing and composition were still the same, but how digital captured light has subtle but important differences to my eye as compared to film. [ Much like digital audio equipment sounds different when compared to tube based equipment. ]
While I still occasionally shoot with negative professional film using my older Nikon equipment, nearly all of my images today are shot with my full frame Nikon digital cameras.
From my earliest days as a photographer, my approach was to capture what interested me just exactly as I saw it in my ‘mind’s eye,’ so to speak.
Initially all of my work was done on black and white professional negative film, that I developed in my lab. Developing of film was done by the ‘book’ without enhancing the image. Slowly I experimented with color negative film but my concern was that it was too easy to get an interesting picture simply because of the colors as compared to black and white. For example, this shot of spices from India is really only interesting to me because of the colors as compared to shooting it in black and white.
This approach still reflects my technique today, except I normally only shoot with an eye to the colors and how they interact with the composition.
Machu Picchu
And certainly, many images rely totally on color for dramatic impact:
Sunset in Egypt
Yangtze River China
I trust my ability to see and capture what I want without coming back and spending time using readily available software (today’s equivalent of chemicals in the lab and development times when I started) to modify the image. I don’t think there is anything wrong enhancing images using post shooting software, but believe it reflects more of a philosophical difference. I consider myself a ‘naturalist’ photographer verses an artist/photographer producing a final photograph with software.
When you look at photographs do you wonder if it is reflective of reality or enhanced? Does it matter to your enjoyment of the photograph? Look forward to hearing from you! Please feel free to comment below.