by Jeff Daum, Ph. D., PPA
Product & Technology Analyst
The is the second generation Beatbot pool cleaner. I was really impressed with the first generation and its capabilities. You can read that review by following this link https://insight.daumphotography.com/2024/05/14/beatbot-aquasense-pro-clean-your-pool-with-a-robot-every-bit-as-smart-as-r2-d2/
Unboxing and Technical Information
The Beatbot AquaSense 2 Pro Robotic Pool Cleaner arrives in a single large box, approximately 20 inches wide by 31 inches long by 14 inches high and weighing 41 pounds. [50.8 cm x 78.74 cm x 35.56 cm and 18.6 kg] It is very well packed and protected in the carton.


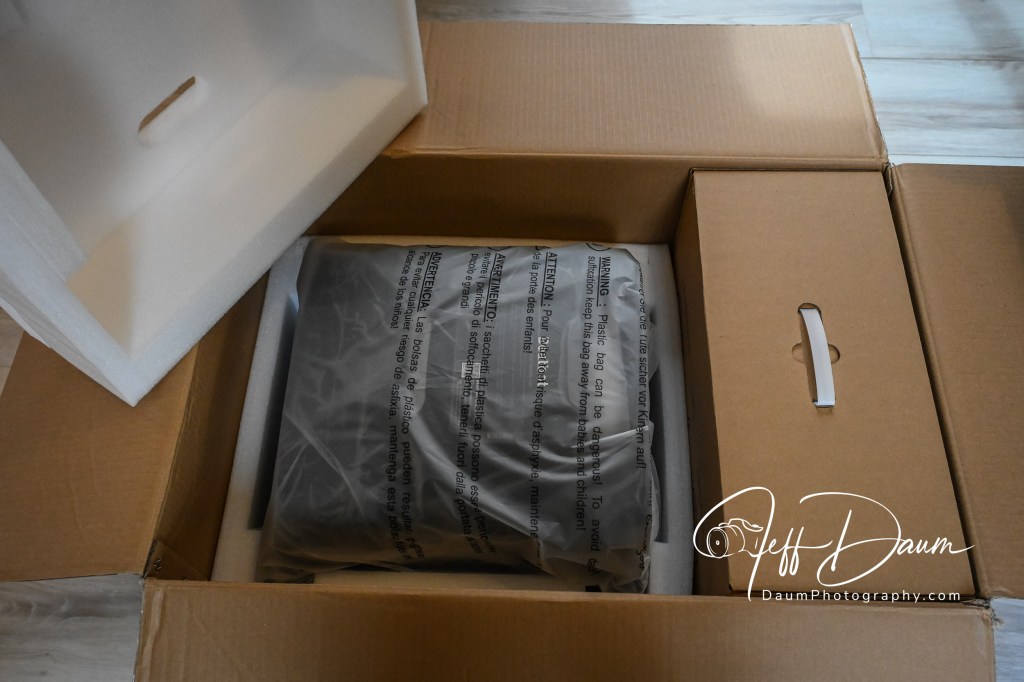

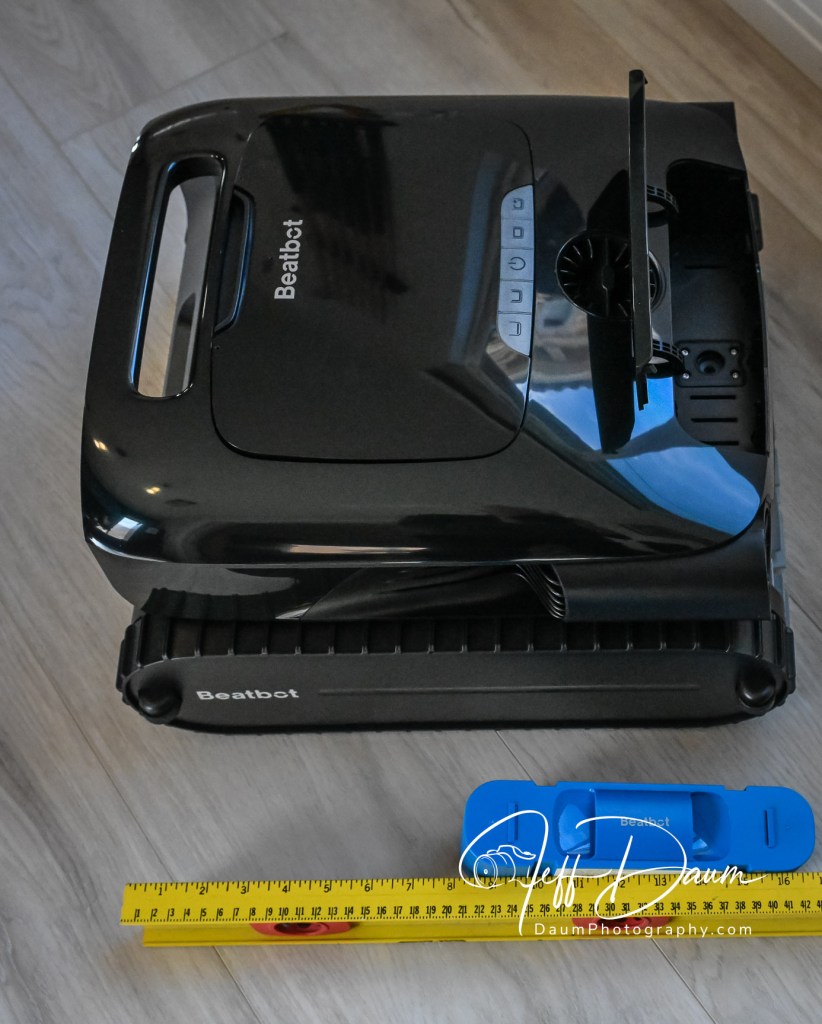
Everything you need to get started is included along with a very large Quick Start Guide sheet and the Owner’s Manual.
Set up is easy, simply assemble the charger base by sliding the two support legs on and plug it into a wall outlet. Then set the AquaSense 2 Pro onto the base and it automatically starts charging indicated by the blue ‘breathing’ light on the unit.

The first time you set it up, you also need to download the free Beatbot app and let it find your new Beatbot. This goes quickly through your WiFi (both 5G/2.4G) and Bluetooth on your smartphone.
Here are the highlights of the Beatbot AquaSense 2 Pro as listed on their official website (https://beatbot.com/products/aquasense-2-pro )
- 5-in-1 Cleaning: Water Surface, Waterline, Floor, Walls, Water Clarification
- Skin-Safe & Eco-Friendly ClearWater™ Natural Clarification
- Efficient Water Surface Cleaning with App Navigation Control
- Smart Water Surface Parking & One-Touch App Retrieval
- Full Coverage Path Optimization with 22 Sensors
- Up to 11 Hours of Continuous Surface Cleaning
- 3-Year Warranty with Full Machine Replacement
- Durable Automotive-Grade IMR Coating
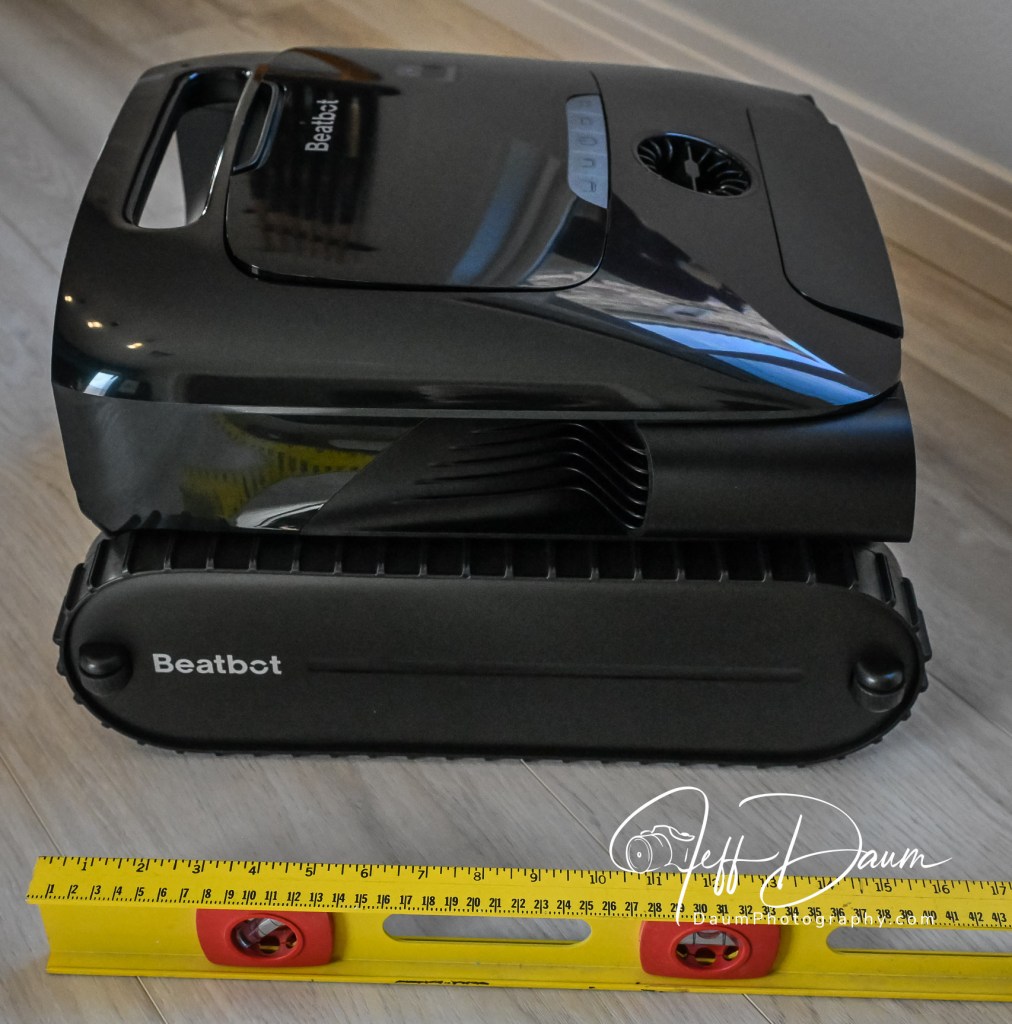
It comes with a 13,400 mAh Lithium Ion built in battery capable of easily cleaning a 4000 square feet pool in a single charge. It is equipped with nine motors and generates 5500 gallons per hour of suction! It has a removable two-layer filter basket with a 3.7 liter capacity.
The AquaSense 2 Pro has a dry weight of approximately 25 pounds (11.34kg) and an automated feature that empties the water as you remove it from the pool.
It lists for US$2,499, though from time to time they offer a discount directly on their site.
Preliminary Field Test Results
The manual tells you to (1) turn off your pool (pop-up cleaner, water input from the pool pump) (2) remove any objects including people 😊 floating in the pool that can interfere with the multiple sensors, and (3) place the robot on a level surface by the pool for 5 seconds to allow it to calibrate. Then you are ready to ease it into your pool. It will turn itself on shortly after it senses the water and begins the cleaning process depending on the mode you selected.
I set this unit up to use the Pro Mode. There are four cleaning modes you can select ranging from Floor Mode- cleans the pool floor once, Standard Mode- cleans the pool floor, walls and waterline one-time, Pro Mode- cleans the pool floor, walls, waterline and surface one time, and Custom Mode.
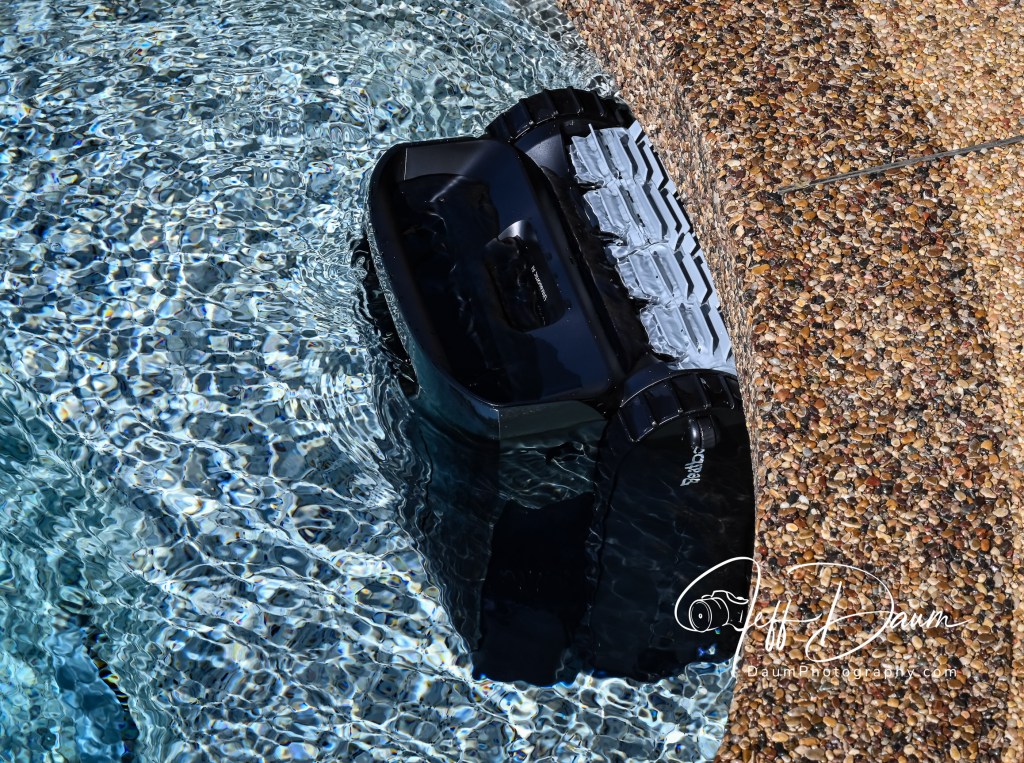
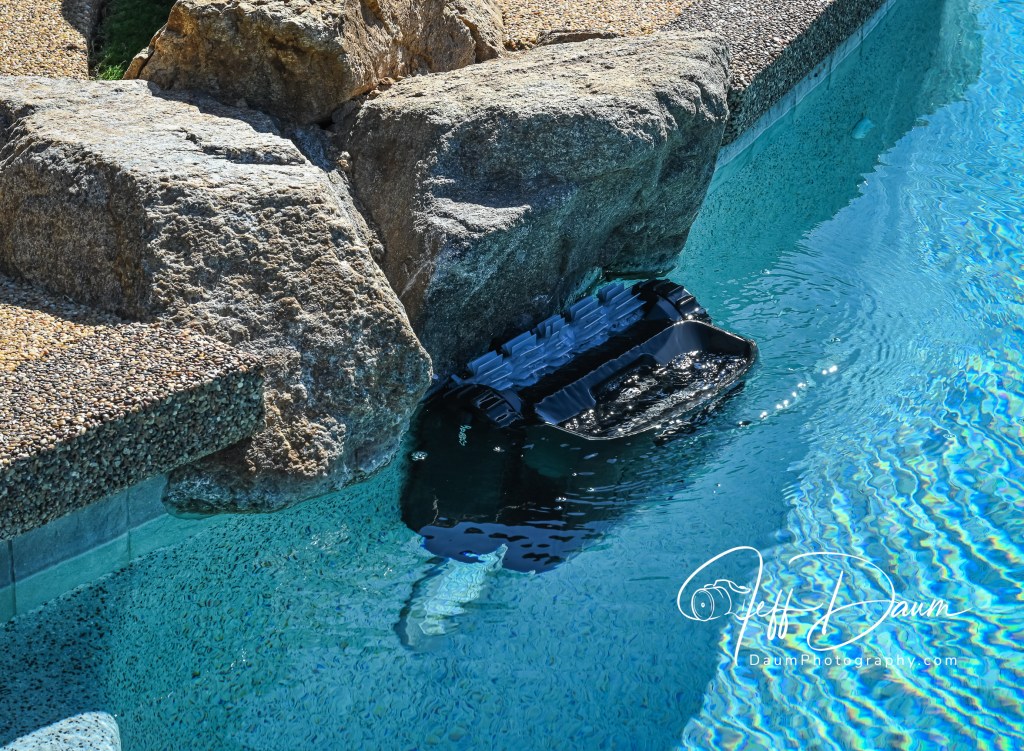
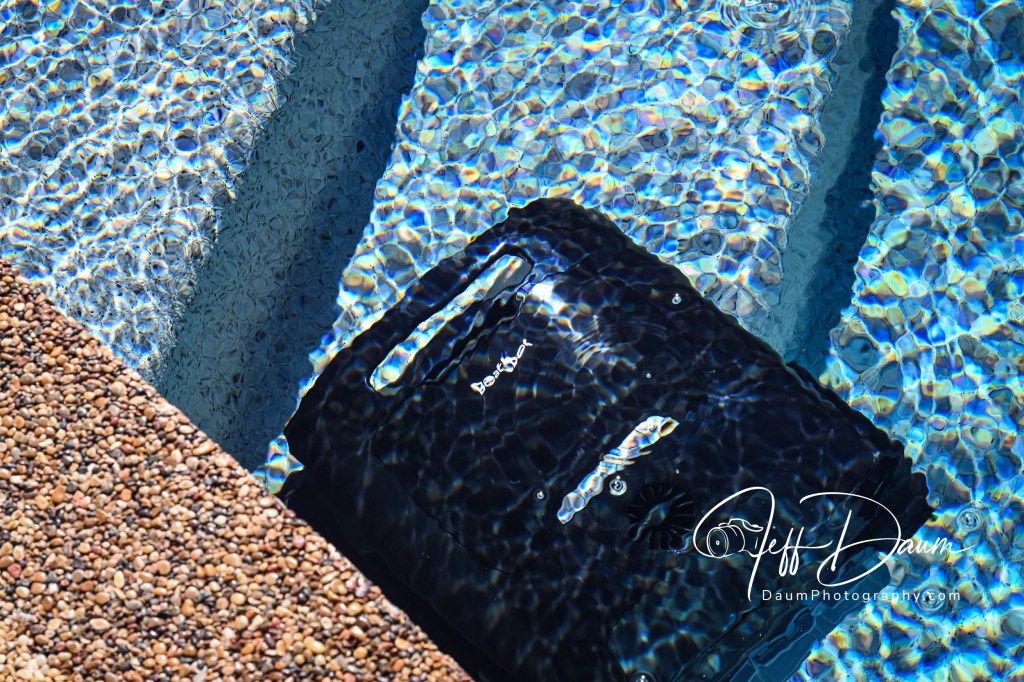
The testing was done in a pool I considered a challenge for it to clean: a 14,000-gallon salt water free-form pool with two sets of steps/landings and attached jetted hot tub. The pool depth varies from about 3 feet to 5 feet, the walls curve to the bottom and the waterline has several boulders that jut down into the water.

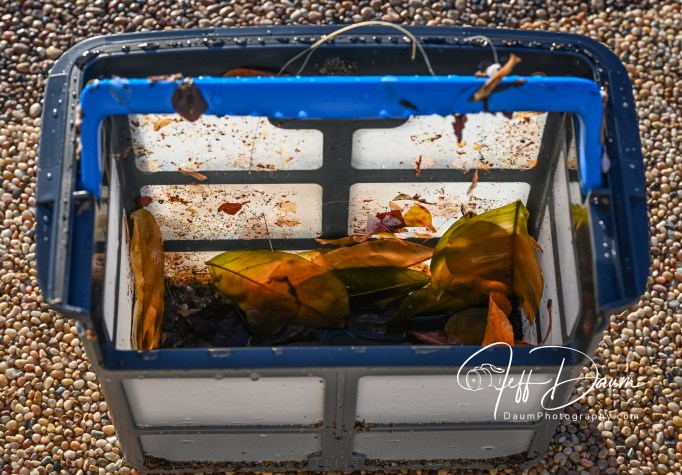
The AquaSense 2 Pro had no issue climbing the curved walls and even cleaning the bottom edge of the small boulders at several locations around my pool. It thoroughly cleaned the pool bottom of debris including fine sand and wind-blown dirt. It did a good job capturing leaves floating on the surface but had some problems with small lightweight flower petals. They would tend to get pushed away from the intake of the AquaSense 2 by its wake. Additionally, when the unit would back up or raise its front slightly, some of the captured petals would float back out.


It captured leaves, dirt and even fine dust blown into the pool as seen in the AqualSense 2 Pro dual bins.
I also tried the new feature on the app to remotely control the Beatbot when it was on the surface. It was a trial-and-error learning process since the Owner Manual does not go into using this feature, nor does the app. The app has a dial with arrows at the 12, 3, 6 and 9 o’clock positions that control the direction. It also has two speed options along with a recall of the unit to dock at the edge of the pool. Unfortunately, I did not find you could accurately control the direction by fine movements, but it has possibilities that perhaps will be enhanced with future software updates.
Here is a short video of the Beatbot AquaSense 2 Pro in action: https://youtu.be/m2gMIHInVx4
Summary
Like the earlier version I tested, this Beatbot AquaSense 2 Pro truly automates the pool cleaning process and does an outstanding job. I did not find it significantly better than its predecessor the Beatbot AquaSense Pro, since both did excellent jobs in cleaning. The paint job on the AquaSense 2 Pro is nicer and in fact changes perceived color depending on the lighting. The app is improved as is the size of the battery over previous versions.
The ability to remotely control this unit is fun but not as practical as it should be. I anticipate that it will be improved with future software updates. I would also like to see a means other than using the hook, to bring the Beatbot back early if your plans change. I realize this isn’t practical using WiFi or Bluetooth underwater, but perhaps some sonic sensor could be incorporated to allow this. For example, slapping the water three times in rapid succession would trigger the Beatbot to return to the surface and edge of the pool.
To answer my leading question: I don’t think the Beatbot AquaSense 2 Pro is the paramount of pool robots. Perhaps the Beatbot AquaSense 2 Ultra will be. Stay tuned for my upcoming review of that!
Thanks for visiting and reading. If you have a question or like to comment, please feel free to enter it below!