By Jeff Daum, Ph.D., PPA
Technology & Product Analyst
In a word, this Reolink Elite Floodlight WiFi surveillance camera is truly impressive. Reolink raises the bar for surveillance systems on multiple levels including image quality, ease and flexibility of use and AI-assisted search of recorded videos. This unit was provided to me by CommunicateMore for testing and review.
Here are the Reolink Elite Floodlight WiFi specifications listed on their website*:
- Image Sensor 1/2.7″ CMOS Sensors
- Resolution 5120×1552(8 Megapixels) @20fps
- Lens f=2.8mm fixed, F=1.6
- Field of View Horizontal: 180° Vertical: 59°
- Infrared Night Vision Up to 30 meters (100ft); LED: 9pcs/850nm
- (Auto-switching with IR-cut filter)
- Color Night Vision With Floodlights: 19W 3000 Lumens/3000K~6000K
- Frame Rate Main stream: 2fps – 20fps(Default: 20fps)
- Sub stream: 4fps – 20fps(Default: 20fps)
- Code Rate Main stream: 3072Kbps -8192Kbps(Default: 5120Kbps)
- Sub stream: 256Kbps – 2048Kbps(Default: 1024Kbps)
- Audio Two-way audio
- Tailorable real-time mobile notification options of email, text or both.
- Unit cost: US$219.99 list
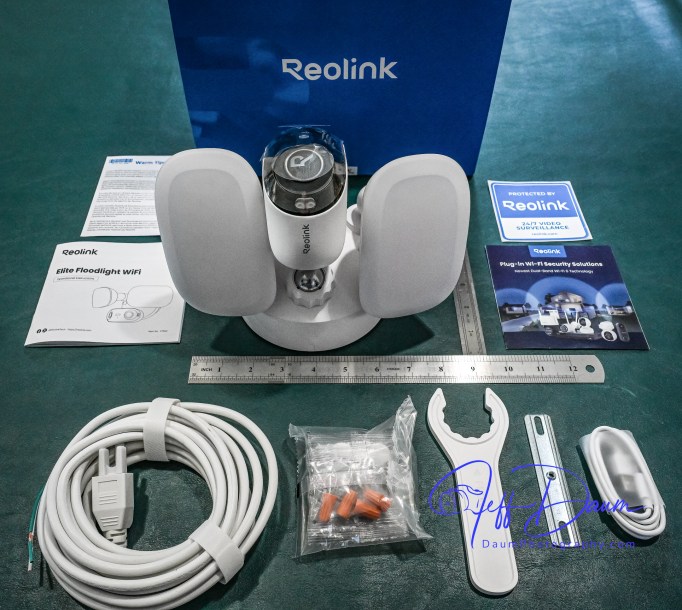
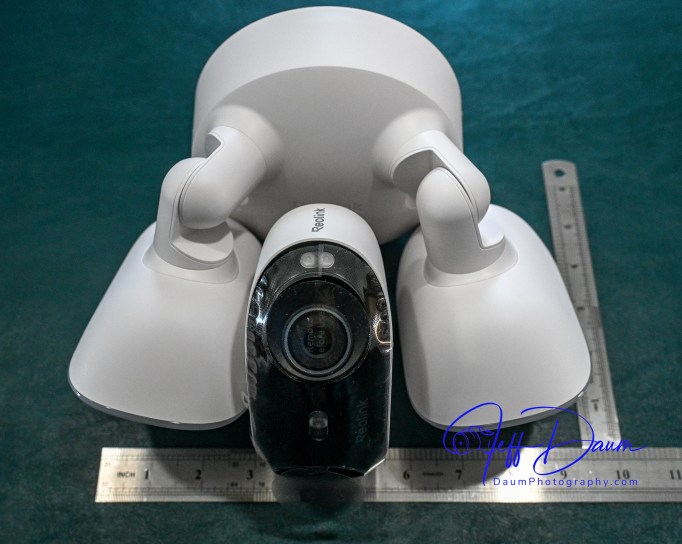
The unit ships with just about everything you need to mount the surveillance camera and get it up and operational. Included is the camera unit with dual cameras and two LED floodlights, hardware to mount it on the wall or overhang, and a brief manual. Additionally, each package of the different screws needed are clearly labeled and match the labeling in the brief manual.
Initializing and Mounting
Before you mount the unit you need to use your smart phone to download their free app which then guides you through the initialization of the camera and linking it to your WiFi. At this stage you temporarily power the camera with the supplied USB A to C cord. However, you will need to provide your own 5-volt 2-amp USB power adaptor (standard with most phones in the past). Access the USB port on the camera body by removing two Phillips head screws in the port cover (the screws are ‘captured’ so you don’t have to be concerned about losing them).
This initialization process will go smoothly if you make sure you do a couple of necessary things:
- Ensure you set up the permissions for the Reolink app to access your camera, its Bluetooth, precise location, etc.
- Notice the little check box on your phone as it is stepping you through the process that says ‘you heard the voice prompt’ from the unit.
Once you get the initialization set up, you disconnect the USB cord. If you are going to use the unit’s internal storage, you will need to install a micro-SD card at this point. It supports up to a 512GB microSD card with FAT32 format and Class 10 read and write speed. You will find the microSD slot near the same area that you inserted the USB cord.
You don’t have to use internal storage, but I recommend it even if only as a backup. Reolink offers the option of storing recorded videos to the microSD card, your own NAS or their NVR unit.
Next you screw the port cover back on and are ready to mount the unit. Since it is powered by AC 100V~240V, 50~60Hz you will need to have a junction box available where you plan on placing it or run power and a new box to the location. Wiring is straight forward, just the hot, neutral and ground connections. The mounting bracket Reolink supplies has a level built into it that makes it easy to correctly align the three screw holes as you mount it to the wall.
The camera and floodlights unit then screws on the mounting bracket. Note: There is a small loop incorporated into the back of the camera unit that allows you to temporarily support/hang it while you connect the three wires with the supplied wire nuts.
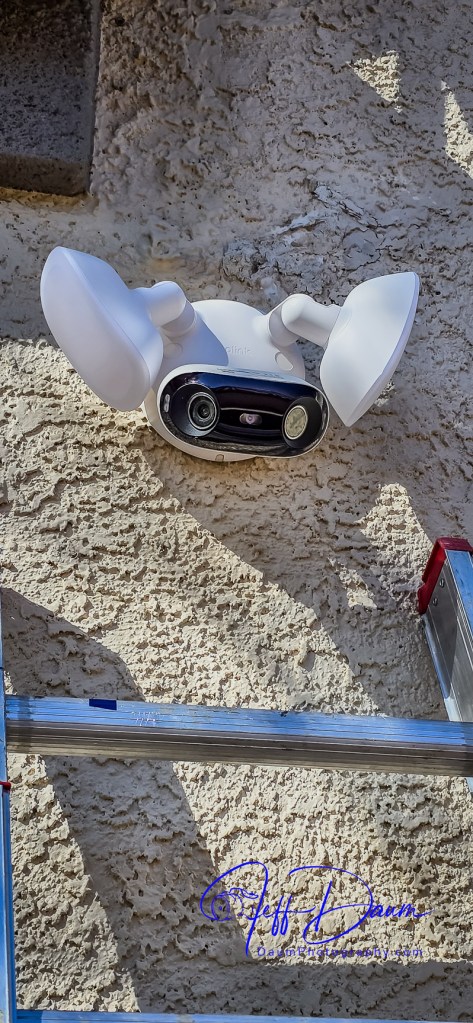
Once you have the unit mounted and have placed the supplied hole plugs over the screws, you are ready to turn on the power to the camera.
In my case the unit came online in the app on my phone almost immediately. Next, using the live stream in their app, you position the camera head to deliver the best coverage. They provide a plastic wrench to tighten the camera support once you have it positioned.
Keep your ladder handy if you mount your unit high on a wall, since you will need to wait until it is dark to position the two floodlights best for your situation.
Preliminary results
Reolink’s smart phone app is very easy to use and well designed. It opens to a live stream of the camera’s 180 view. The app is intuitive with icons to trigger the 105dB siren, floodlights, two-way audio, snap a picture or start a recording, talk over its built-in speaker, playback recorded events and access your settings.
They also have free versions of the app available for use on a PC or Mac that are equally easy to use.
The key function that sets Reolink’s app and this Elite 4K Floodlight WiFi surveillance camera apart from competition is the ease you can review recorded videos. Instead of having to wade through potentially hours of video to find what you are looking for Reolink uses AI to do it for you!
When you click on Playback on the phone, it loads the videos by date and then there is an icon that allows you to sort/search by event type. For example, you can choose to see all videos where a person entered the field of view, or a vehicle, or animal or combination of these. When you select one or more of these filters, it then quickly sorts through the videos and brings up only those matching your selection. If you used the settings function to define a specific line or zone in the viewing area, you could also select to see videos where someone has crossed the line or entered the zone. It can even identify and sort when someone is loitering in the viewing area.
When you are looking at saved videos, the app allows you to play the video at normal speed or as slow as ¼ speed or in increments up to 16xs speed. As mentioned, you can at any point snap a picture of what you are viewing, and/or download the current video.
The Reolink apps on PC or Mac are very similar to the smart phone app in functionality and ease of use.
I found this AI assisted search to be excellent and correct most of the time. It really saves so much time and effort searching through recordings to find an event.
This brings me to the quality of the image. Whether you are looking at the live feed or the recorded image, it is outstanding in both day and night versions. The image is sharp, the color excellent during the day and very good at night even with the floodlights set to lower lumen output (I did set the color temperature to 6000K and reduced the lumens to about half power).
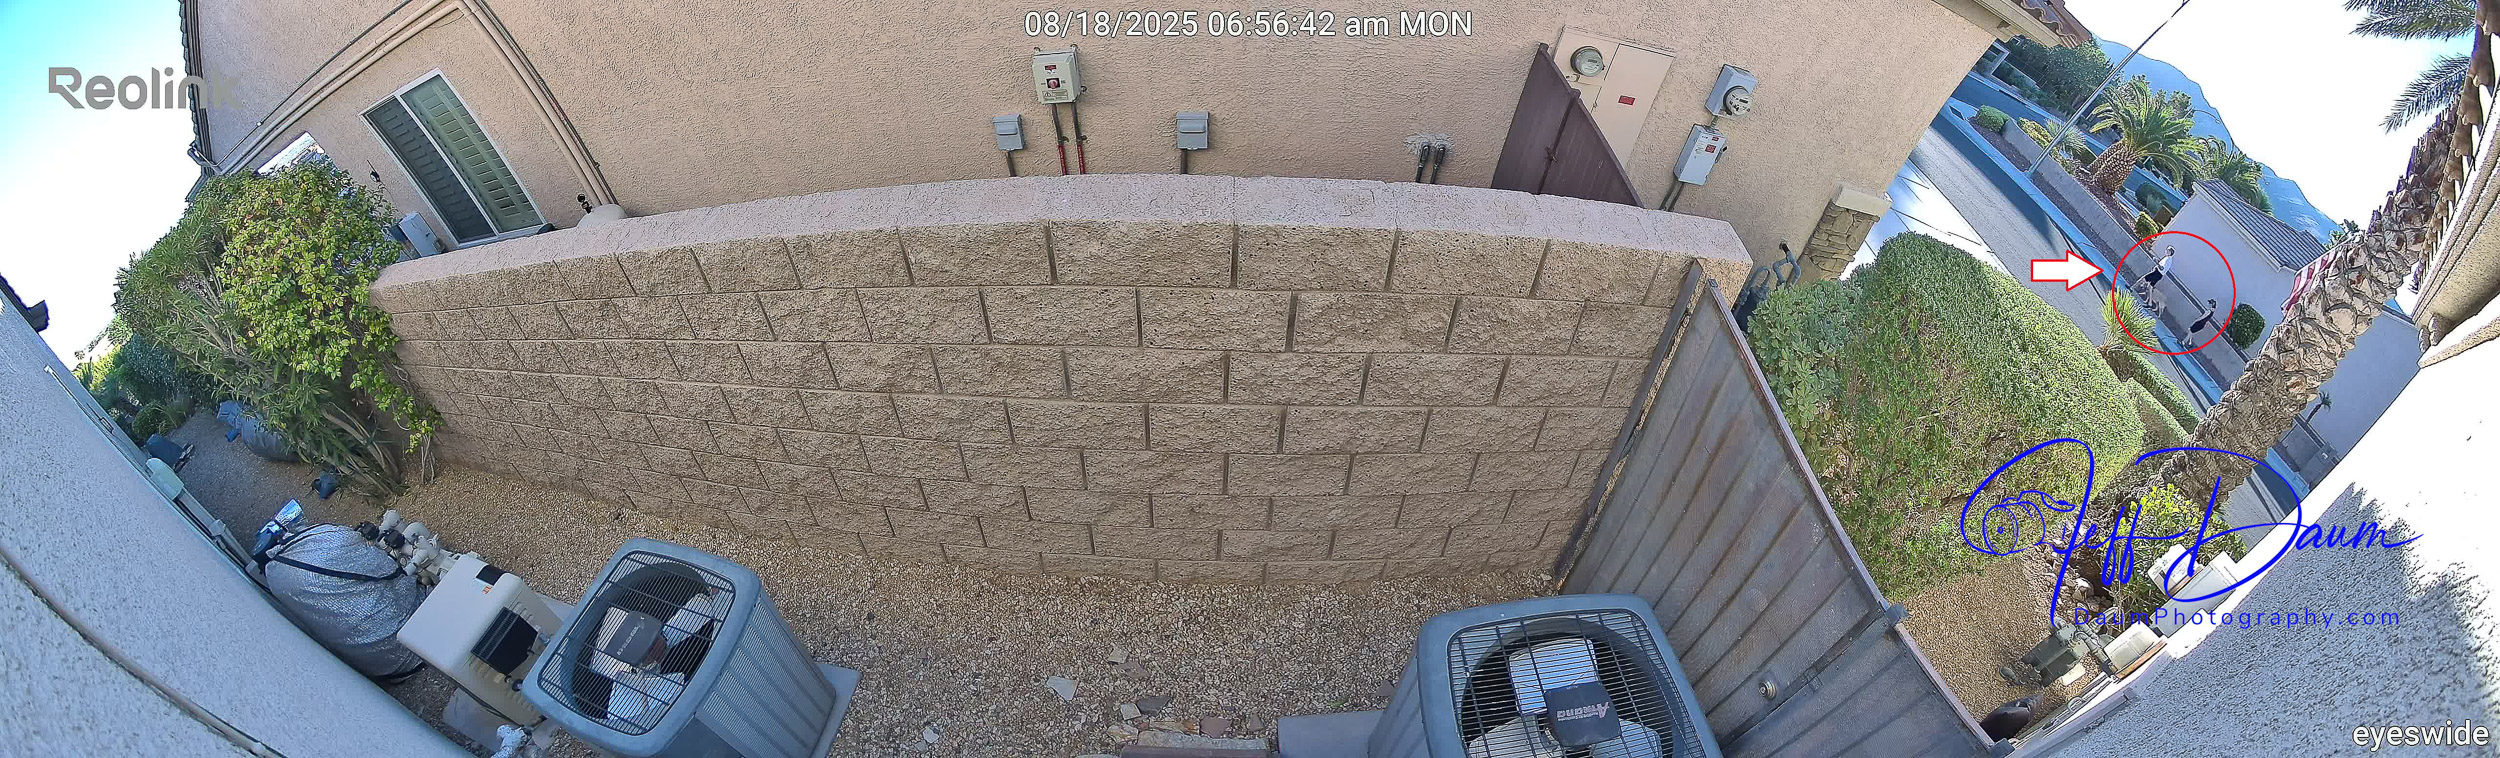
Here are some samples of daytime images and nighttime images directly from the live stream. The detail holds up even if you considerably enlarge (crop) an image. Note, these are uncorrected images directly from the Reolink unit. Because of the native quality, they could if necessary be easily enhanced using post production editing.
These are day and night images:


These sets show enlargements of the red circled area in the first image:


Similarly, the videos are smooth and images crisp. For a short day clip see https://youtu.be/L3aVJGOvWz0
and for a short night clip see https://youtu.be/Z7__wVtNgxs
You can see in these samples that the Reolink software automatically stitches the simultaneous images from the two cameras in the unit together to provide a panoramic picture.
In my set up because I have the unit both mounted high and pointed downward so I can see both ends of the side yard as well as wall of my house, you do end up getting normal curvature distortion from the center of the image to both sides. This is mild and does not impact the sharpness of the image. If you end up mounting the unit lower or don’t need to point it downward as much, you will have little to no curvature distortion.
The type of recording you want to save is set in options, along with where you want to store them. For this review I went with a 512GB MicroSD card and allowed it to save recordings of all forms of activity. It appears that it will store approximately a month’s worth of recordings on my setting before recording over the oldest files.
Summary
The Reolink Elite 4K Floodlight WiFi surveillance camera and its free apps do not disappoint. The high quality180 degree view along with the AI search set this system apart from competition. It is easy to tailor it for your specific needs and is value-priced considering everything it delivers.
It receives five out of five thumbs up!
*Reolink website https://reolink.com/us/
Thanks for visiting and reading. If you have a question or like to comment, please feel free to enter it below!