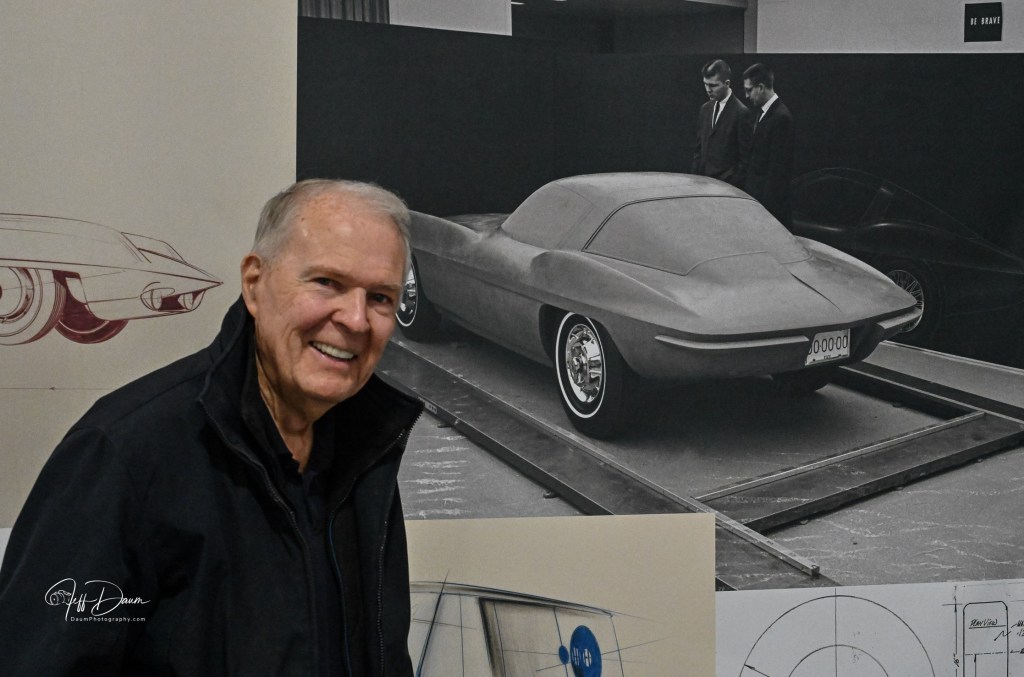
By Jeff Daum, Ph.D., PPA[1]

Sixty-seven years ago, Peter Brock penned the sketch that Bill Mitchell[2] chose to become one of the most iconic cars: the split window 1963 Corvette Sting Ray. At the time, Peter was the youngest designer at General Motors. He would go on to be a renown visionary and prolific designer with accolades and records for a broad range of his designs including the Datsun 510 Coupe, Cobra Daytona Coupe, Shelby-DeTomaso P70 and Aerovault trailer. But my focus here is on Peter’s latest achievement, the 2025 Sting Ray Studio Concept car[3] revealed at the 2024 SEMA[4] show in Las Vegas, Nevada.
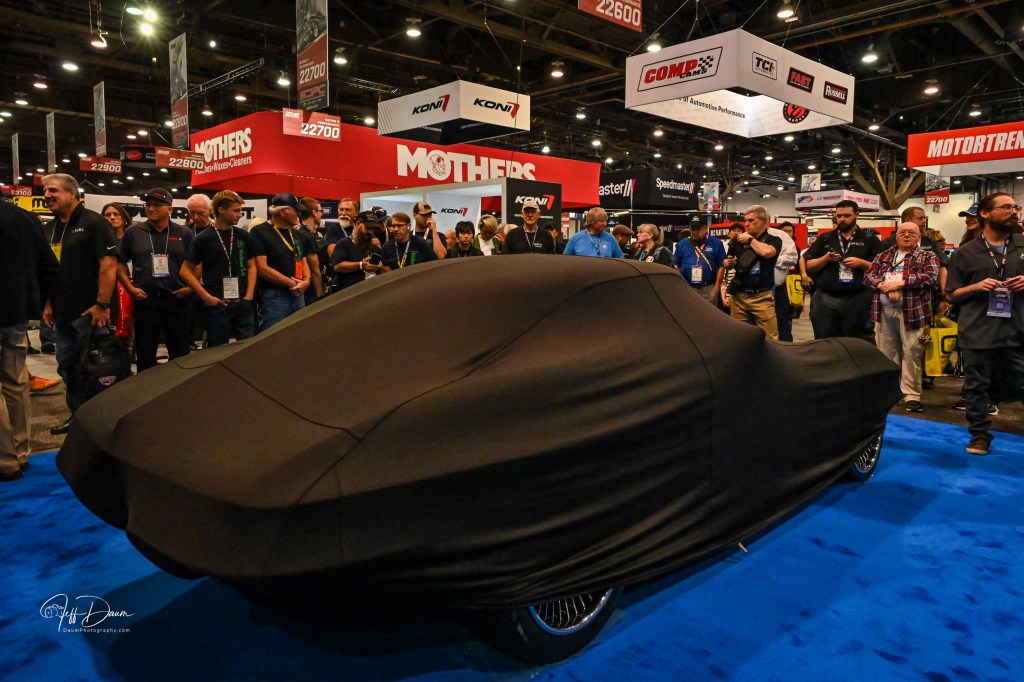
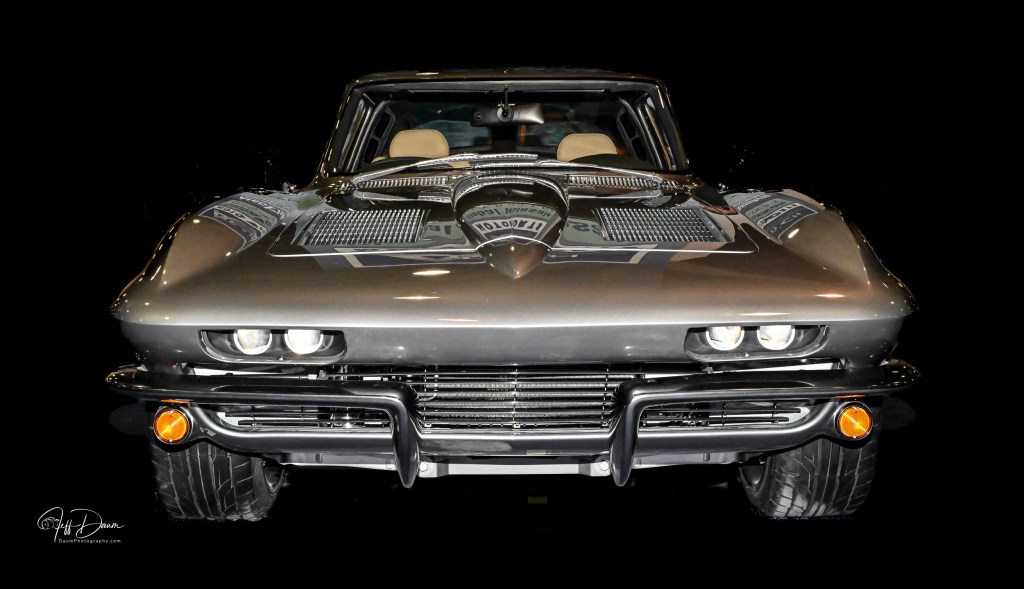
At first glance when the cover was drawn back on the 2025 Sting Ray Studio Concept car at SEMA, the body looked very similar to a well preserved 1963 Sting Ray even though it was described as a resto-mod. Peter had done something other resto-mod builders of the C2 Sting Ray had not. He retained the original body shape and design, staying away from radical changes such as widening the body, adding bulging fenders, etc. More importantly Peter added back into the 2025 Sting Ray subtle details and changes to bring it closer to what he had originally designed.

Peter shared with me the back story on how, and why, this came to fruition. He made a conscious decision to change as little as possible in the body to retain the original form since it was well established as an automotive design icon. In the five years it took to take its design to being a production car in 1963, GM was primarily focused on making money so there were compromises made on which details went into the final car. In this 2025 Sting Ray Studio Concept car Peter wanted to restore some of those important details.
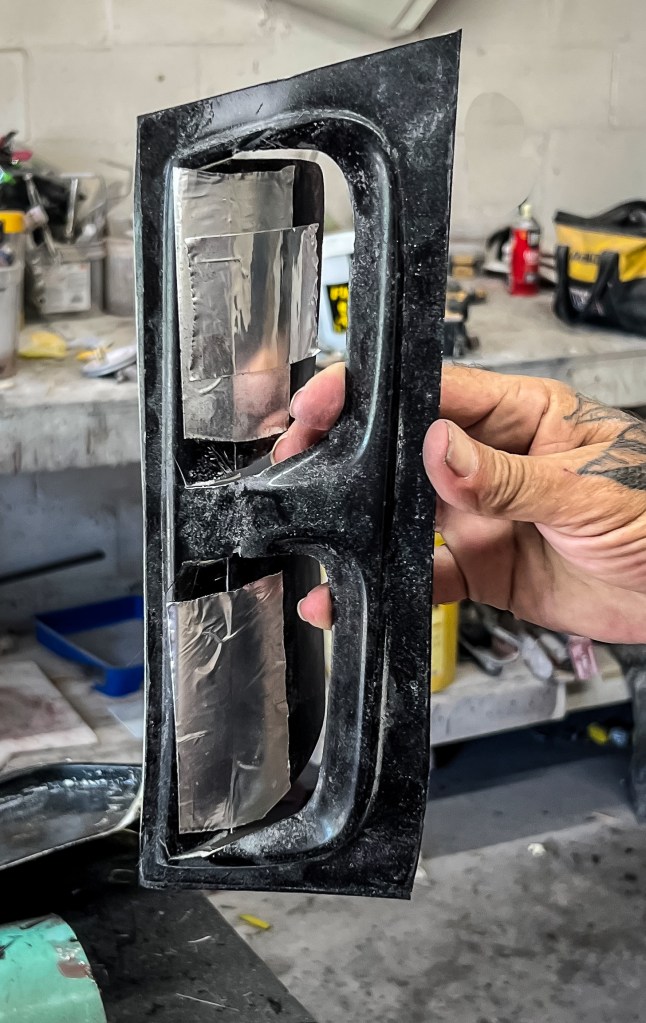
Peter worked with Mike Staveski and his company, Resto Mod Vette to build the 2025 Sting Ray. This is the second car that he did with Mike, but the first one that is designed fully to Peter’s specifications. Here are a few images of Peter at Mike’s shop making some of the modifications:


They began with a 1963 donor Sting Ray body. Mike decided on and sourced the modern drivetrain and chassis which included:
- GM crate LS3 engine
- Electronically raised and lower hood
- Harrop fuel injection
- Holley engine management
- Dewitts radiator
- 4L60e transmission
- PSC push button shifter
- Ididit steering column with Sparc Industries Wheel
- Dakota Digital gauges (with Peter’s signature)
- Vintage Air AC
- Art Morrison custom chassis
- Cerakote frame
- C7 front suspension with AME IRS, Ridetech Coilovers
- Wilwood electric brakes
- Additional Corvette parts from Corvette Pacifica
- Additional parts from Atech Motorsports
- Dynamat sound proofing
- Custom glass from AM Hot Rod Auto Glass
- Douglass Interiors Leather, Linen & Sage
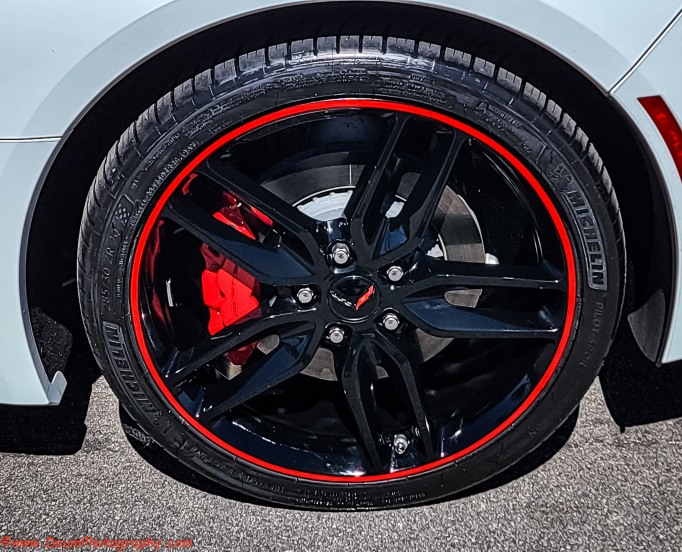
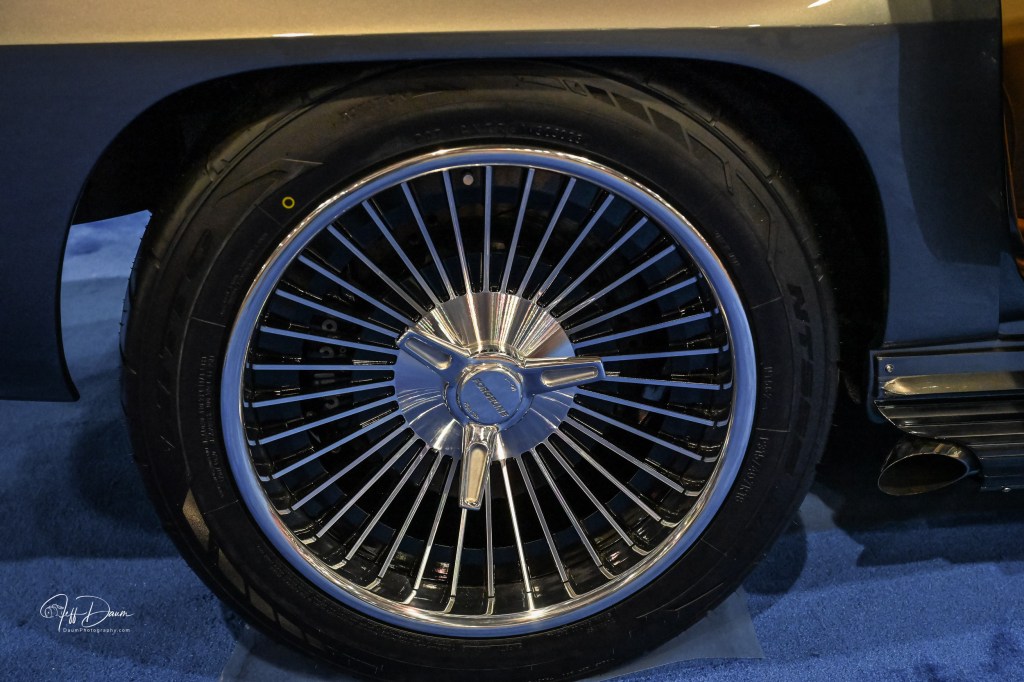
- Forgeline 18 wheels
- GM Hypersonic Gray paint
Peter designed and supervised the details he wanted to add back to the body. These included making all the vents and air scoops functional. Mitchell, at the time, wanted the nonfunctional vents because while it saved money by not making them real, it added perceived value to potential buyers as they viewed the car in the showroom.
[Note: clicking on an image in these mini galleries will bring it up to full size]


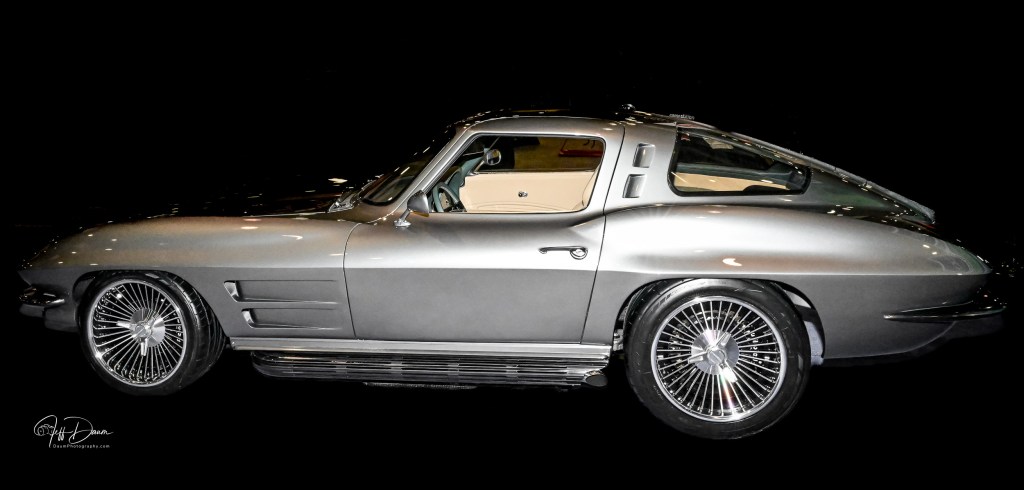
Another important change for Peter was to improve the interior visibility. Mitchell wanted a split rear window on the 1963 Sting Ray as homage to the Bugatti 57SC Atlantique, but that impacted the rearward visibility and Zora Arkus-Duntove[5] was really upset with Mitchell for mandating that. In Peter’s original sketch the glass was not split and went all the way down to the radius along the side. To improve this on the 2025 Sting Ray, Peter enlarged the area of each split window and eliminated the “B” pillar on the doors so that now the side windows are one continuous piece of glass. Together these changes result in better visibility from the inside of the Sting Ray and it feels more open. Complementing this, Peter used only the finest materials on the interior of the resto-mod. This is reflected in the new instrumentation, the top-grain leather on and around the dash, including around the air ducts. All that leather was hand stitched but resulted in a very high-end production finish.
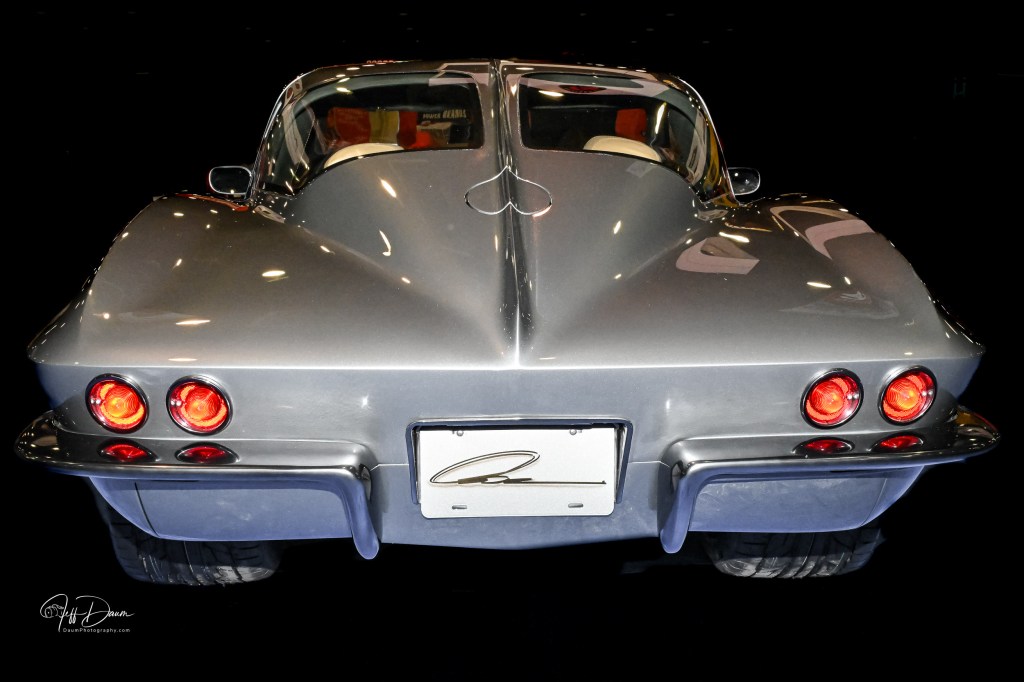


Continuing with detail changes on this 2025 Sting Ray, two more can be seen when looking at it from the back. In addition to the enlarged split windows, Peter brought the fin all the way down to the midline of the body through and including the gas filler door. The fin is also slightly raised paying more homage to the Bugatti Atlantique. A nice detail is that the gas cap can now be placed into a holder inside of the gas filler door when removing it. At the front of the car the headlights have been changed from the flip up 1963 approach to built-in LED quad headlights with halos. Most of the original bright work on the body, like the bumpers, was downplayed and changed to black chrome encouraging one’s eyes to focus more on the overall form. Peter also put his race-type mirrors on the doors, which work well with the flow of the body.


At one point in our interview, Peter mused that this is based on a sixty-seven-year-old design, saying “how does something last that long and still evoke such admiration and desire from people that see the car.” He went on to add “the impetus for the Sting Ray grew out of Mitchell going over to Italy and seeing all the streamlined cars and bringing back photographs of them for us to study. I do not think he knew whether we could design a car that would meet his expectations. But once he saw what we were turning out, his enthusiasm grew, and he kept coming back into the studio to see the progress we were making. We did not always agree on direction, for example, I wanted the nose lower and back end higher, but Mitchell was traditional and knew the drop away in the rear would sell, so that is what we went with.” With emotion, Peter added that he had a particularly good relationship with Mitchell, and that he was a great mentor. Tony Lapine and Larry Shinoda, veteran design specialists, took over the final version as the Sting Ray was getting ready to go into production. Peter had been moved to work with Harvey Earl.[6] He added that it would have been super to have Tony and Larry around to work with him on this 2025 Sting Ray. Since that was not possible, he wanted to make sure it stayed true to their original efforts.


Peter said Mike has a super crew who worked on this 2025 Sting Ray. It came out so well and has been so successful that Peter and Mike have decided to do a series of these cars. Mike told me (JD) he has sold three of these already. This one is headed to Barrett-Jackson’s Scottsdale auction. Craig Jackson, CEO Barrett-Jackson, was at the SEMA reveal and was very impressed with the car and intimated it may be his feature car at the auction. Based on the level of enthusiasm and interest, Peter and Mike think they may do a dozen or two of these cars. Each will be different in terms of paint, interior and finish, but the overall design details will remain the same, so it becomes a limited production that follows the Studio Concept. Mike already has plans for a Z06 version that will follow this same approach. I mentioned to Peter that notably missing on this first 2025 Sting Ray were some safety features such as shoulder (three-point lap) belts and air bags. Peter said he expects more enhancements to make it into upcoming versions, and that the seat belts in this one will be changed before Scottsdale.
It almost seems heretical to talk about cost when discussing the sheer beauty, art, and evolution of the 2025 Sting Ray, but I know some readers will ask me if I do not. Mike told me he has priced these Studio Concept models starting at USD 495k. Of course, Barrett-Jackson’s Scottsdale auction will provide a real-world test of the market value of Peter’s 2025 Sting Ray.
Lest you think Peter, at 88 years old, is now resting on his laurels, he took me into his studio to show me his new car project. Of course, it is sleek with some neat aerodynamic features, and he is very excited about it. However, that is all I can share now, details are currently embargoed but stay tuned.
Thanks for visiting and reading. If you have a question, please feel free to ask below!
[1] Primary sources for content were interviews with Peter Brock and Mike Staveski. Other sources included Peter’s book Corvette Sting Ray Genesis of an American Icon and Brock Racing Enterprises publications.
[2] Head of GM Design from 1958-1977
[3] A Studio Concept car was a term applied to a few special ‘one-offs’ made at GM Styling, after production was underway, for GM executives.
[4] SEMA is the Specialty Equipment Marketing Association, and the show held annually, is the largest of its kind.
[5] Corvette Engineering 1953-1975
[6] In charge of GM Design from 1927-1958